

How to make a miniature magical fairy garden in your backyard using an old Radio Flyer wagon or other containers found around your home. They’re beautiful and fun to make!
I have a confession… I have a “tiny” obsession…I love miniature things! (Are ya loving the word play?)
I adore fairy gardens! Even before they were popular I loved them. They are magical and whimsical, and transport us to imaginary wonderlands. (I warned you it was an obsession)
I love them so much that I announced to “Mars” (I’ve decided this is his new nickname…cause… he’s out of this world! I know, I know… Gag, gag, gag!), a few years back, that one day my yard would be filled with fairy gardens!
I want my grandchildren to enjoy their magic. (I believe the response was eye rolling and head shaking! Humpf! Rude!) If you have dreamed of having a fairy garden I want to share mine with you. Perhaps I can share a few “helps” I have learned over the last few years…
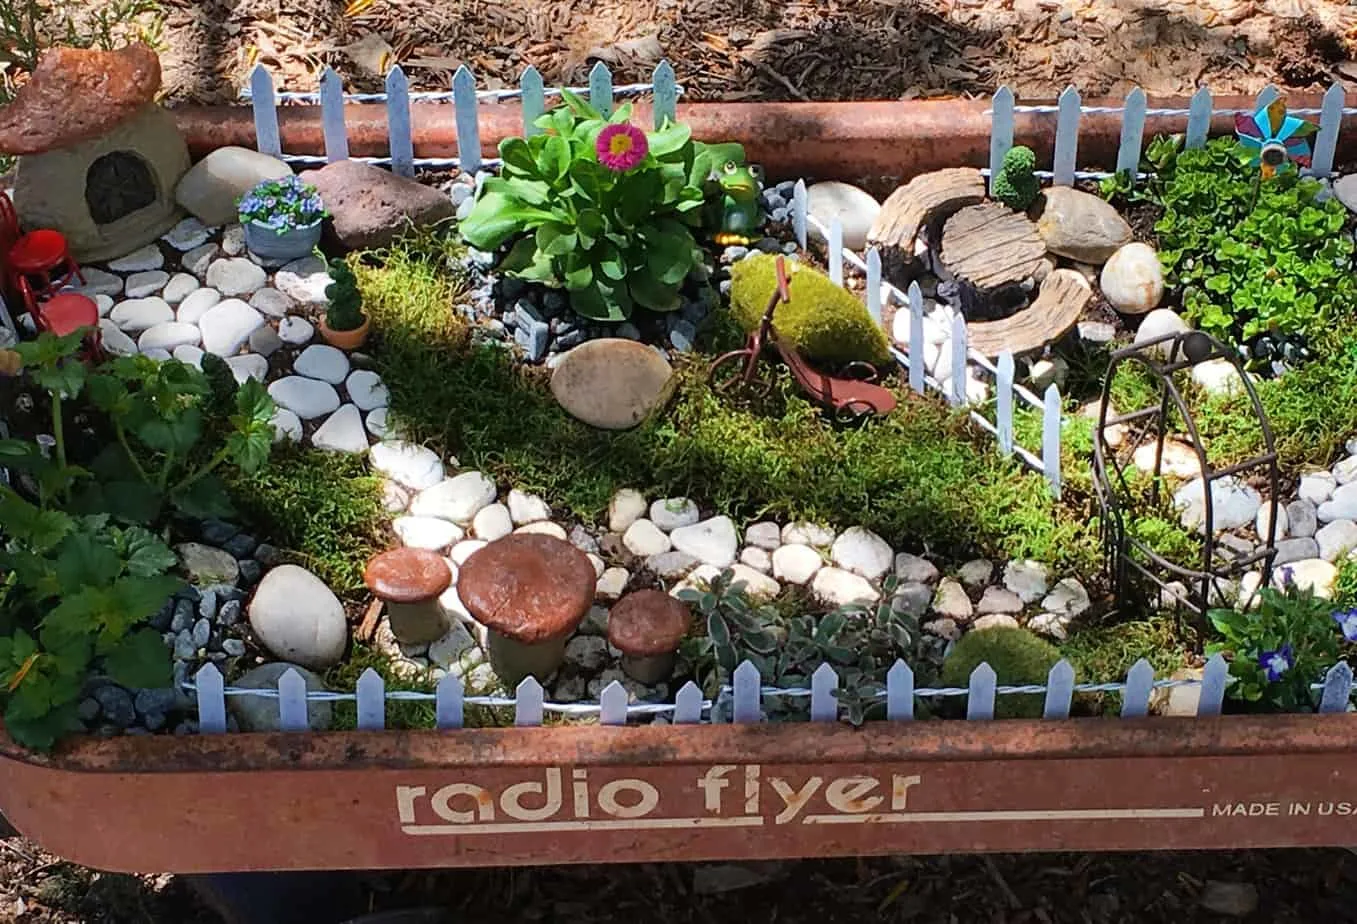
In my quest to create a fairy garden… I confiscated the old Radio Flyer wagon! (I was so glad “Mars” hadn’t chucked it out!) I just knew it was perfect!
My first attempt was… Okay. It contained some of the elements I desired. I gathered a few handfuls of rocks, I had a miniature hut and some plants.
The following year I added a few more pieces. Things I had found around the house or in thrift stores. The key, I found, is to look at something ordinary and imagine what it could be if it were used by a “fairy”!
I’m sure I’m dating myself but, does anyone remember the book “The Borrowers?” I loved that book as a young child. The pictures of everyday things they used to make a “home” is magical. (Sorry, it’s the only word I can think of when it comes to miniature things)
It’s the same premise with a fairy garden. Go to the dollar store and let your mind go wild! Dig through that “junk” drawer! (We all have one…come on!) Check yard sales and thrift stores. You’ll be surprised what you find!
How To Create the Perfect Fairy Garden
Pick out the container you want to use to create your garden.
You can mingle it in among your existing plants or flower beds but, I recommend some type of planter . It gives you a “canvas” to work with.
Mine is the old wagon. Pick out 4-5 small plants. Make sure a few have tiny flowers. Keep in mind plants can be “trimmed” back to remain small.
Check with your local nursery. They generally carry a fantastic supply of fairy garden items and can also recommend the perfect plants.

Beginning your garden
Fill your container with a good quality potting soil (I like miracle grow but, any good potting soil will do).
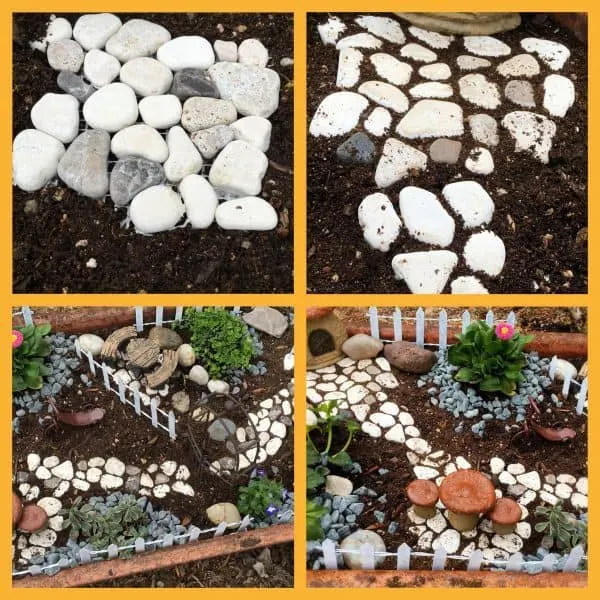
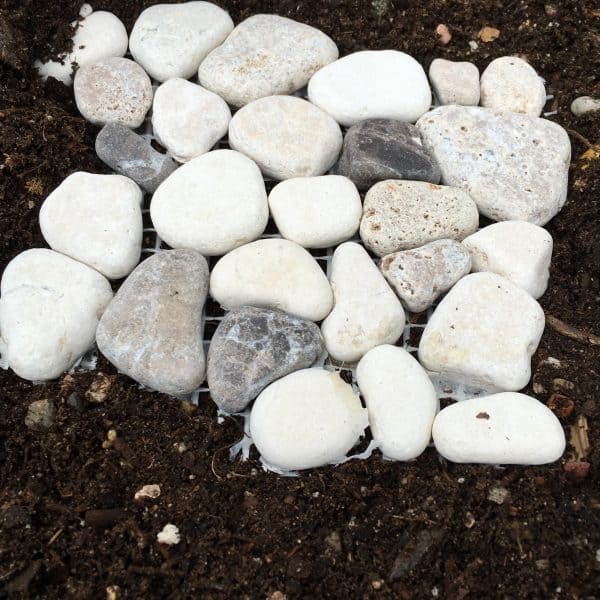
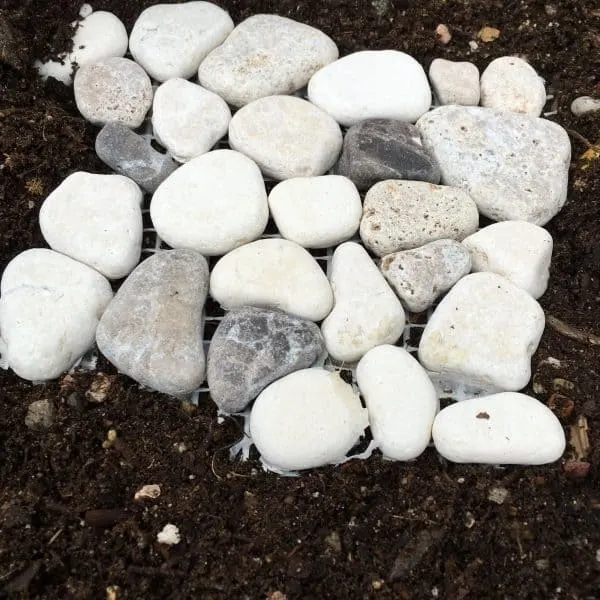
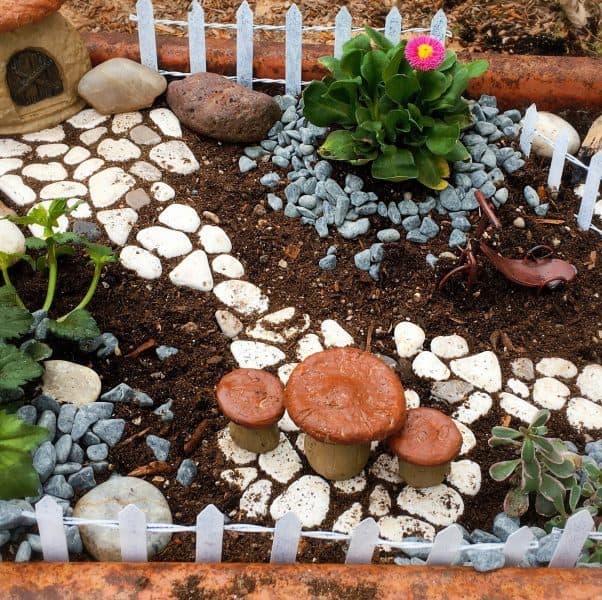
Next you want to create your pathways. This year I had the idea to use a “pebble” tile square from Home Depot to create mine! (Like in the photo above. Can you see the netting?) It was a stroke of brilliance! (That doesn’t happen often people!)
I will admit cutting it will take a box cutter and patience but, it works perfectly!
I have found over the years that having a “stone pad” to place your houses or furnishing on is much better than using the soil. It adds stability. So, after you have your paths in, create your “stone pads”. Use your dirt to fill in where the “grout” would go.
Now for the fun part!
Start adding your various design pieces. Start with the big pieces first. The house’s, arch ways, gates etc.
Next plant the plants. If you have to move something that’s okay. You can always move it back…and you will! I love that you can create your own little world in just a matter of minutes.

The “eye roller” gave me some really cute fairy garden kits this year from Home Depot. (I think I have converted him! Hooray!!!) It was seriously one of the BEST gifts he has ever given me! I was so excited!!
I used rocks around all my plants to help keep the moisture in. They come in the kits so why not? I like the finished look it gives to the garden.
As you can see I have placed the house and furnishings on the pebble pads.

I wanted a “fairy” and a few little “extras” this year. With fairy gardens gaining in popularity there is a plethora of trinkets to chose from.

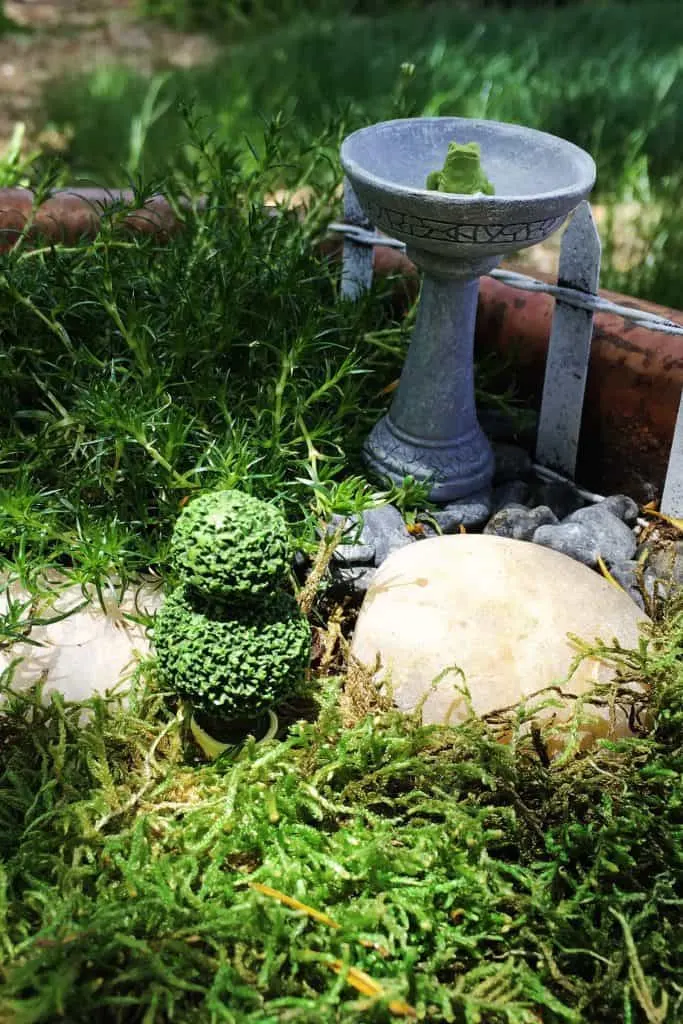
Don’t you just love the bird bath with the “toad”. We kind of have a toad joke at this nest, so I love it!
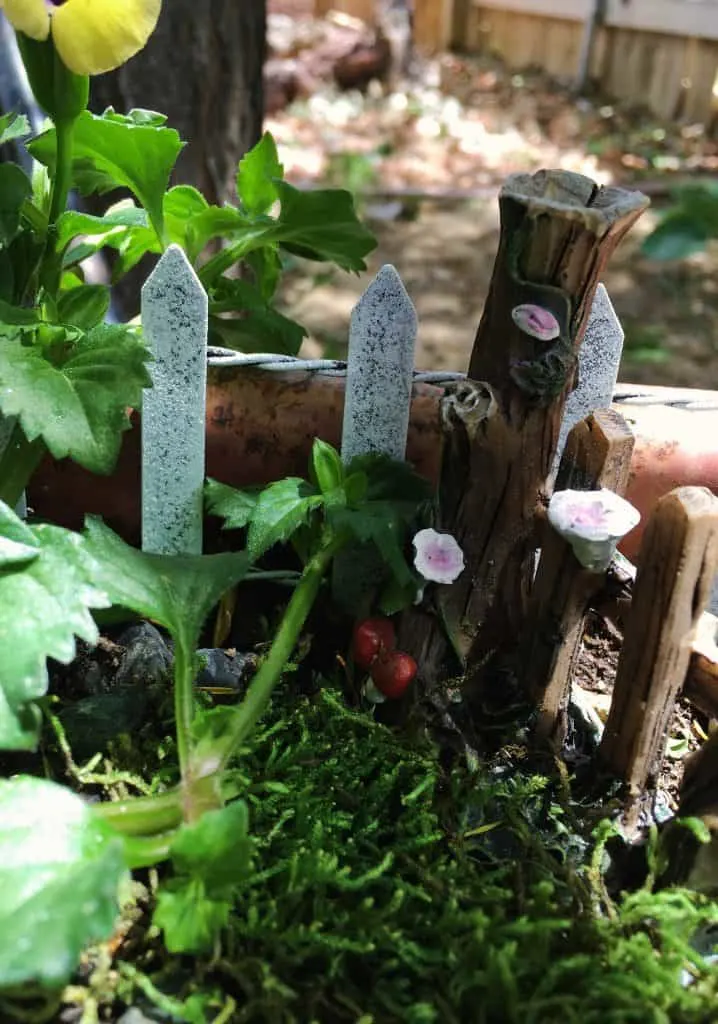
After I added all my new pieces I laid down sheet moss.
This serves two purposes. One, it keeps all the soil covered so that the plants will hold their moisture and two, it makes everything look beautiful, green, and finished. I’m almost done. I have one more special addition to this year’s garden…fairy lights!
Adding Lights to your Fairy Garden
Kicking up the magic!! Oh my goodness, I was dancing in the yard with joy when I was finished! (Thankfully no one could see me because I’m sure I looked silly!)
I used small wooden dowels, 8 inches long, for the light poles and “washi tape” to make flags on both the lights and the poles. (The tape holds the lights onto the poles. By placing one flag above the light wire and one below the string.)
I found my fairy lights at TJ Maxx for around $4.99 for a 10 ft. strand. I was really impressed by how much light they throw off. It lights the garden perfectly at night. So fun! Whooo-Hooo!

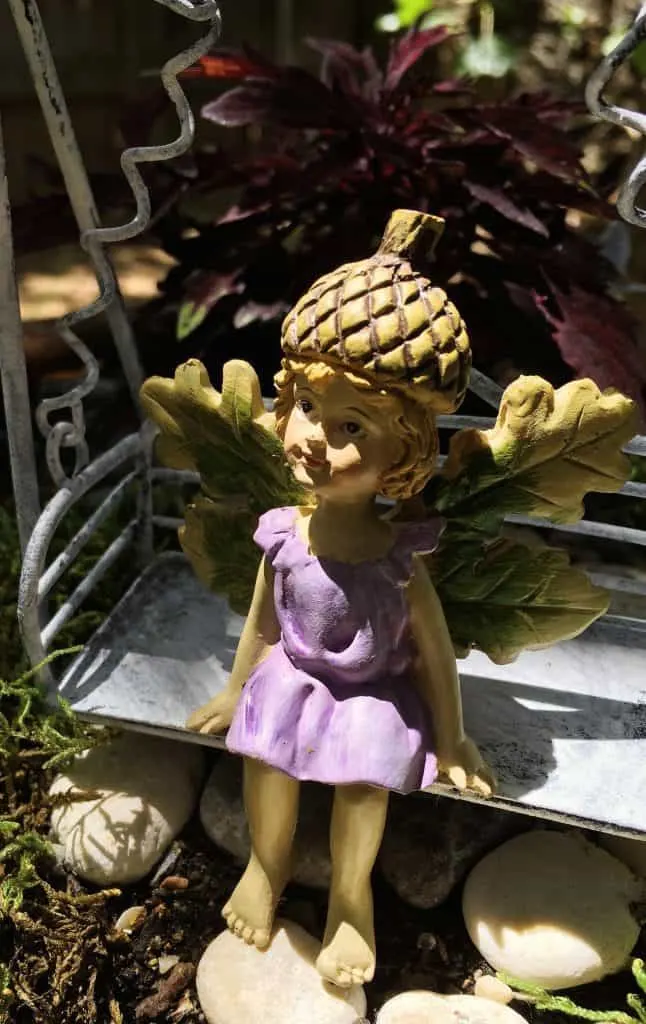
This year I added an actual “fairy” to my garden. Isn’t she sweet? This is her home.
I love how my fairy garden turned out this year!
I hope, in some small way, I have inspired you to make your own.
Remember, to use what you have on hand. I have spent the last 4 years collecting things.
Get creative! In the beginning I had a painted bird house for the main hut, wooden spools for chairs and tables, and old pots. I used rocks from my yard (I still do!). You don’t have to spend a lot of money to create a garden. Have your children and grandchildren help you. It is such a fun project to do together!
I think I need to have a fairy party for my favorite little girls. Can’t you see it… Maybe at night with twinkle lights, fairy wands and crowns of flowers. A quilt laid out next to our wagon and some yummy cupcakes and tea! Oh, I love summer! School’s out! Make some amazing memories…have fun!
Thank You SO much for stopping by! I love visiting and sharing with you.
Happy creating!!


Debbie Roupe
Saturday 26th of March 2022
Beautiful wagon Norine! I’m planning on using an old Greyhound wagon. Thank you for the awesome ideas. I can’t wait to start. Looking forward to more ideas. Thanks Debbie❤️
[email protected]
Monday 28th of March 2022
Hi Debbie! My fairy garden has greatly expanded since I posted this. I now have an old wheelbarrow that I use in addition to the wagon. They are so much fun and my granddaughters truly believe that the fairies live there and come out at night. It's the BEST! Have fun! Come back soon! Norine
Charming DIY Gnome Garden Ideas For Your Yard ⋆ Listotic
Thursday 9th of September 2021
[…] Such a sweet wagon garden. This idea caught my eye because we have a little radio flyer wagon like this. We have had so many great memories with our wagon. This would be a fun way to create a new memory. I love this DIY whimsical and similar fairy garden idea within an upcycled little red wagon because you can move it around. You can get some great tips on how to create the perfect little stone path over at Norine's Nest. […]
Fairy Garden Ideas for Kids (Fun to DIY) | Fairy Garden DIY
Thursday 20th of May 2021
[…] At Norine’s Nest, an antique radio flyer is transformed from a rusty old toy to a magical tiny fairy display. Don’t be disappointed if your child’s fairy garden doesn’t look QUITE the professional – I just wanted to show you the perfect container idea here! […]
23 Unique Outdoor Fairy Garden Container Ideas
Saturday 24th of October 2020
[…] Norine’s Nest, an antique radio flyer is transformed from a rusty old toy to a magical tiny fairy display. With […]
Janet
Monday 2nd of September 2019
Just found your blog. What do you do with your plants from your fairy garden in the winter? My 3 yr old granddaughter and I created a fairy garden this summer. It has been such fun. I'd like to winter it over but it's planted in big half whiskey barrel so can't bring inside. Suggestions?
[email protected]
Tuesday 3rd of September 2019
Hi Janet! I'm so glad you found me! I love that you and your granddaughter made a fairy garden over the winter. I usually pack mine away every summer and tell my little granddaughter that the "fairies" live inside the tree's during the winter. However, if I were going to leave them out during the winter in a big barrel I would try to create a "green house" cover using plastic and maybe a tomato cage! Cut a small vent hole on the sides. It's worth a try right? Hope that helps in some small way! I'd love to see a picture of your fairy garden! They are so much fun! Thanks so much for stopping by and visiting with me. Hope you have a great week! Happy Nesting! Norine