
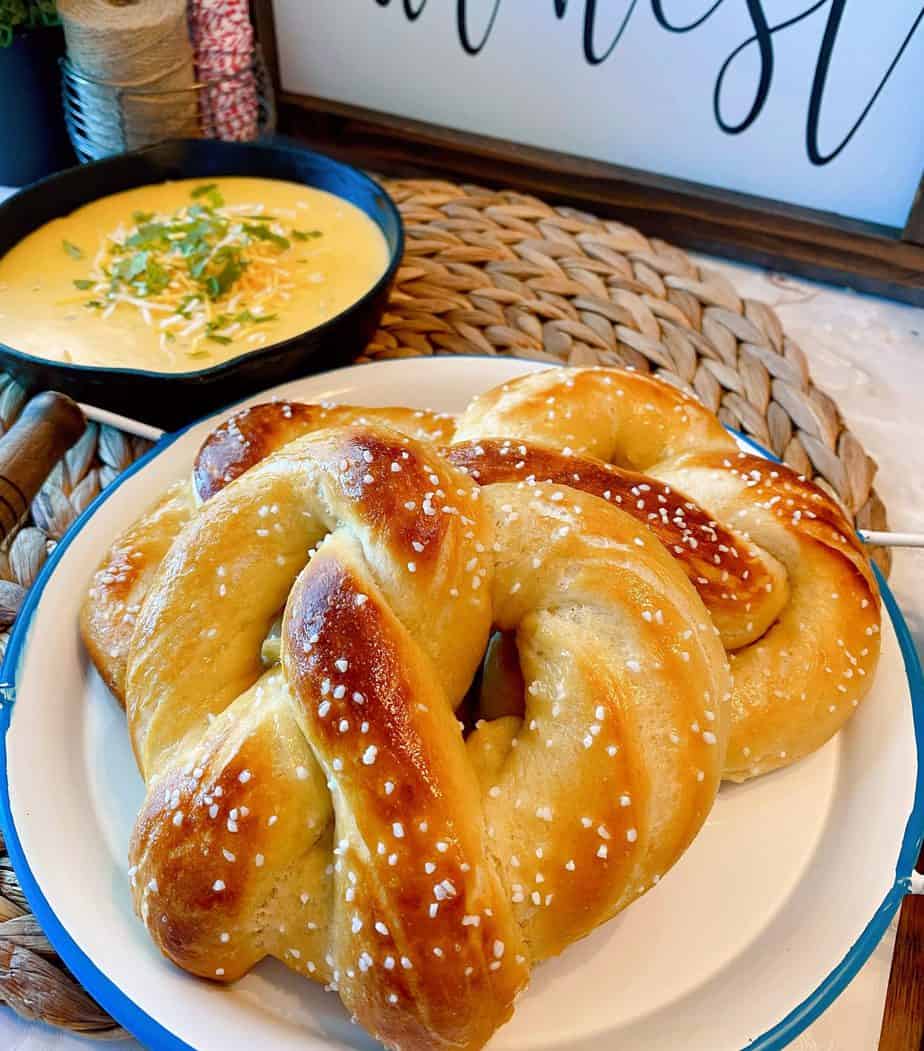
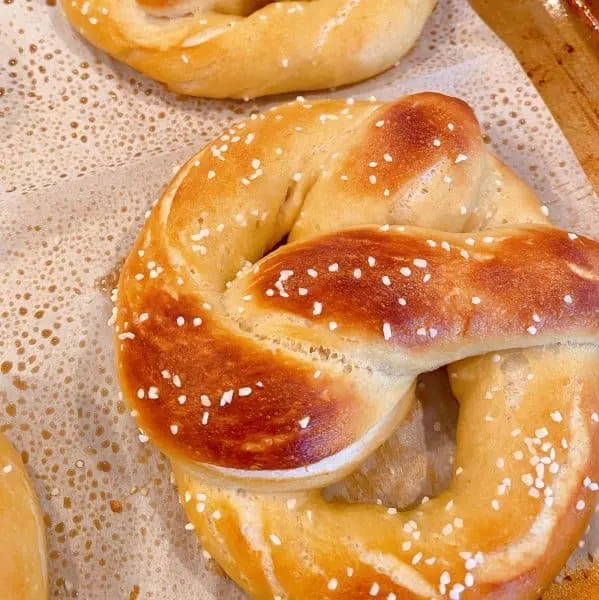
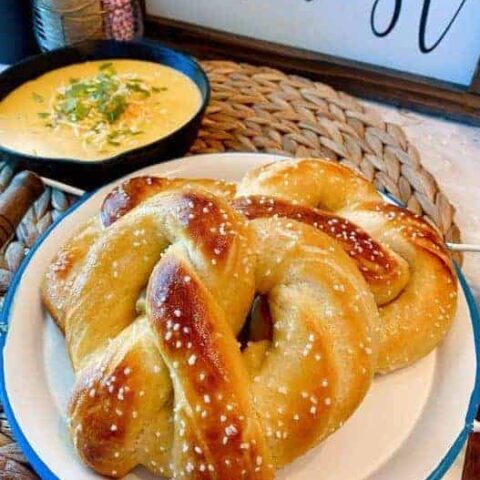
Homemade soft buttery Pretzels with an amazing Salsa Verde Cheese Dipping Sauce. They’re so easy to make you’ll wonder why you waited so long to make this delicious treat at home!
Have you ever had a craving that you just can’t shake? I’ve been craving Hot Buttery Soft Pretzels, the kind like you get at the mall, for months!

I’d wake up in the morning craving them, and go to bed at night sad that another day had passed… my cravings not met! Sniff, sniff!
I decided it was time to break down and make some! However, true confessions… I’d never made homemade pretzels, and to be honest, they intimidated me a bit. Years ago my daughter would make homemade pretzels from a boxed mix we’d purchase at the market. She took it upon herself to make them herself… I just enjoyed the benefits of her labors. So I was clueless! (Not the first or last time in my life! I assure you!)


I wanted a homemade pretzel that was chewy on the outside, but not so chewy they were tough! They also had to be fluffy and soft on the inside. The perfect combo…for the perfect “pull” when you tug them apart for dipping.
Speaking of “dipping”…that requires an amazing cheese sauce to dunk those buttery sticks of delight into! Not your typical cheese sauce, but one with rich warm flavors! A Salsa Verde Cheese Sauce seemed like the perfect solution…and boy is it ever! The world of Pretzel dunking will never be the same!
I found an amazing Homemade Pretzel recipe from Alton Brown on the Food Network. It’s quick, easy, and in my ever so humble “carb expert” opinion, the BEST pretzel recipe out there!
I can’t believe how easy, and fun, these Home Soft Pretzels are to make! So let’s get baking!
How To Make Homemade Chewy Soft Pretzels
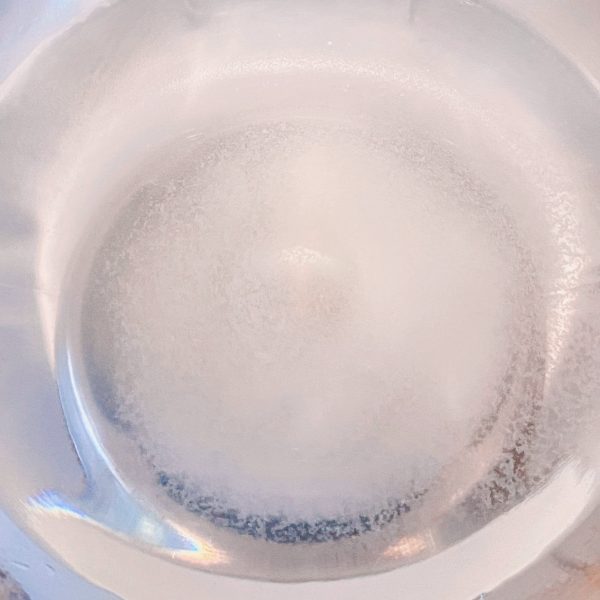
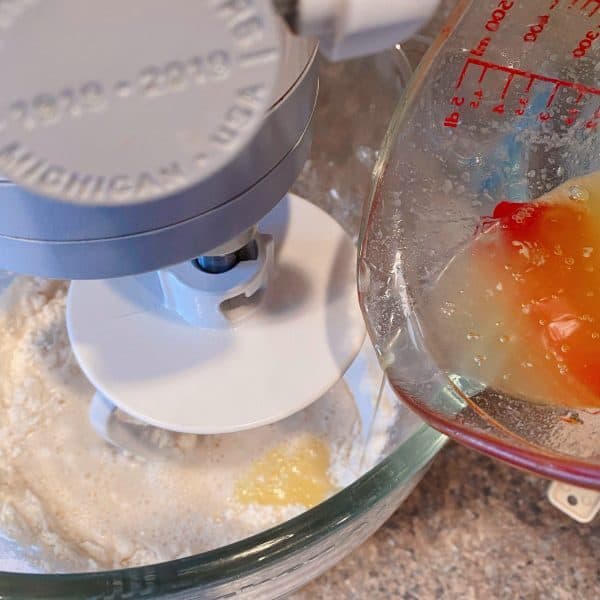
In the bowl of a stand mixer, combine hot water, sugar, and kosher salt.
TIP: Be sure the water temperature is 110 to 115 degrees. Water that is too hot can kill the yeast! You do not want to be a yeast killer! It makes rising to new heights difficult! (That was really bad! The puns are rolling off the fingertips today my friends!)
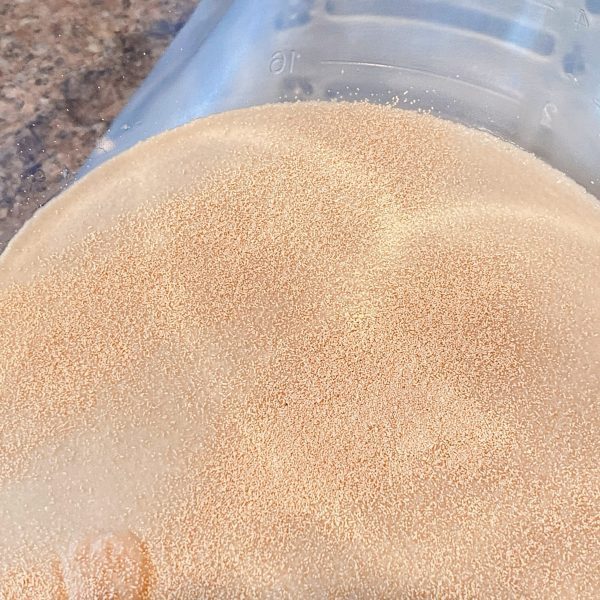
Sprinkle the yeast on top and allow to sit for 5 minutes or until the mixture begins to foam. You can lightly mix the yeast into the warm water. I find it helps to activate the yeast.

Mixing the Pretzel Dough
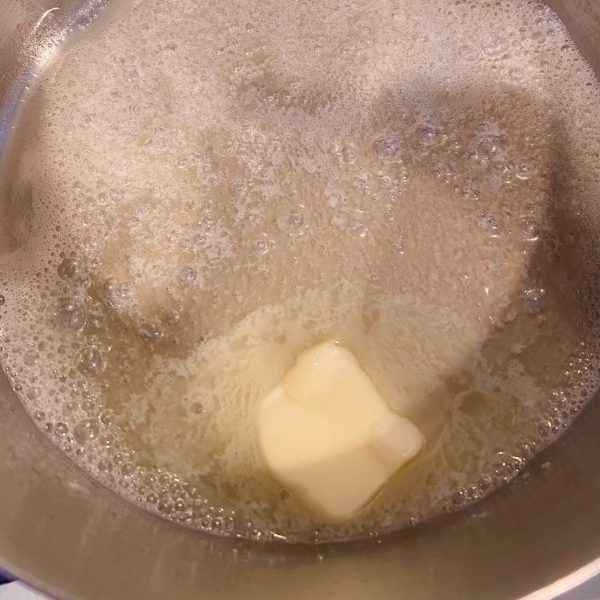
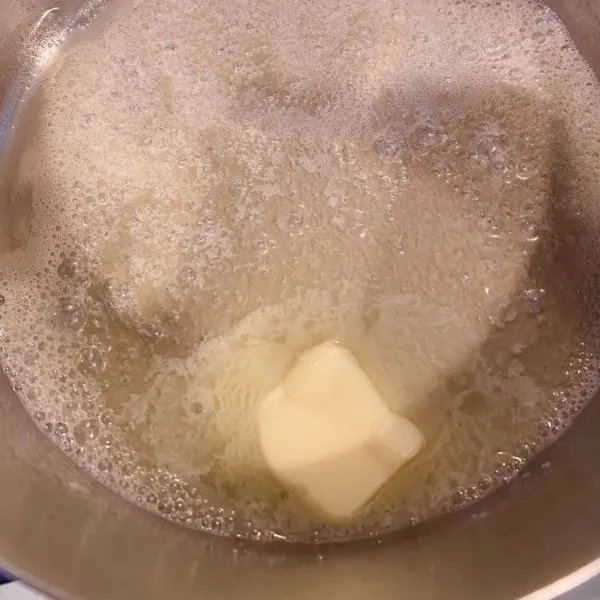
Add 2 cups of flour and 1/4 cup melted butter, using the dough hook attachment, mix on low speed. Add another 2 ½ cups of flour. Continue mixing on low speed until all the ingredients are well combined.

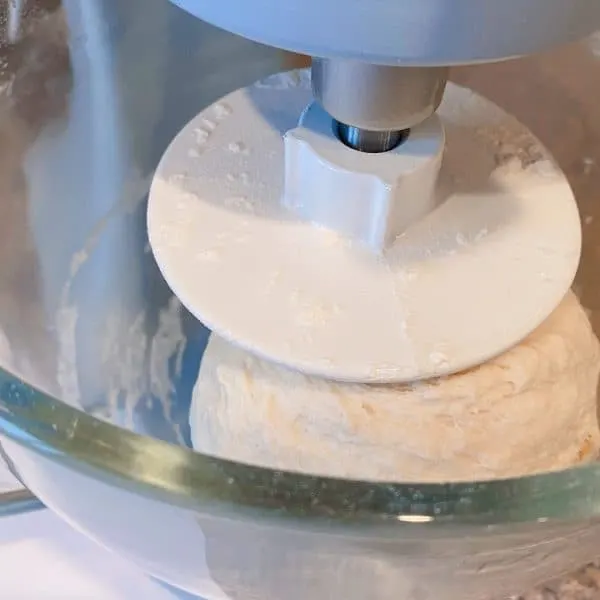
Change to medium speed and knead until the dough is smooth and pulls away from the side of the bowl, approximately 4 to 5 minutes.
TIP: It’s important to increase the speed so that the dough will knead and cling to the dough hook.

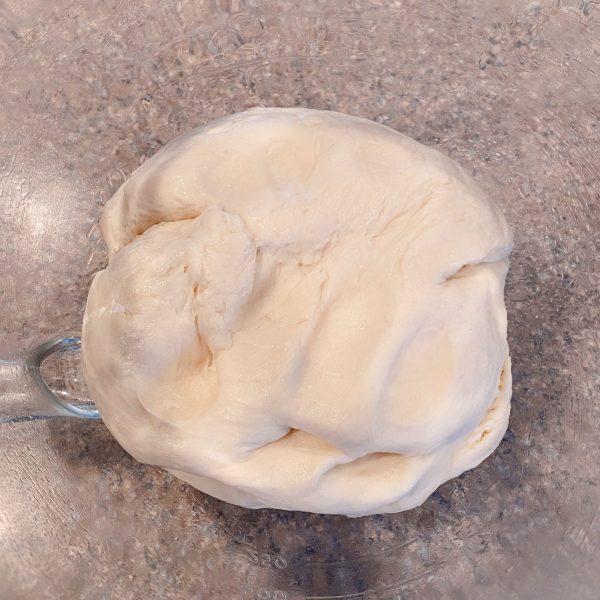
Remove the dough from the bowl, clean the bowl, or use a new clean bowl… I’m all about saving on washing dishes, oil the bowl well with vegetable oil. Return the dough to the bowl. Turn dough over, so oil side is up.

Cover dough with plastic wrap.
TIP: I love the reusable plastic covers that I purchase in the plastic wrap aisle. You can wash and dry them and reuse them. They’re super handy!

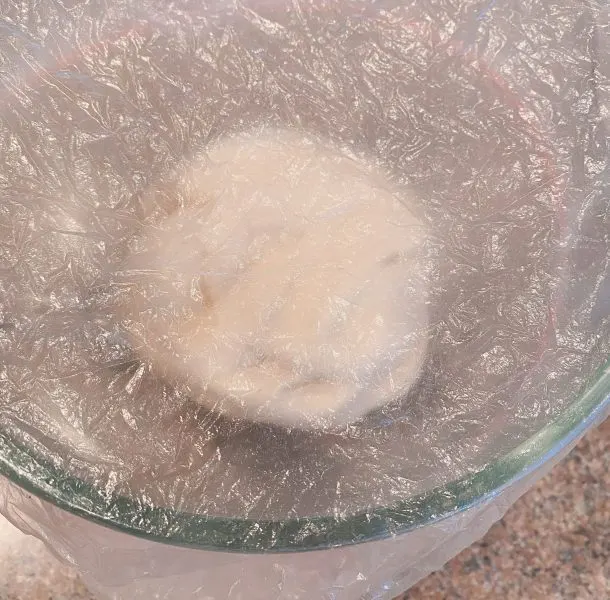
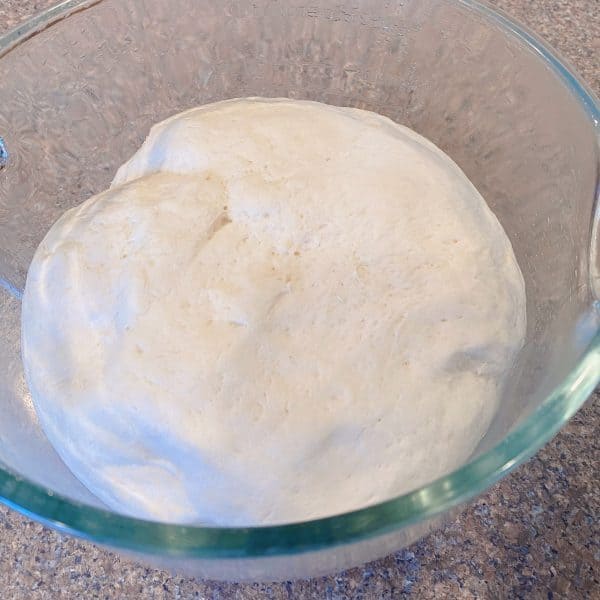
Place the covered dough in a warm place for about 50 to 55 minutes or until the dough doubles in size.

Preheat the oven to 450° degrees F. Line 2 half-sheet pans with parchment paper lightly sprayed with non-stick cooking spray. Set the pans aside.
In a large pot, 8 quarts or larger, bring 10 cups of water and 2/3 cups of baking soda…YEP…2/3 cups baking soda, to a rolling boil.
How To Shape Pretzels
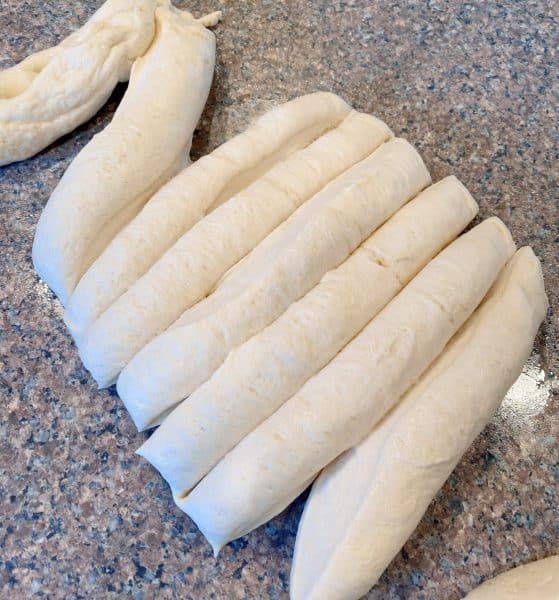
While the water is coming to a boil, turn the dough out onto a slightly oiled work surface. I used my counter top and sprayed it with non-stick cooking spray. Divide the dough into 8 equal pieces.

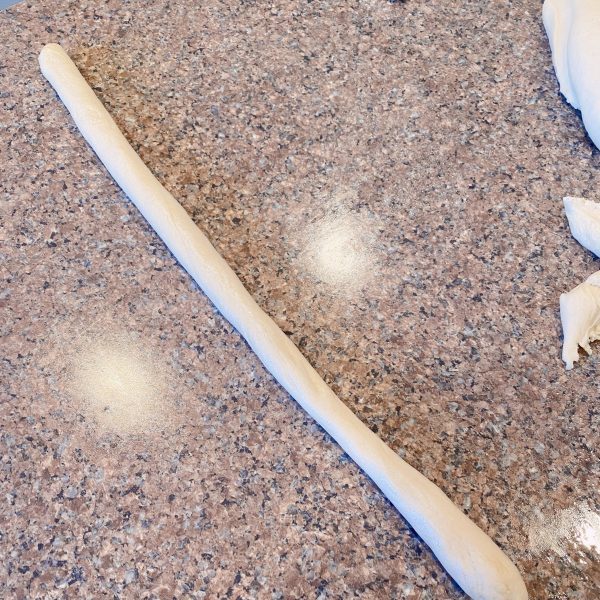
Roll out each piece of dough into a 24-inch rope…just like making snakes with play dough! (I may or may not do that particular activity with the grandkids! It’s why I’m an expert!)

Make a “U” shape with the rope…

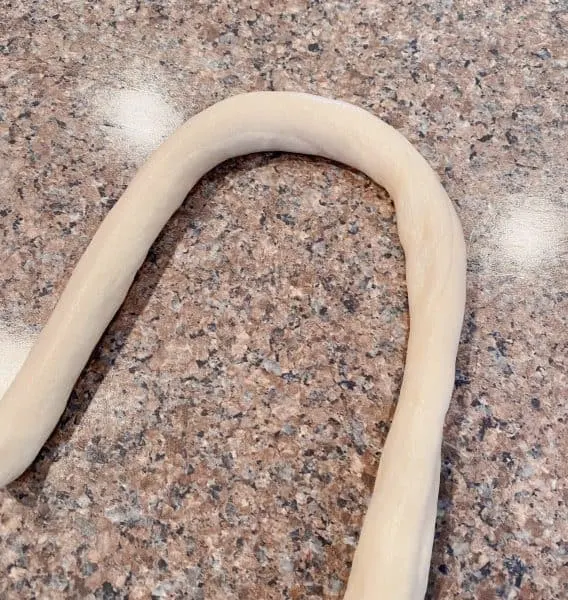
Holding the ends of the rope, cross them over each other and twist…not your body…the dough. I know you were thinking about doing a little happy dancing!
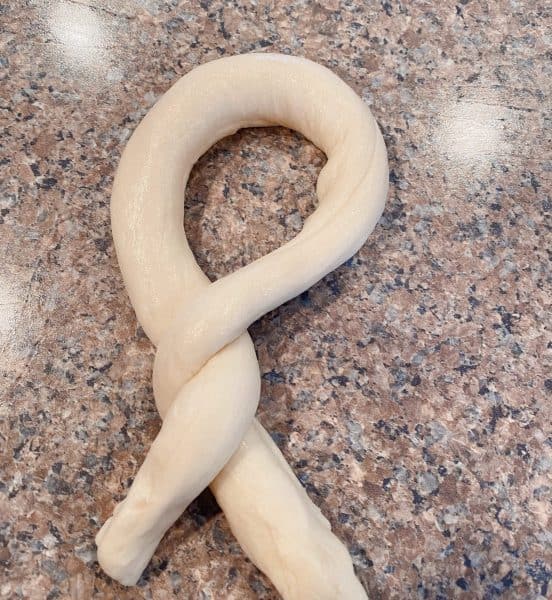
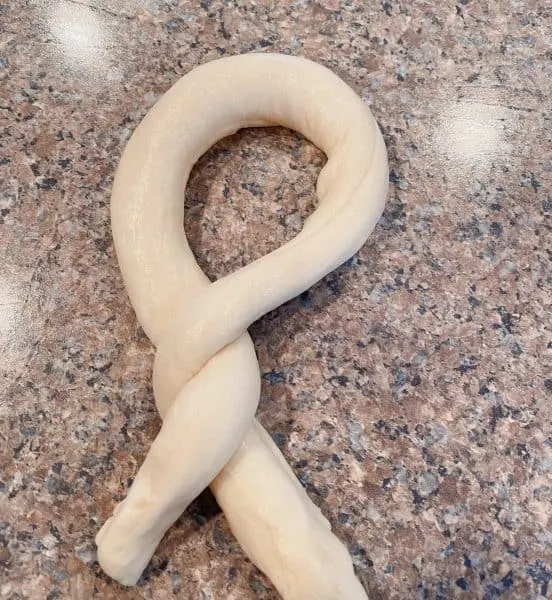
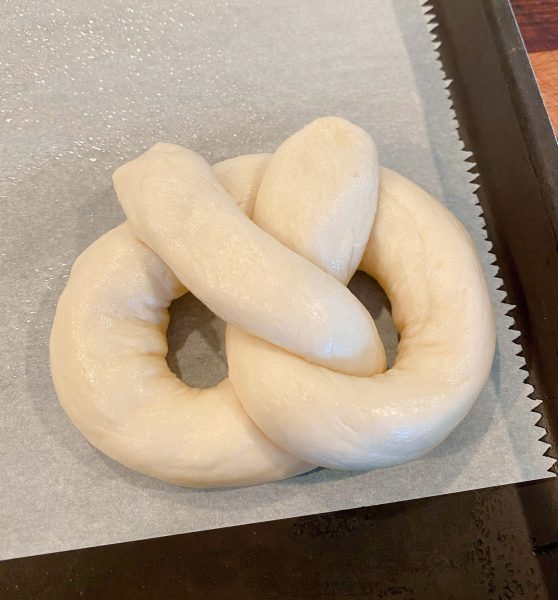
Press the ends onto the bottom of the “U” in order to form the shape of a pretzel. Place the formed pretzels onto the parchment-lined half sheet pans.

Hot Water Bath for Pretzels
Now for some FUN! Seriously this part is fun…but you need to be careful because that’s BOILING HOT water! This step is what makes the outside of the pretzels chewy!
TIP: I ALWAYS place the pot on the BACK burner to prevent it from tipping over and spilling! Please always use caution when working with boiling fluids.
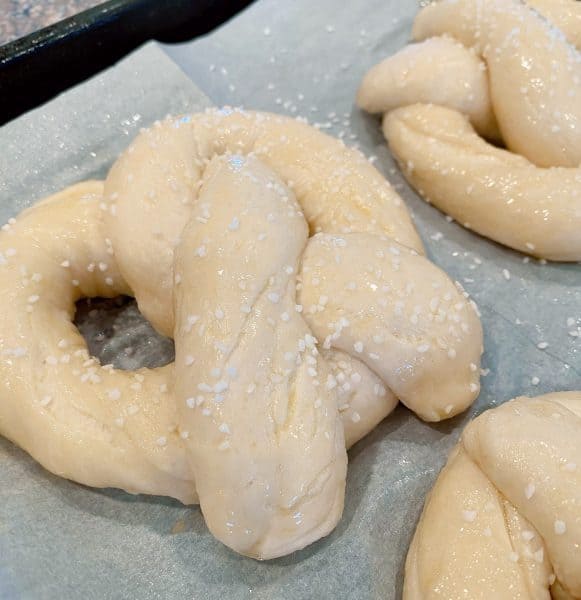
Carefully place the pretzels into the boiling water, 1 by 1, for 30 seconds. I used a large flat spatula to place the pretzels into the boiling water and to gently splash water over the top of each pretzel. Slide the spatula under the pretzel and remove from the boiling water.
Note: They’ll rise slightly in the boiling water.


Return the pretzels to the half sheet pan. Brush the top of each pretzel with the beaten egg yolk and water mixture, or “egg wash” and sprinkle with pretzel salt. (This step adds the final “chewy” factor and allows the salt to stick!)

Bake until golden brown, approximately 12 to 14 minutes. Transfer to a cooling rack for at least 5 minutes before serving!
You can bake them longer, until they are darker than mine…but I felt this was perfect!

If you’re going to eat them immediately…and I double dog dare ya not to…brush them with melted butter!
If you want to store the pretzels then I recommend waiting to brush them butter until ready to serve. Overnight the melted butter can dissolve the salt and make your pretzels look like they have a serious medical condition. They still taste amazing…they just don’t look at pretty!
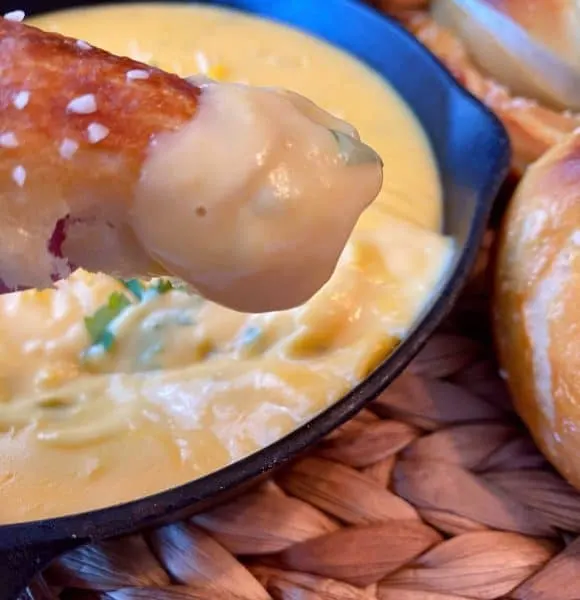
Look how YUMMY!! Are ya drooling yet? Well hold on…we still need to make that EPIC Salsa Verde Cheese Sauce. I made mine while the pretzels were baking.


How To Make Epic Pretzel Cheese Dip
In a small sauce pan melt 2 Tablespoons of butter over medium heat.
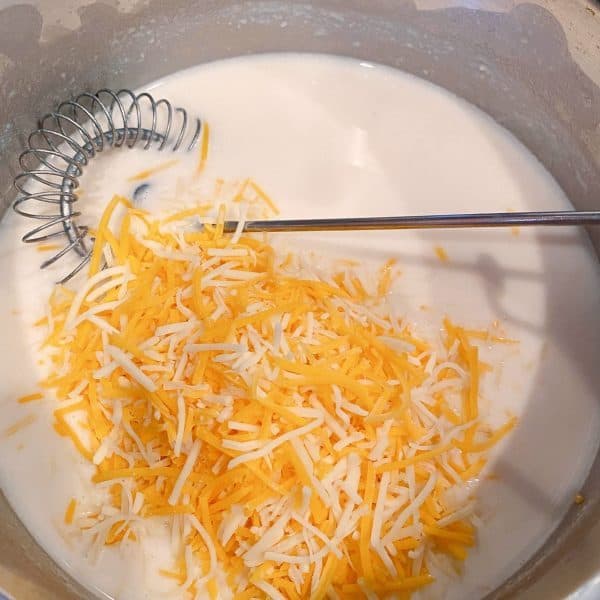
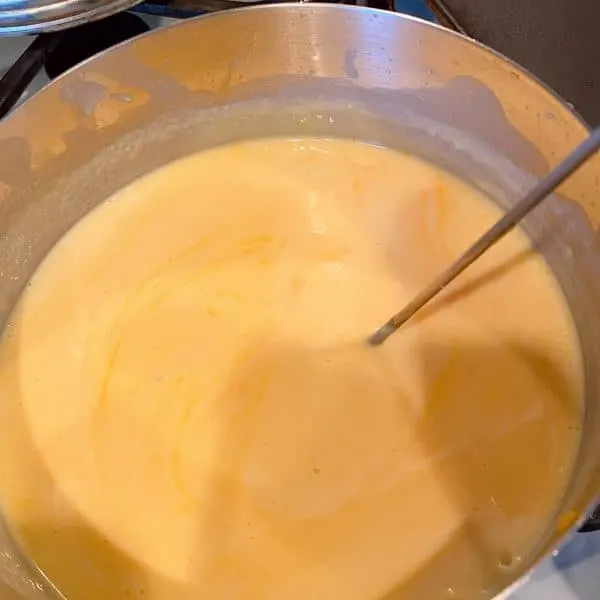
Whisk in 2 Tablespoons Flour until smooth, whisk in 1 cup of milk and stir until slightly thickened. Add 1 Cup grated cheese, continuing to stir.

Add in one pouch of Velveeta Cheese Sauce. Stir until smooth and creamy over low heat.

Now to “Kick up” this cheese sauce! Add in 1/3 cup Salsa Verde and salt to taste. Cook over low heat, stirring occasionally for 20 minutes. If the sauce thickens too much, add more milk until you reach the desired consistency.
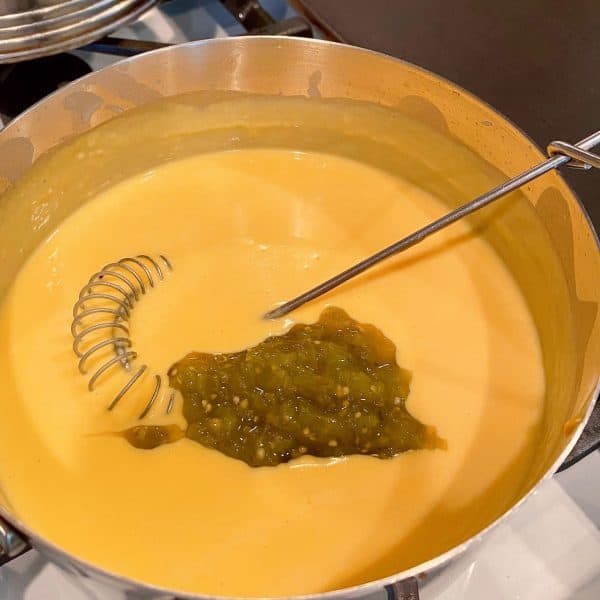

This one simple addition makes the most incredible cheese sauce! It does not make it “spicy hot”…it just adds an incredible depth of flavor that pairs beautifully with these perfect chewy soft homemade pretzels!


It was love at first “dunk”…by my fourth dunk we were in an official relationship!

These big soft buttery pretzels are the PERFECT Game Day snack…or they’re a great “Save the Crazed Mom” with Carbs treat!! Either way it’s a WIN!!
I can’t lie…after the photo shoot of these delectable gluten laden delights…I just sat there…eating! I couldn’t stop myself. They’re AMAZING!!! If you can stop after one bite…you’re a better person than I am!
If you liked these delicious treats….you’ll love these other Game Day Recipes!
- Mini Tostada Bites
- Easy Philly Cheese Steak Sliders
- Grilled Citrus Spiced Wings
- Stuffed Bacon Wrapped Jalapeno Peppers
- Copy Cat Winger Wings
- Homemade Naan Bread from Sandra’s Easy Cooking
- Navajo Tacos with Fry Bread
- Loaded Cheesy Cowboy Queso
- Homemade Pizza Rolls
Thanks so much for stopping by and visiting today! I’d love to have you follow Norine’s Nest on Facebook, Instagram, and Pinterest where I share my favorite recipes every day!
Happy Nesting Friends!


Easy Homemade Soft Pretzels Recipe

Homemade soft buttery Pretzels with an amazing Salsa Verde Cheese Dipping Sauce. They're so easy to make you'll wonder why you waited so long to make this delicious treat at home!
Ingredients
- 1 1/2 cups warm water
- 1 Tablespoon sugar
- 2 teaspoons kosher salt
- 1 package active dry yeast, or 2 1/4 teaspoons
- 4 1/2 cups all-purpose flour
- 1/4 cup melted butter
- 10 cups water
- 2/3 cups baking soda
- 1 large egg yolk with 1 Tablespoon water
- Pretzel Salt
- Non-stick cooking spray
Salsa Verde Cheese Sauce
- 2 Tablespoon butter
- 2 Tablespoon flour
- 1 cup milk
- 1 cup grated cheddar cheese
- 1 - 4 oz packet velveeta cheese sauce
- 1/3 cup Salsa Verde
- Salt to Taste
Instructions
- Combine the water, sugar, and salt in the bowl of a stand mixer and sprinkle the yeast on top. Allow to sit for 5 minutes, or until the mixture begins to foam. Add the flour and melted butter using the dough hook attachment, mix on low speed until well combined. Change to medium speed and knead until the dough is smooth and pulls away from the side of the bowl, approximately 4 to 5 minutes. Remove the dough from the bowl, clean the bowl, or use a new bowl, and then oil the bowl well with non-stick cooking spray. Return the dough to the bowl, turn dough over to oiled side up, cover with plastic wrap and sit in a warm place for approximately 50 to 55 minutes or until the dough has doubled in size.
- Preheat the oven to 450 degrees F. Line 2 half-sheet pans with parchment paper and lightly brush with vegetable oil. Set aside.
- Bring the 10 cups of water and the baking soda to a rolling boil in an 8-quart saucepan.
- In the meantime, turn the dough out onto a slightly oiled work surface and divide into 8 equal pieces. Roll out each piece of dough into a 24-inch rope. Make a U-shape with the rope, holding the ends of the rope, cross them over each other, twist, and press onto the bottom of the U in order to form the shape of a pretzel. Place onto the parchment-lined half sheet pan.
- Place the pretzels, carefully, into the boiling water, 1 by 1, for 30 seconds. Remove them from the water using a large flat spatula. Return to the half sheet pan, brush the top of each pretzel with beaten egg yolk and water mixture and sprinkle with the pretzel salt. Bake until dark golden brown in color, approximately 12 to 14 minutes. Transfer to a cooling rack for at least 5 minutes before serving. Brush with melted butter if serving immediately.
How To Make Salsa Verde Cheese Sauce for Dipping
1. In a small sauce pan over medium heat, melt butter. Whisk in flour to form a paste. Add in milk while whisking continually until mixture thickens creating a roux.
2. Add in grated cheese and the pouch of velveeta sauce. Mix until smooth and creamy. Add in 1/3 cup Salsa Verde and stir. Allow mixture to simmer on low heat for 20 minutes while stirring occasionally.
3. Serve Warm.
Recommended Products
As an Amazon Associate and member of other affiliate programs, I earn from qualifying purchases.
-
 Ultra Cuisine 100% Stainless Steel Wire Cooling Rack for Baking fits Half Sheet Pans Cool Cookies, Cakes, Breads - Oven Safe for Cooking, Roasting, Grilling - Heavy Duty Commercial Quality
 -
 Nordic Ware Natural Aluminum Commercial Baker's Half Sheet (2 Pack), Silver
 -
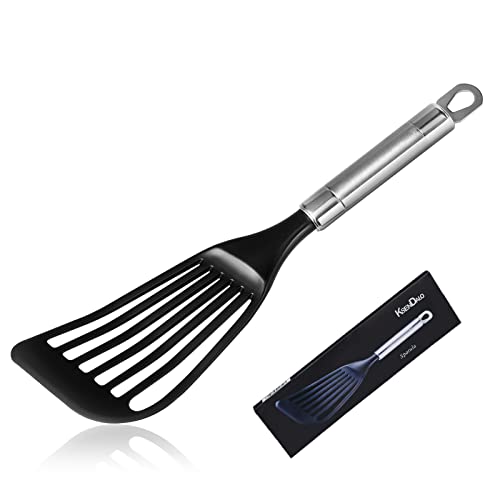 Wide Thin Slotted Nylon Spatula, KSENDALO Lightweight but Sturdy Turner, with Brushed Stainless Steel Handle(Opion1)
 -
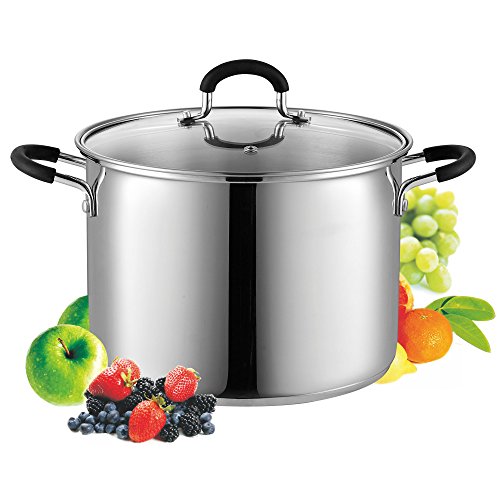 Cook N Home 8 Quart Stainless Steel Stockpot Saucepot with Lid
 -
 KitchenAid KSM150PSER Artisan Tilt-Head Stand Mixer with Pouring Shield, 5-Quart, Empire Red
Nutrition Information:
Yield:
8 servingsServing Size:
1 pretzelAmount Per Serving: Calories: 504Total Fat: 19gSaturated Fat: 11gTrans Fat: 0gUnsaturated Fat: 6gCholesterol: 97mgSodium: 6321mgCarbohydrates: 65gFiber: 3gSugar: 4gProtein: 16g
Kim
Thursday 21st of March 2024
Loved this recipe! Surprising easy and a big hit with the family!! Thanks for sharing!!
[email protected]
Thursday 28th of March 2024
Hi Kim! You are so welcome! I'm so glad the family enjoyed this recipe. I've been craving it, but I know if I make them I'll eat them all myself...and that would not be good for my carb addiction. LOL Thanks for stopping by and sharing with me. You made my day! Have a great Easter! Norine
Joy potestio
Friday 2nd of February 2024
Hello! I want to thank you for sharing this recipe! Yeast and I are not friends, I’ve never actually had dough make it to the oven! Your recipe was easy to follow and I can’t believe that they actually turned out great! I need to work on my twisting skills though! I’m going to end with two things… first a funny story, I started boiling the water with what I thought was baking soda, I asked my husband to make sure it didn’t boil over while I continued shaping the dough, I couldn’t figure out why my water was so white, that’s when I realized I used powder instead of soda! Thank god I figure it out before placing the pretzels in the pot!
And the second, my dough was kind of elasticky, like I would roll it out but it didn’t want to stay rolled.. can you offer me some advice on that? Thanks! Wish I could share a pic!!
[email protected]
Monday 5th of February 2024
Hi Joy! First this made me SO happy!! I love when someone is willing to keep trying even when in the past they may not have had success. It's how we learn, and cooking is no exception! Second...WHEW...glad you caught the baking soda mistake! Yikes!!! My entire reputation was at stake! Lol Third...the reason why your dough was kind of elastic, was because the dough was probably slightly overworked causing the strands of gluten to become stronger. My suggestion is to not over knead the dough. It's easy to do, and we've all done it. Every bread maker on the planet has overworked their bread dough at one time or another. Lastly...you can ALWAYS share a picture with me. Just email it to me at [email protected]! I love seeing photos of your successes! Thanks so much for stopping by and sharing with me today! You made my day! Happy Nesting and continued bread making! Norine
Amy
Saturday 20th of January 2024
These were sooo good! I live in an area where we can’t get good soft pretzels. It was a first for me to make and found it pretty easy except for the twisting part. They got better as I went along. Thank you!
[email protected]
Tuesday 23rd of January 2024
Hi Amy! I'm so glad you enjoyed this recipe. It is hands-down one of my very favorite recipes. Little secret...I struggled with that twisting in the beginning too! It's a lot trickier than one would think. Thanks for stopping by and I hope you'll visit again soon. Norine
Kathy
Monday 15th of January 2024
My daughter and I made these on a very cold Colorado day.
They are excellent. The bread is so good.
Next time I will make them smaller. 16 instead of 8.
Thank you for the great instructions too. So easy to follow. 😀
[email protected]
Tuesday 16th of January 2024
Hi Kathy! A perfect cold day activity with a warm treat at the end! Love your idea of making them smaller...I got bigger so I feel less guilty eating only one! Lol Thanks for stopping by and sharing. Have a great New Year! Norine
Hannah
Tuesday 26th of December 2023
Can they be left out on the counter in an airtight container or do they need to be refrigerated? Also do they freeze well?
[email protected]
Thursday 28th of December 2023
Hi Hannah! Sorry for the delay in responding. I was out of the office last week for Christmas. They can be left out on the counter in an airtight container. The salt can get a little "funky" but, they still taste wonderful. You can also wait to add the salt later, just the like the frozen pretzels you buy at the markets and then you won't have funky salt on top of your pretzels if they sit out on the counter. Enjoy! Norine