
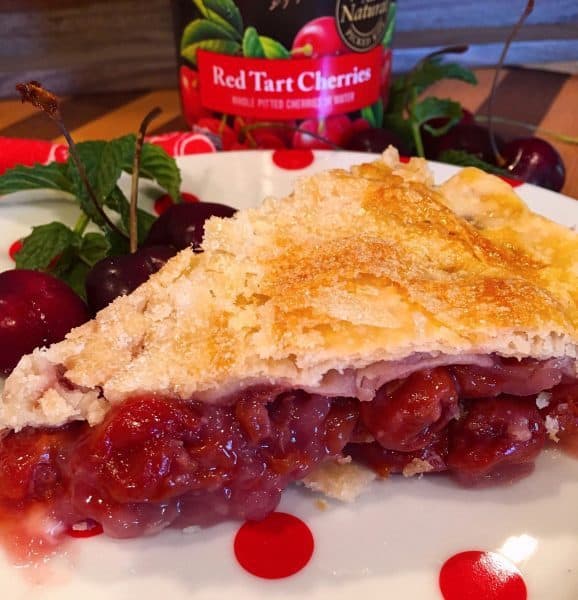
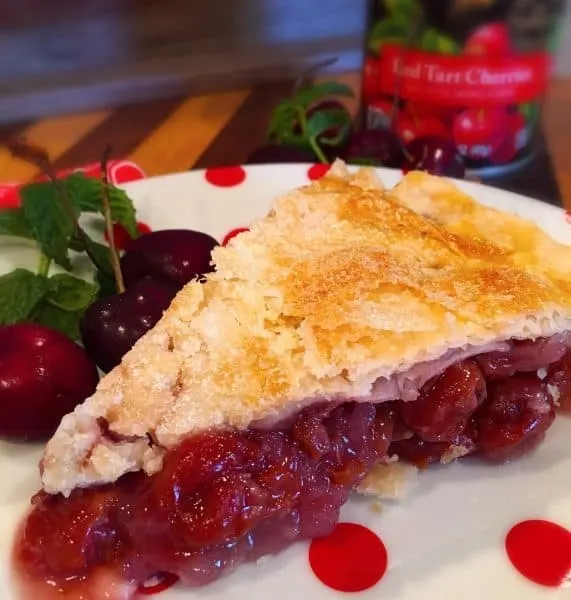
Cherry pie was my Grandpa Howard’s favorite! Cherry Pie made with canned tart cherries, in a slightly sweet filling, with a hint of almond extract, and a tender flaky crust was his one great dessert weakness…well that and Strawberry Shortcake!
I can completely understand why Grandpa loved Cherry Pie so much! I’m a huge Cherry fan myself!

My Mom told me her job growing up was to make pie’s for the week. (A tradition that was not carried on in my own childhood home. Hmmm? Suddenly feeling very jipped! This is why children have to go into therapy my friends! Lol)
I may not make Cherry Pie every week…but when I do…this is the one I make! I wish I could tell you it’s 100% my recipe, but that would be a lie. My friend Betty Crocker knew what she was doing. I just improved upon it a tad.
Start off with a double 9-inch pie crust. You can make it from scratch or store-bought dough. I won’t judge.
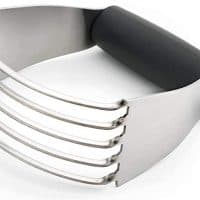
Here’s my recipe for Flaky Pie Crust. It’s the only recipe I ever use. You just can’t beat a good Crisco crust! The flaky layers are to die for!
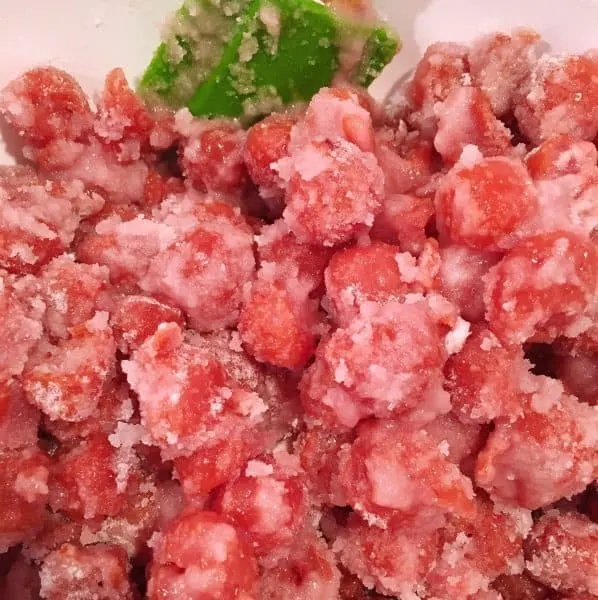
Next Preheat your oven to 425°. Drain Three 14.5 oz. cans of “Pitted” Red Tart Cherries in water. I like to encourage using “pitted” cherries for this pie. It makes for a more enjoyable pie eating experience. (Again I just like to make subtle suggestions.)
Even when purchasing pitted cherries one of those little suckers slips through! PLEASE go through the Cherries carefully! (I am not responsible for dental work!)
How To Make Traditional Homemade Cherry Pie
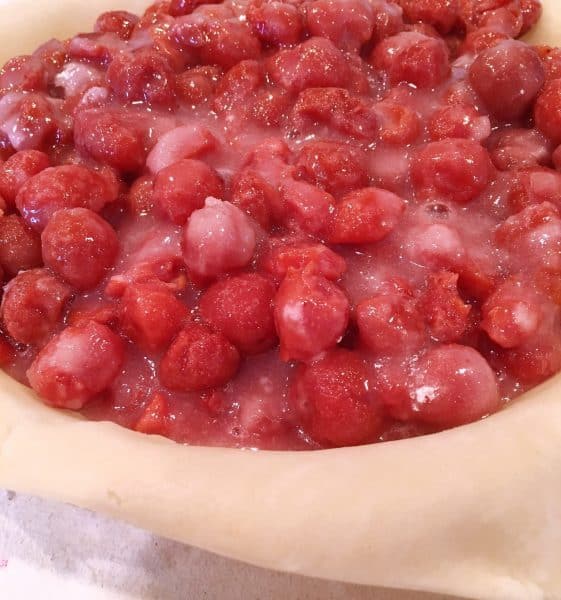
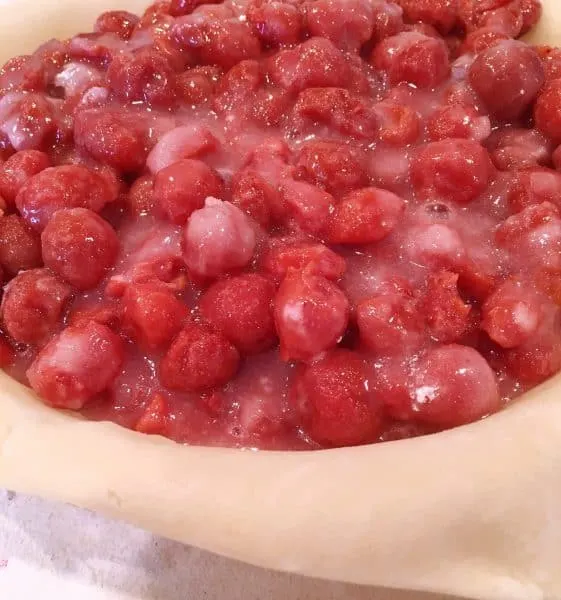
In a bowl add 1 1/2 cups of sugar with 1/3 cup + 2 Tablespoons of all-purpose flour to drained cherries.


Gently stir! When mixed allow them to sit for about 5–10 minutes. They need to “chill” out for a minute! They’ve been through a lot with all that “pitting” and water soaking!

Roll out bottom Pie dough. Turn cherry mixture onto pastry-lined pie plate.
Sprinkle with 1/4 teaspoon almond extract and dot with 2 Tablespoons of butter. Look at all those cherries!
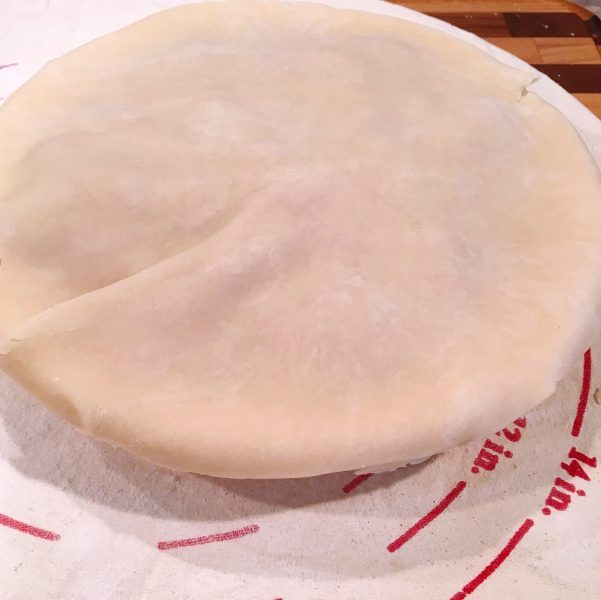
Roll out top crust. I love to my dough disc! I’ve raved about it over and over here on my blog. If you’re looking for a quick easy way to roll out pie crust, biscuits, rolls, or sugar cookies…your kitchen needs an amazing dough disc! I couldn’t make it through without this dough disc! To me, it’s right up there with my baby…my kitchen aid mixer!
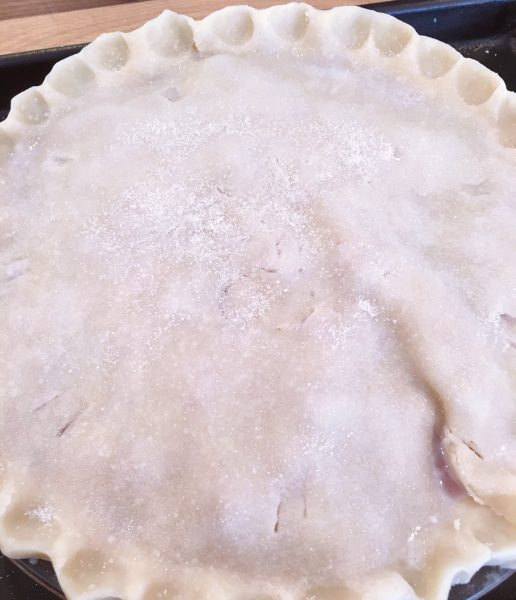
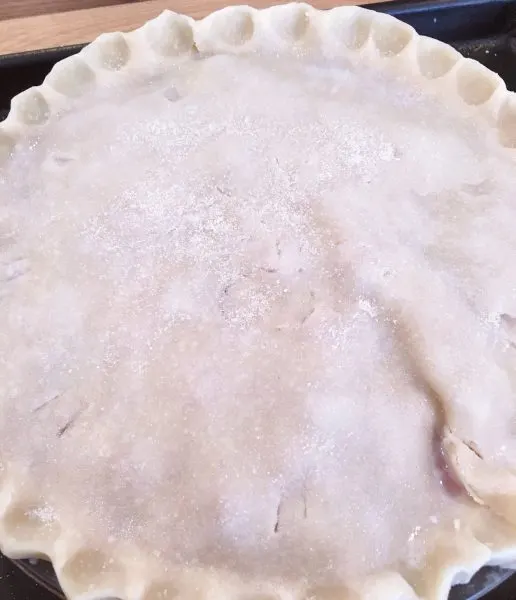
Cover Cherry Pie filling with top crust. Trim around the outer edge of the pie plate with kitchen shears. Fold edges under to seal and flute.
TIP: “Flute” means to crimp your edges!

I know a lot of bakers prefer to cut slits into their pie crust tops before placing it over the fruit filling.
I do it opposite and for a reason. It’s much easier to move that rolled out pie crust if it is one piece with no cuts. It prevents the crust from falling apart.
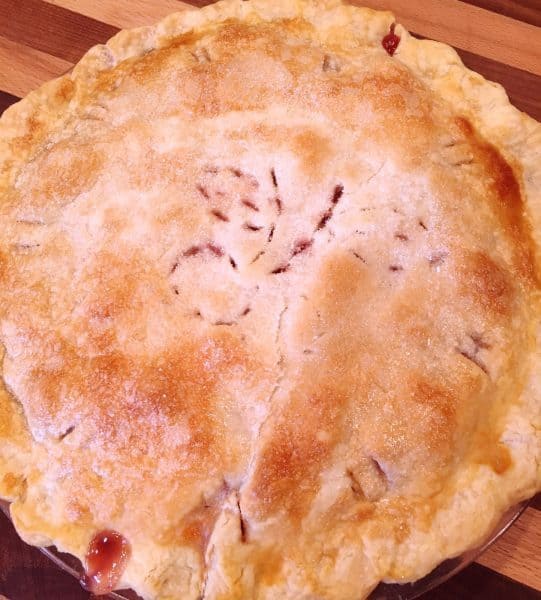
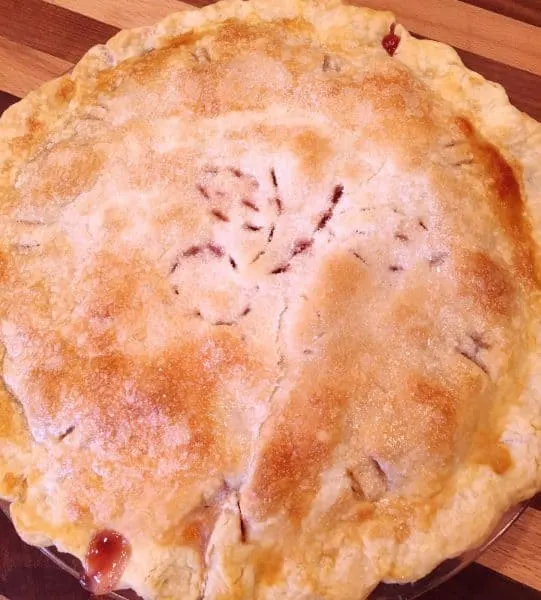
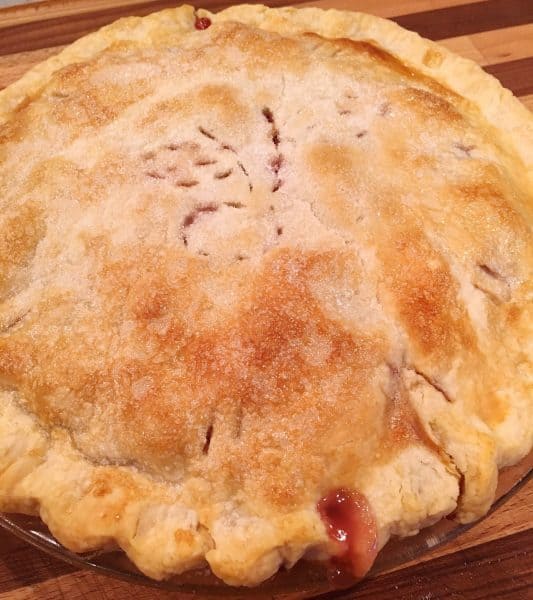
Cut slits into the top of your pie crust with a sharp knife. I did a Cherry motif. (Move over Van Gogh!) It seemed fitting!
Brush with milk and sprinkle with sugar.
Place on a non-stick baking sheet and place in the oven for 15 minutes at 425°. Reduce heat to 350° and continue to bake for another 30–40 minutes. The baking sheet will prevent any run-off from burning in the bottom of the oven!
TIP: If pie is beginning to get too brown, but the juices haven’t begun to bubble through the slits, make a “tent” out of a large piece of aluminum foil, and place it over the top of the pie for the final few minutes of baking.
Bake until crust is brown and juice begins to bubble through the slits in the crust.
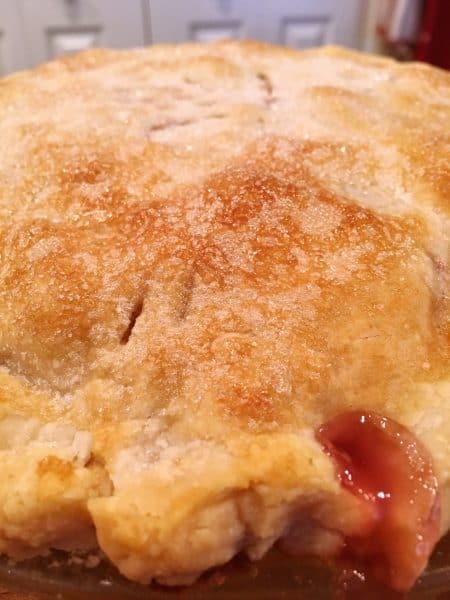

Allow to cool for 45 minutes for “soft set” or completely cool for a firmer set.
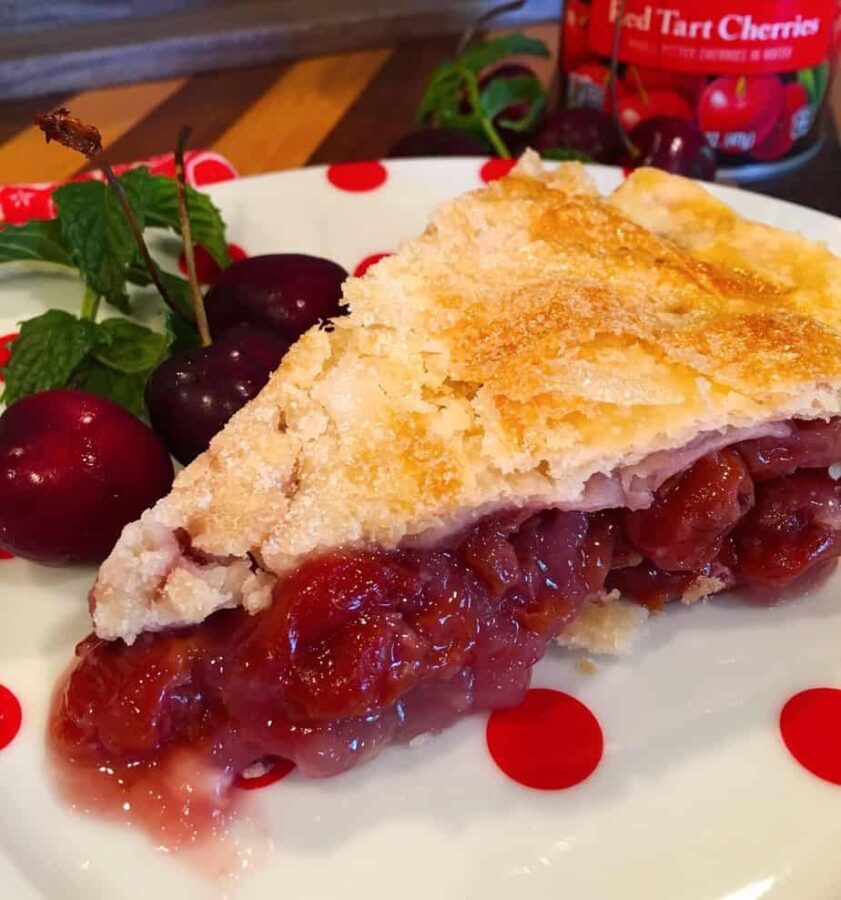
I wanted warm Cherry Pie with my scoop of Vanilla Ice Cream! So my slice isn’t super firm.

Ya know what would go with this even better than Vanilla Ice Cream? A big scoop of my recipe for Cherry Chocolate Chip No-Churn Ice Cream! How heavenly would that be?

I’m sure food photographers would have a lot to say about this photo with its crumbling flaky crust!
I love a delicious flaky crust over a thick hard crust any day! I prefer to look at this photo and admire that flaky flake! That’s because I know… it melts in your mouth! It also creates the perfect “crust” edge! Mmmmmm!
Well, there ya have it! My version of Traditional Cherry Pie! I’m pretty sure Grandpa would love this nice big slice, polka-dot plate and all! Sure hope they have it in Heaven! (wink, wink)

Remember to follow me on Pinterest, Facebook, and Instagram. You can find me by searching for “Norine’s Nest”! It’s my favorite place to hang out! I hope it’s yours too!
Here are some other Great Pie Recipes
- Fresh Classic Blueberry Pie
- Cranberry Apple Pie
- Mile High Lemon Meringue Pie
- Dutch Apple Pie
- Fresh Triple Berry Galette
- Cherry Cranberry Raspberry Pie
Thanks so much for stopping by today and Happy Nesting!

Traditional Homemade Cherry Pie
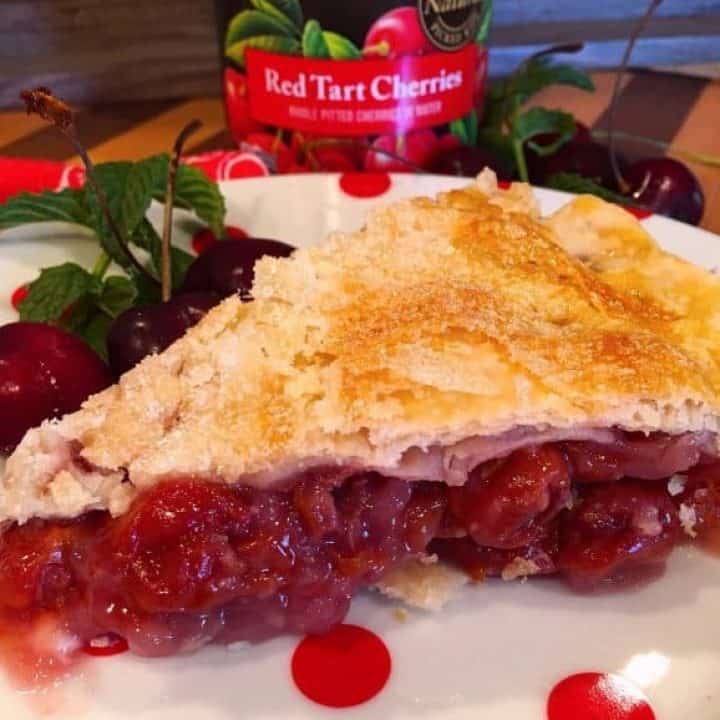

Traditional Tart Cherry Pie is the perfect slice of happiness for Cherry lovers all over the world. Plump, ripe, tart cherries are balanced with a sweet filling and wrapped up in a flaky crust.
Ingredients
- Pastry Crust for 9-inch Two-Crust Pie (Homemade or Store bought)
- 1 1/2 cups of sugar
- 1/3 plus 2 Tablespoons of All-purpose Flour
- 3 - 14.5 oz. cans of pitted red tart cherries, drained
- 1/4 teaspoon almond extract
- 2 Tablespoons of butter
- Milk and Sugar for top of pie crust
Instructions
- Preheat oven to 425°
- Prepare Pastry Crust.
- Drain Cherries. Add Flour and Sugar. Gently Stir. Allow to rest 5-10 minutes.
- Turn into pastry-lined pie plate; sprinkle with almond extract and dot with butter.
- Cover with top crust. Trim pie crust about 1/4 inch from outer rim of pie plate. Fold Under. Flute edges. Cut slits into top of pie. Brush with milk and sprinkle with sugar.
- Place on a baking sheet and bake for 15 minutes at 425°.
- Turn down to 325° and continue baking for an additional 30-40 minutes. Until crust is brown and juice begins to bubble through slits in crust.
- If crust is too brown before juices bubble, cover with foil tent.
- Remove from oven and allow to cool.
Recommended Products
As an Amazon Associate and member of other affiliate programs, I earn from qualifying purchases.


Nutrition Information:
Yield:
12 servingsServing Size:
1 Slice of PieAmount Per Serving: Calories: 321Total Fat: 10gSaturated Fat: 4gTrans Fat: 0gUnsaturated Fat: 5gCholesterol: 10mgSodium: 155mgCarbohydrates: 57gFiber: 3gSugar: 39gProtein: 4g
Cat Boss
Wednesday 25th of November 2020
Thank you!!! This is the recipe my late mother always used but I couldn’t find it! I’m so happy to have it for Thanksgiving this year!
[email protected]
Friday 27th of November 2020
Hi! I'm so glad you found this recipe. It's a favorite at this nest and truly was my Grandfather's favorite recipe. I hope you enjoyed every forkful! Happy Holidays! Come back and visit soon. Norine
Julia
Sunday 22nd of July 2018
Norine, I the pie looks delicious!!! I love the story and the pie. I am finally taking some time away from Instagram to explore your blog and the other girls in the group. I love your blog, you have so many great recipes as well as wonderful stories. xoxo
[email protected]
Monday 23rd of July 2018
Hi Julia! Thank you SO much for all your support, friendship, and love! You are a true girlfriend! Thank you for stopping by and sharing your kind words with me! You are the BEST!!! Hugs! Norine