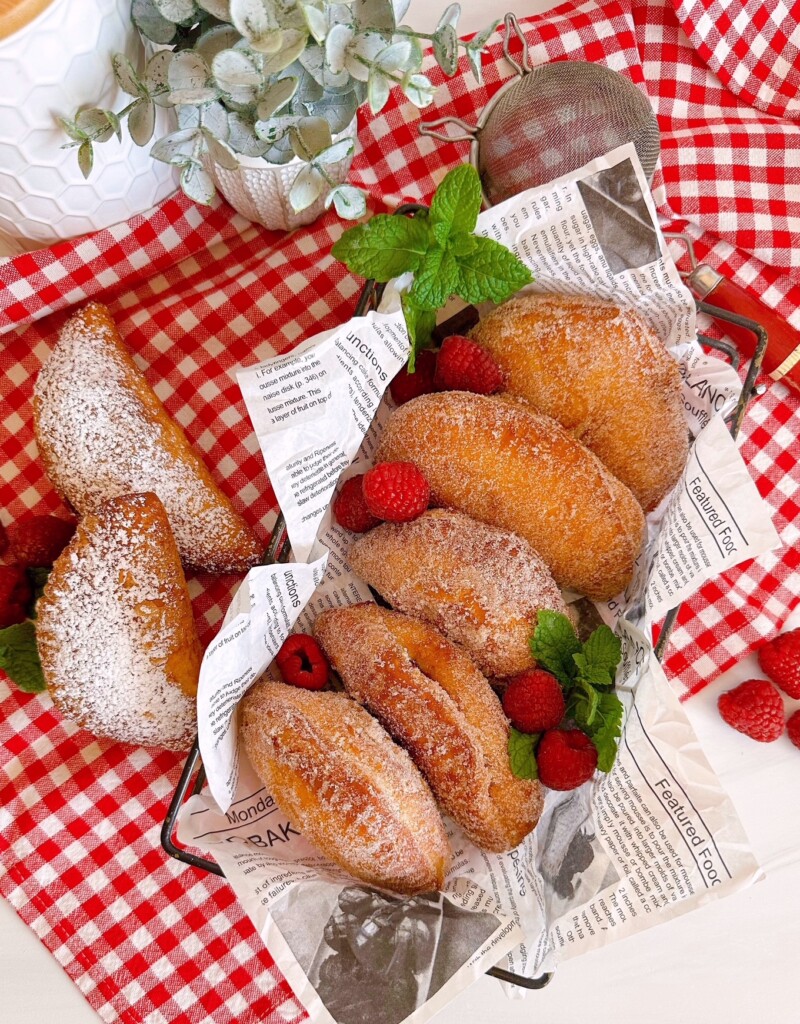
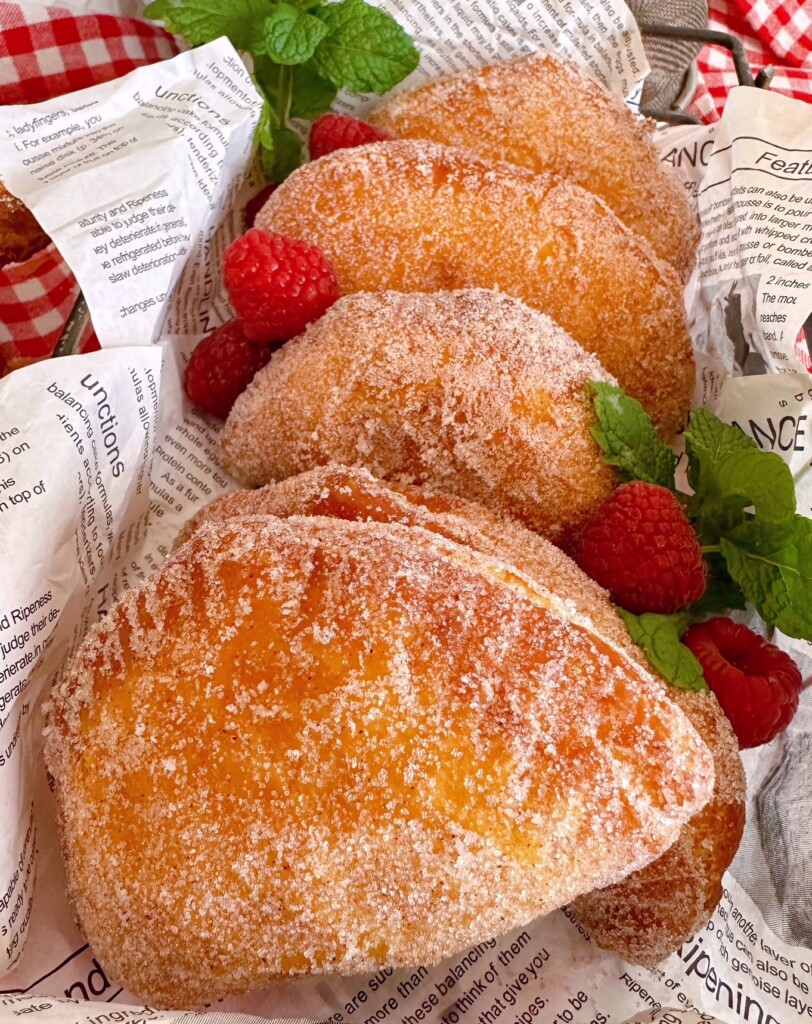
Easy Biscuit Fruit Filled Hand Pies


Discover a quick and delicious way to satisfy your sweet tooth with these easy fried pies made from canned biscuits—perfect for a homemade treat in minutes!
Why Fried Pies With Canned Biscuits Are A Great Choice
There’s something wonderfully nostalgic about a warm, golden hand pie—especially when it comes together with almost no fuss. That’s exactly why fried hand pies made with canned biscuits are such a fantastic choice for busy home cooks.
Using canned biscuits as your shortcut dough means you get consistent, tender results every single time—no kneading, no rising, and no guesswork. Just flatten, fill, fry, and enjoy!
Sweet canned pie fillings or Nutella chocolate spread create the perfect sweet treat. The possibilities are as endless as your cravings. It’s the kind of simple kitchen magic that brings big smiles with very little effort, and honestly, that’s what great home cooking is all about.
Ingredients Needed For Fried Pies
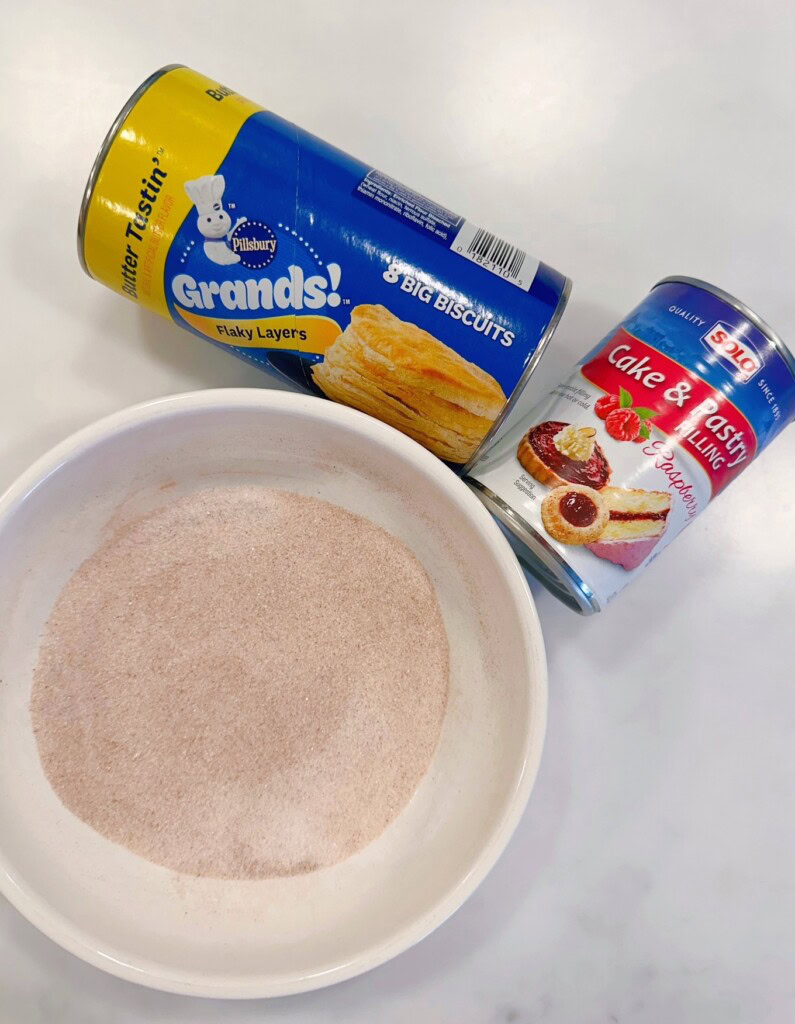
- 1 Can 16.3 oz. 8 count, Pillsbury Grands Biscuits — Flaky Layers work best!
- 1 cup pie filling — I LOVE Solo Cake & Pastry Raspberry Filling. I found it at Walmart.
- 1 cup granulated sugar
- 2 teaspoons ground cinnamon
- 1 cup powdered sugar
- Oil for frying
Step-By-Step Instructions For Making Fried Pies Using Canned Biscuits
STEP 1: In a large heavy sauce pan, add 3–4 inches of oil. Heat over medium-high heat until the temperature reaches 350°(F).
TIP: When frying, ALWAYS use extra caution, turn the handle AWAY from you towards the back of the stove top AND ALWAYS use a kitchen thermometer to constantly check the temp of the oil for perfect frying results.
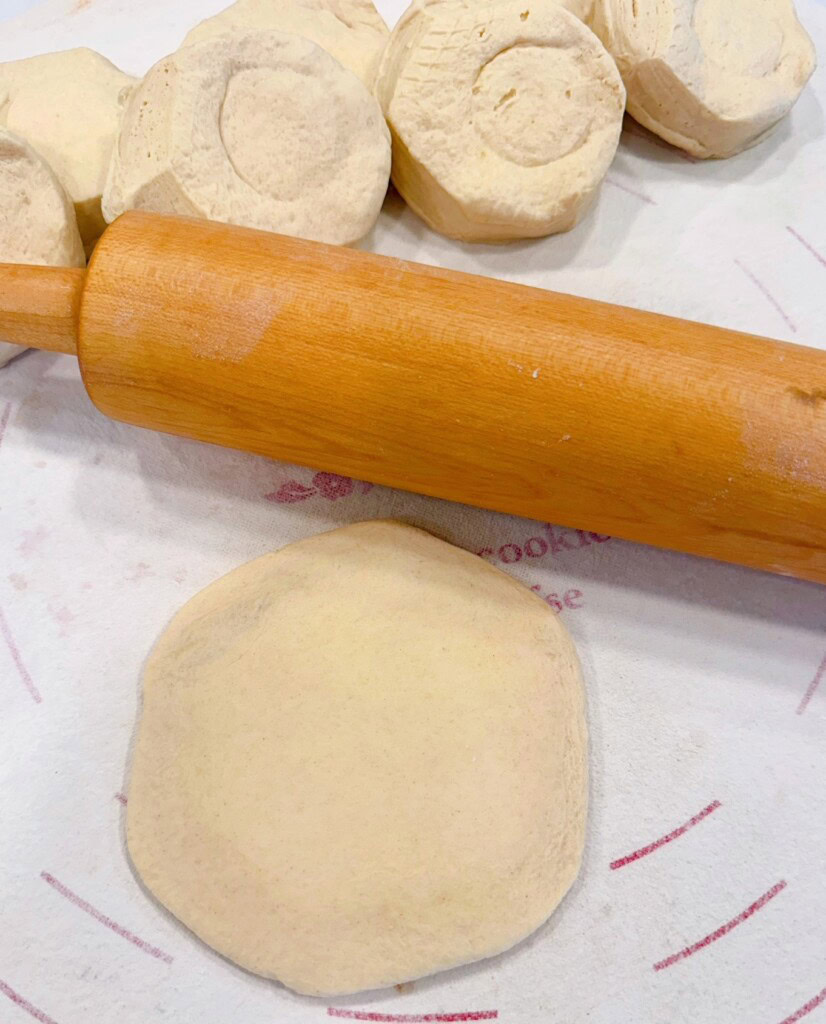
STEP 2: On a lightly floured surface, roll each biscuit out into a four-five-inch circle.
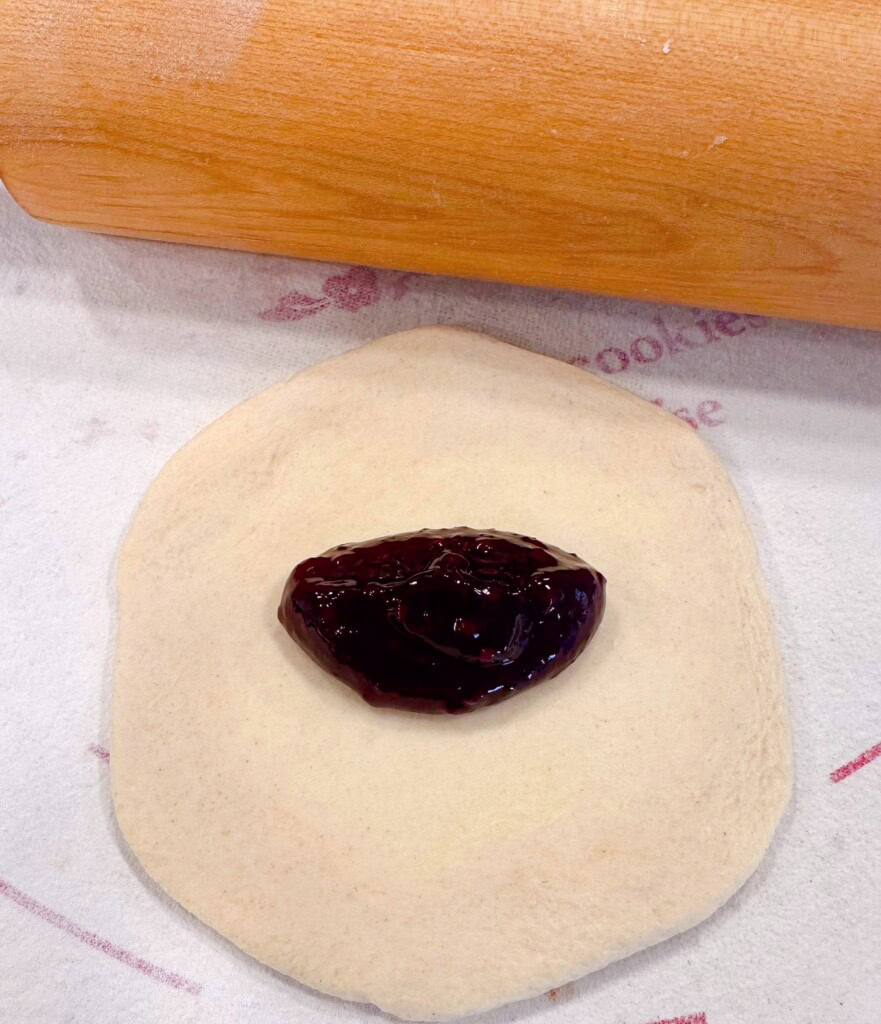
STEP 3: Once all the biscuits are rolled out, place a heaping tablespoon of filling into the center of each dough disc.
TIP: Be careful NOT to overfill each biscuit. In order to reduce splatter when frying, it’s important to keep the filling inside each hand pie.
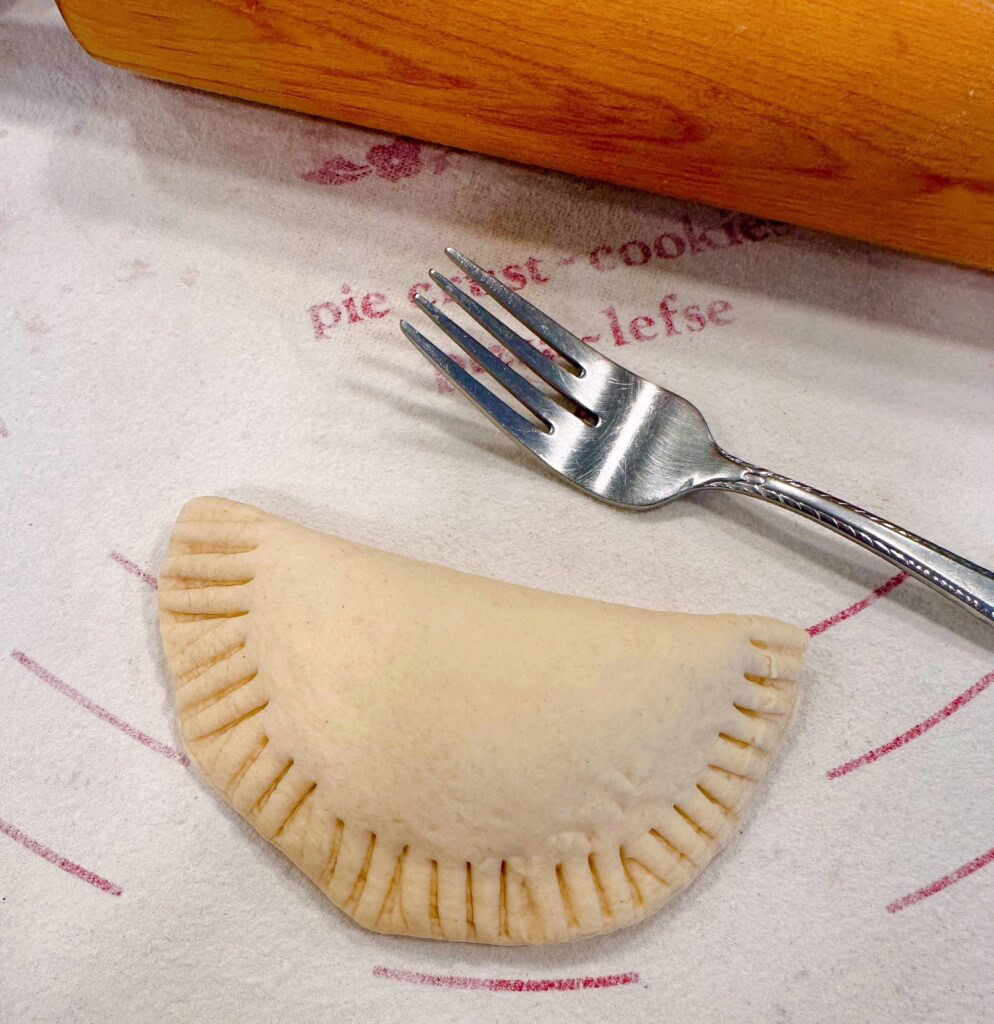
STEP 4: Fold the dough over the filling. Crimp the edges with a fork, pressing down firmly, making sure the edges are sealed together. Repeat until ALL the pies are filled and ready to be fried.
TIP: Place the prepared hand pie on a parchment-lined baking sheet to prevent it from sticking to the pan.
Frying Instructions for Hand Pies
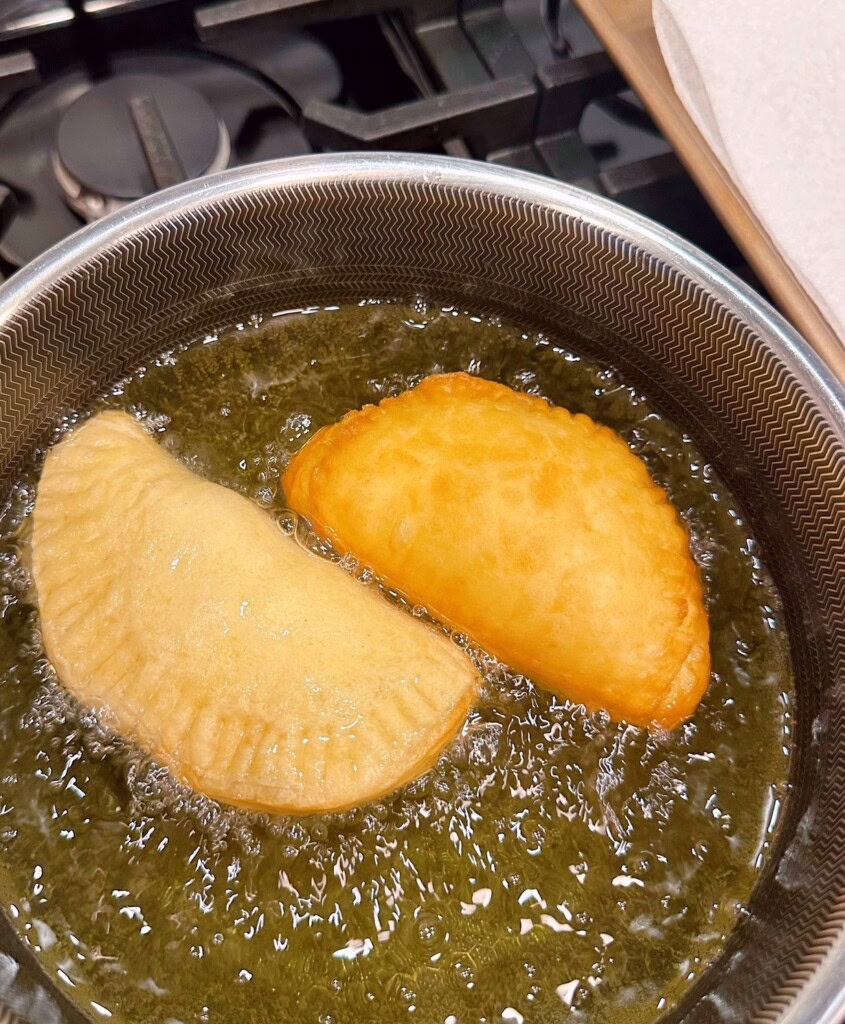
STEP 1: Once the oil is heated to 350° (F), carefully place one hand pie into the hot oil, making sure you lay it away from you to prevent splatters.
Cook until golden brown, 2–3 minutes. Gently turn the hand pie over, using a slotted spoon, and cook the other side until crispy and golden.
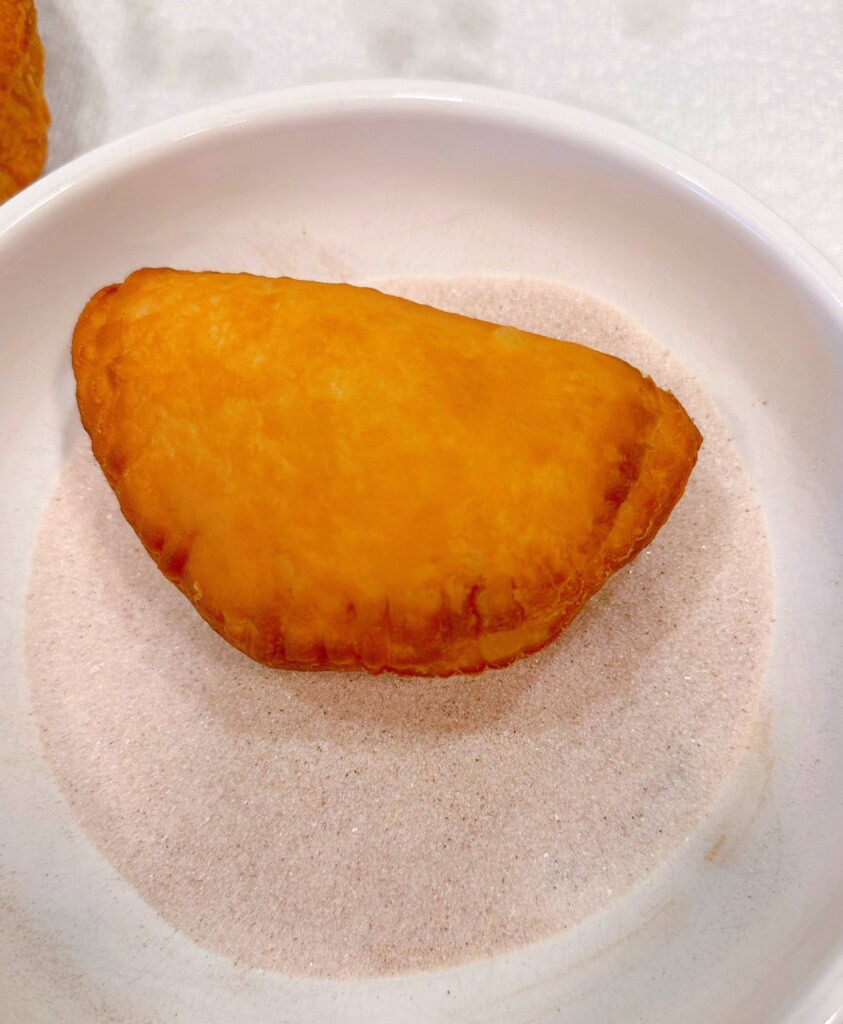
STEP 2: Using the same slotted spoon, remove the fried hand pie and place on a paper towel-lined paper plate or on a cooling rack placed on top of a baking sheet.
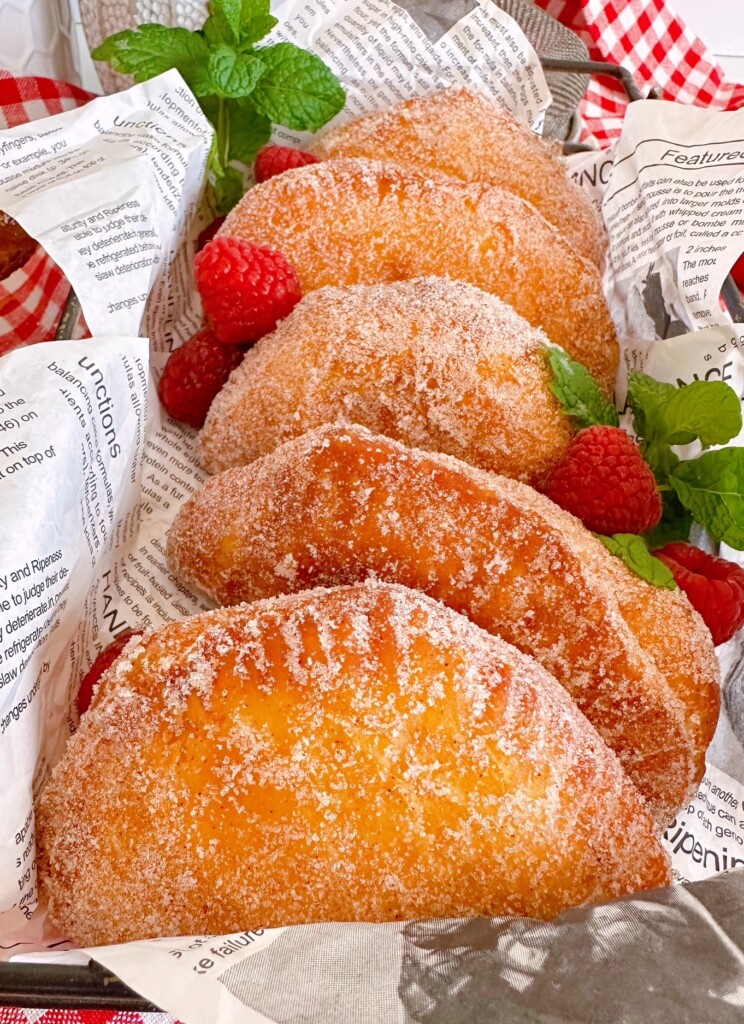
STEP 3: Roll the warm pie in the cinnamon sugar mixture, or sprinkle with powdered sugar.
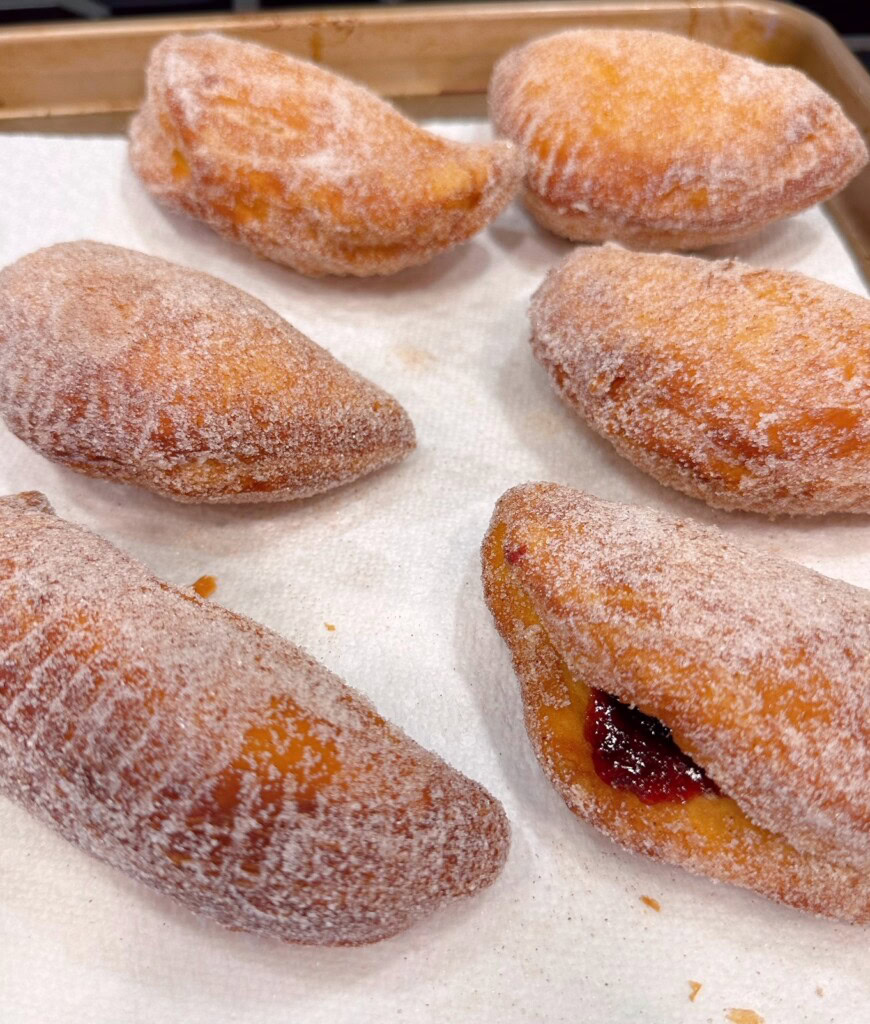
STEP 4: Place the sugar-coated pies on a fresh paper-towel lined baking sheet.
Fruit Filling Options: Popular Choices And How To Prepare Them
When it comes to fruit fillings for fried biscuit hand pies, the options are as fun and flexible as your pantry! Classic choices like apple, cherry, peach, lemon and blueberry are always crowd-pleasers.
I like the ease of using canned fillings, but you can make them from scratch if you prefer. With just a few simple ingredients you can whip up your own hand pie fillings.
For apple filling, peel and dice fresh apples, then cook them down with butter, sugar, cinnamon, and a splash of lemon juice until tender and slightly thickened.
Berries like blueberries or cherries can be simmered with sugar and a bit of cornstarch to create that perfectly jammy texture that won’t run out of your pies while frying. Peach filling is lovely with a hint of vanilla and a pinch of nutmeg to bring out its natural sweetness.
TIP: If you’re short on time, and using canned pie fillings—be sure to give chunkier fruit a quick chop and maybe add a squeeze of lemon juice to brighten the flavor.
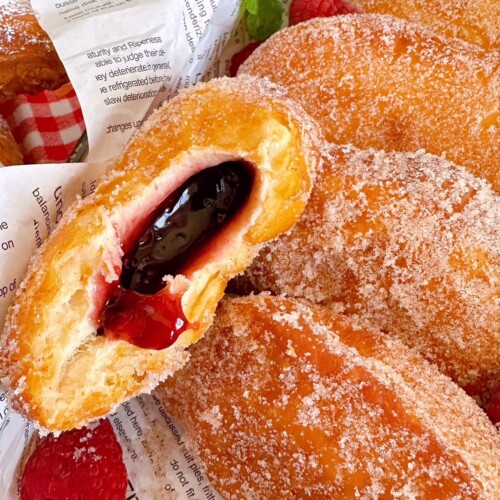
No matter which fruit you choose, the key is making sure the filling is thick enough to stay put, giving you that warm, gooey center wrapped in golden, crispy biscuit goodness.
Tips For Frying Perfect Pies: Temperature And Timing
Frying hand pies to golden, flaky perfection really comes down to two key things: keeping your oil at the right temperature and knowing exactly when they’re done.
For the best results, heat your oil to 350°F. This is the sweet spot—hot enough to create that crisp, golden exterior without soaking the dough in grease. If the oil is too cool, your pies will absorb oil and turn soggy. (I just realized I think I’ve been soaking in cool oil…I’m a tad on the “soggy side”…Lol)
Too hot, and they’ll brown too quickly on the outside while staying undercooked inside. A simple kitchen thermometer is your best friend here, but if you don’t have one, drop in a small piece of dough—if it sizzles immediately and rises to the top, you’re good to go.
Hand pies fry up quickly—usually 2–3 minutes per side. You’re looking for a deep golden brown color and a crisp exterior. Don’t overcrowd the pan, or the oil temperature will drop and affect your cook time. Flip them gently once the first side is beautifully browned, and keep a close eye on that second side—it tends to cook even faster.
A Few Extra “Norine’s Nest” Tips
- Let the pies rest for a minute before frying so the seams stay sealed.
- Fry in small batches for consistent results, making sure to check the temp of the oil.
- Drain on paper towels or a wire rack to keep that crust crisp.
- Coat with Cinnamon Sugar while still warm so the sugar will stick!
- Give them a minute or two to cool before serving—those fillings get hot!
With the right temperature and a watchful eye on timing, you’ll end up with hand pies that are perfectly crisp on the outside and warm, gooey, and irresistible on the inside every single time.
Serving Suggestions And Storage Tips
Serving Suggestions
These golden, crispy hand pies are best served warm, when the filling is soft and the outside still has that perfect crunch. A light dusting of powdered sugar, or rolling them in cinnamon sugar, works beautifully for fruit-filled pies. You can also create a delicious sweet glaze with powdered sugar and a dash of milk. Mix until smooth and drizzle over the top of each pie.

Storage Tips
If you have leftovers (which is rare!), let the pies cool completely before storing them in an airtight container in the refrigerator for up to 3 days. To bring back that crisp texture, reheat them in the oven or air fryer rather than the microwave. For longer storage, freeze them individually and reheat straight from frozen until warmed through and crispy again.
Variations And Creative Twists On Fried Pies
Fried pies are wonderfully versatile, making them the perfect canvas for a little kitchen creativity! While classic fruit fillings like apple or cherry are always a hit, don’t be afraid to mix things up with peach cobbler, blueberry cream cheese, or even lemon curd for a bright twist.
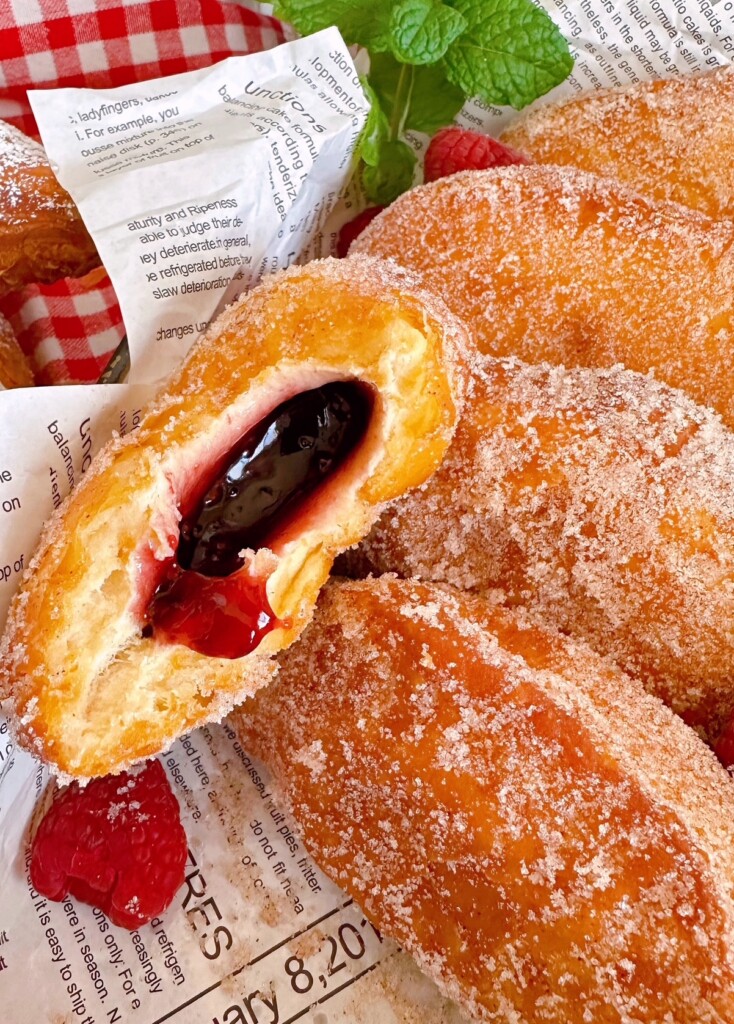
I’m a huge fan of raspberry filling, as you can see from my version of this recipe, but as I always say, “You do you!” and “Get creative in the kitchen.”
Other Favorite Refrigerated Biscuit Recipes
- Sausage Breakfast Uncrustables
- Pizza Stuffed Biscuits
- Chicken Bubble Biscuit Bake Casserole
- Cowboy Biscuit Hamburger Casserole
- Grands Quick and Easy Donuts
Enjoying Your Quick And Delicious Homemade Fried Pies
There’s just something so comforting about a warm, golden fried hand pie tucked in your hand—simple, satisfying, and made with a little bit of love. These quick biscuit hand pies are the kind of treat that brings smiles to the faces of those you love without a lot of fuss!
They’re perfect for busy days, cozy weekends, or anytime you need a sweet little homemade goodie in a hurry. So, gather your ingredients, heat up that skillet, and enjoy every delicious bite—because sometimes the simplest recipes really are the most memorable.
Thanks for stopping by my Nest today! I hope you’ll enjoy making this fun, delicious recipe. Everyone at this Nest swoons when these magically appear…sadly, they magically disappear just as quickly!
Happy Nesting Friends!

Printable Recipe Card
Easy Biscuit Fruit Filled Hand Pies
Ingredients
- 1 can 16.3 ounce, 8 count, Pillsbury Grand Biscuits Flaky Layers
- 1 cup Pie Filling Raspberry, cherry, blueberry, filling of your choice
- 1 cup granulated sugar
- 2 teaspoon ground cinnamon
- 3-4 cups Oil for frying
Instructions
- In a large, heavy sauce pan, preheat 3–4 inches of vegetable oil to 350°(F).
- While the oil is heating, on a lightly floured surface, using a rolling pin, roll each biscuit 4–5 inches in diameter.
- Place a heaping tablespoon of pie filling in the center of each biscuit. Fold the biscuit over, using a fork, crimp the edges together. Place each prepared pie on a parchment-lined baking sheet.
- In a bowl, or shallow pie plate, combine the sugar and cinnamon. Mix until well blended. Set aside until ready to use.
- Check the temperature of the oil with a thermometer. If the oil has reached 350°(F), carefully place one prepared pie into the hot oil. Fry 1–2 hand pies at a time. Cook for 2–3 minutes until golden brown. Flip and cook the other side until golden brown.
- Using a slotted spoon, carefully remove the fried hand pie and place on a paper towel-lined plate or baking sheet. After slightly cooled, roll the pie in cinnamon sugar, or sprinkle with powdered sugar and serve.
Nutrition

Meet the Author
Hi! I’m Norine, the cook, baker, and recipe creator behind Norine’s Nest. I love sharing and creating recipes that invite family, friends, and neighbors to gather around the dinner table. Sharing good food and creating memories with those we love brings me happiness. Thanks for stopping by my Nest!