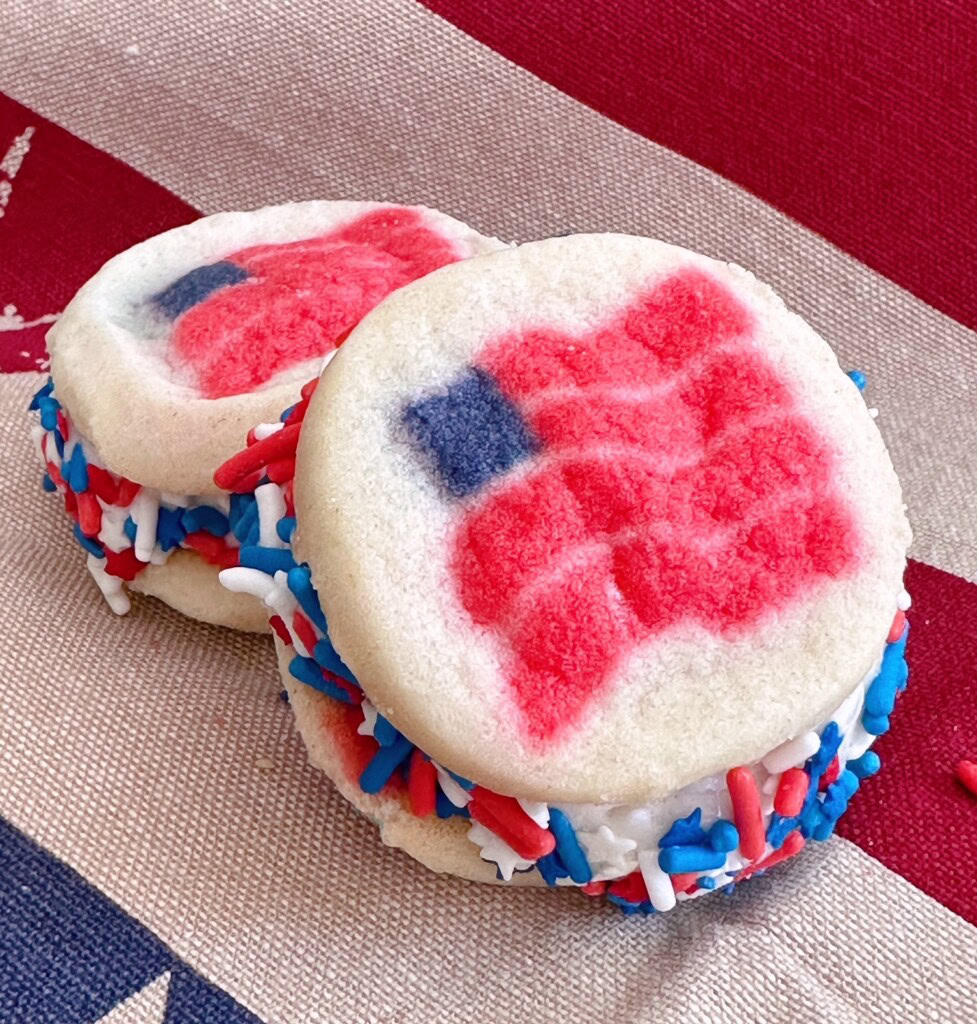
Patriotic 4th of July Ice Cream Sandwiches


Celebrate Independence Day with these easy and festive ice cream sandwiches that are as delicious as they are patriotic. They are perfect for cooling off and showing your red, white, and blue pride!

Celebrate The 4th Of July With Festive Treats
Nothing says “Happy 4th of July” quite like a cold fun treat! That’s why these patriotic Ice Cream Sandwiches are my kind of summer celebration. Made with Pillsbury Refrigerated Sugar Cookie Dough (because who wants to spend their holiday measuring flour?), creamy ice cream, and plenty of red, white, and blue sprinkles, these festive treats are as easy as they are delicious. They’re cool, colorful, and guaranteed to disappear faster than a sparkler on a warm summer’s night! (And, YES! I am speaking from experience!)
Ingredients Needed For Patriotic Ice Cream Sandwiches
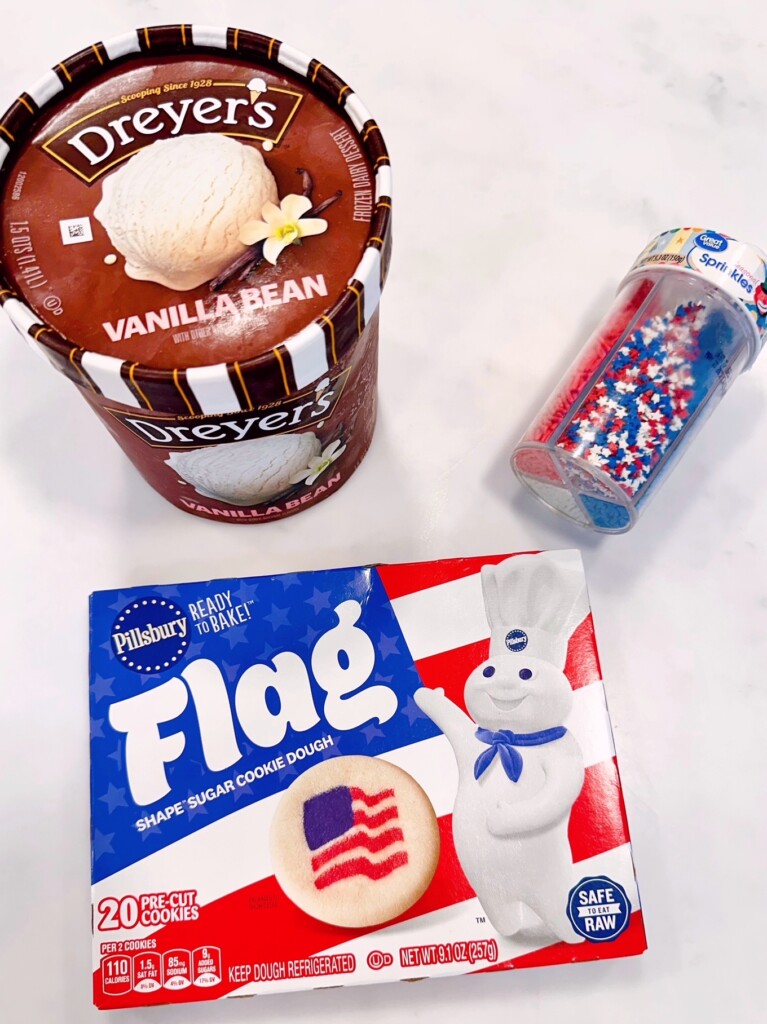
- 1–9.1oz. 20 pre-cut Flag Shape Sugar Cookie Dough Cookies (This will make 10 mini ice cream sandwiches)
- 2 cups ice cream, softened
- ½ cup festive sprinkles
Choosing The Right Ice Cream Flavors For A Red, White, And Blue Theme
I’m a HUGE ice cream lover! You can imagine how hard it is for me to choose just one flavor of ice cream for these fun little ice cream sandwiches. I went with the classic Vanilla Bean. It’s always a crowd-pleaser and perfectly represents the “white” in our patriotic theme. Don’t be afraid to have a little fun with it and customize it to your own tastes.
A good quality ice cream is a must in this recipe. It’s the star of the show and, as such, deserves to shine!
Strawberry ice cream adds a delicious pop of red, while blueberry, berry swirl, or even a patriotic sherbet can bring those beautiful blue hues to the party. No matter which flavors you choose, the goal is to create a colorful, refreshing treat that’s as fun to look at as it is to eat!

Step-By-Step Assembly Of The Ice Cream Sandwiches
Step 1 – Preheat oven to 350° (or 325° for a nonstick cookie sheet).
Step 2 – Place cookie dough rounds on ungreased cookie sheet. Make sure to space them about ½ inch apart as they will slightly spread during baking.
TIP: Please note that these cookies will spread only slightly.

Step 3 – Bake for 12–14 minutes. Be careful not to OVERBAKE the cookies. Cookie surface and edges will be pale in color.
Remove from oven and allow to cool completely! About 30 minutes. This helps the cookies firm up and makes it easier to handle them when filling them with ice cream!
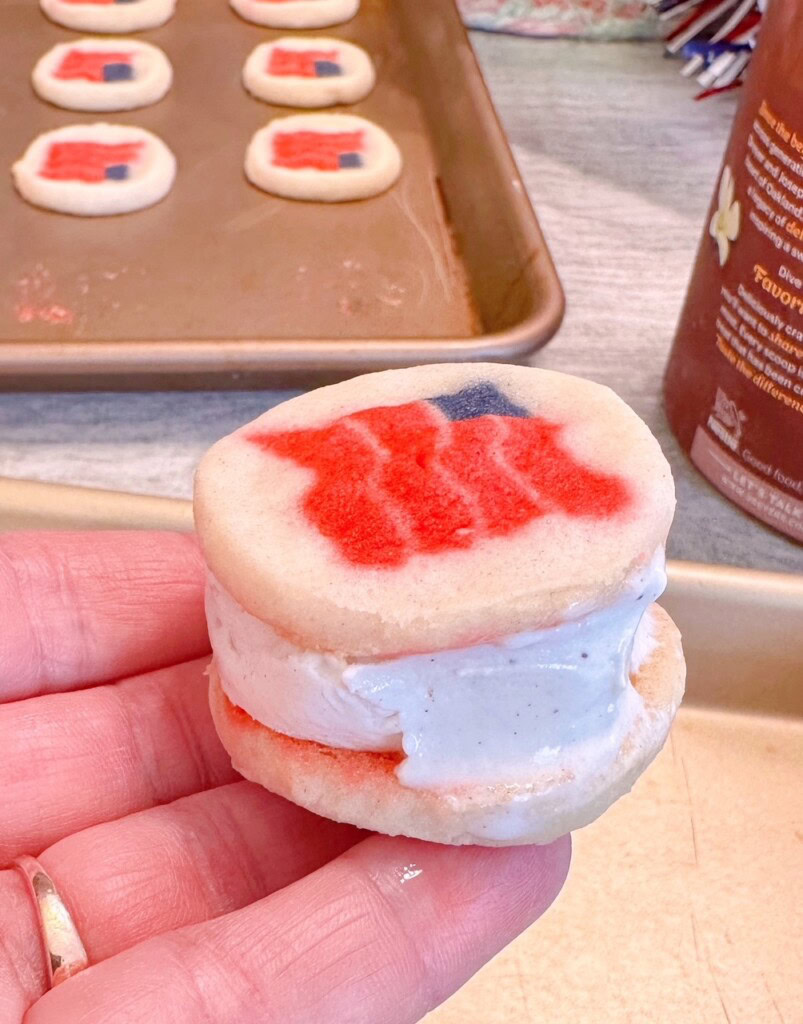
Step 4 – Now comes the really fun part, putting these festive little beauties together! Once your sugar cookies have completely cooled, it’s time to turn them into the ultimate summer treat.
Start by matching the cookies into pairs of similar sizes. Trust me, this makes for much prettier sandwiches and a lot less ice cream squishing out the sides!
Place a generous scoop of slightly softened ice cream on the flat side of one cookie.
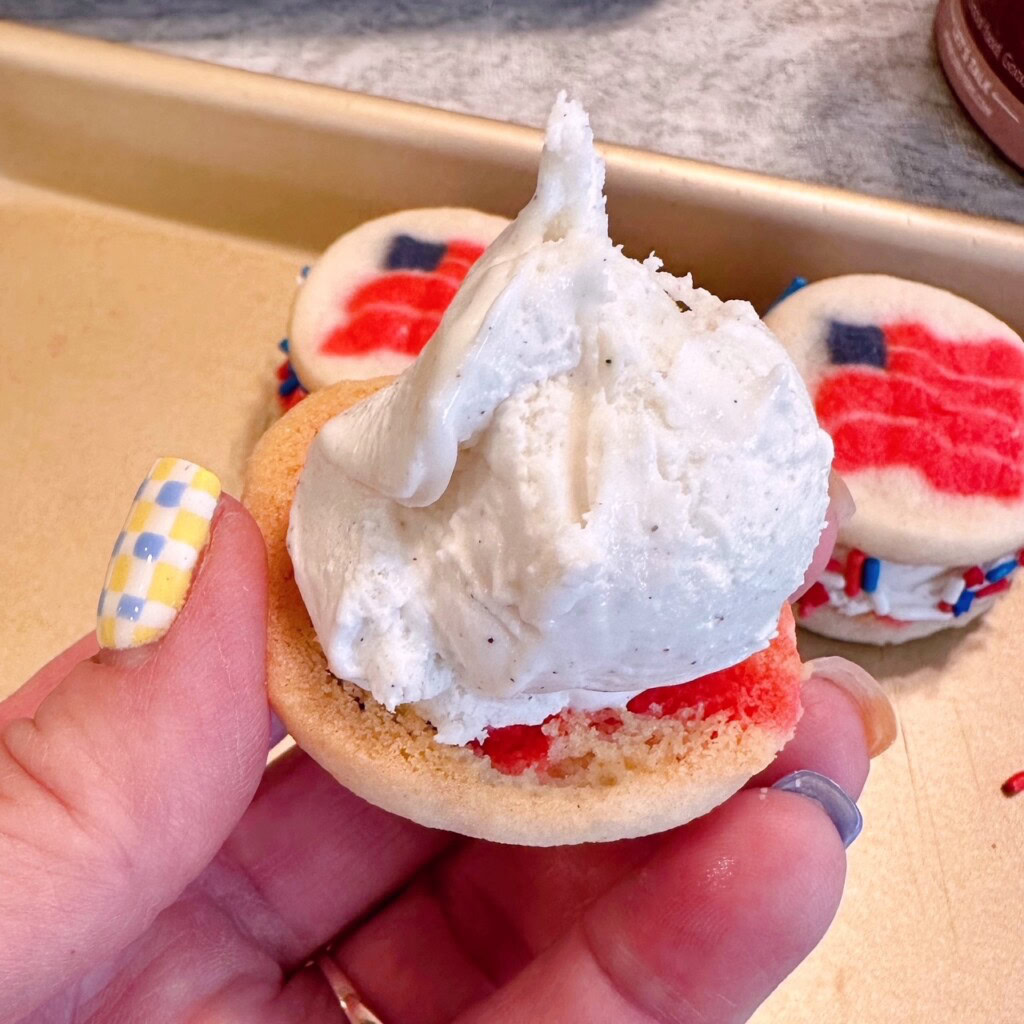
Top with a second cookie and gently press down until the ice cream reaches the edges.
TIP: If the ice cream is uneven, dip your finger in water and run it around the outside edge of the ice cream to create a smooth finish.
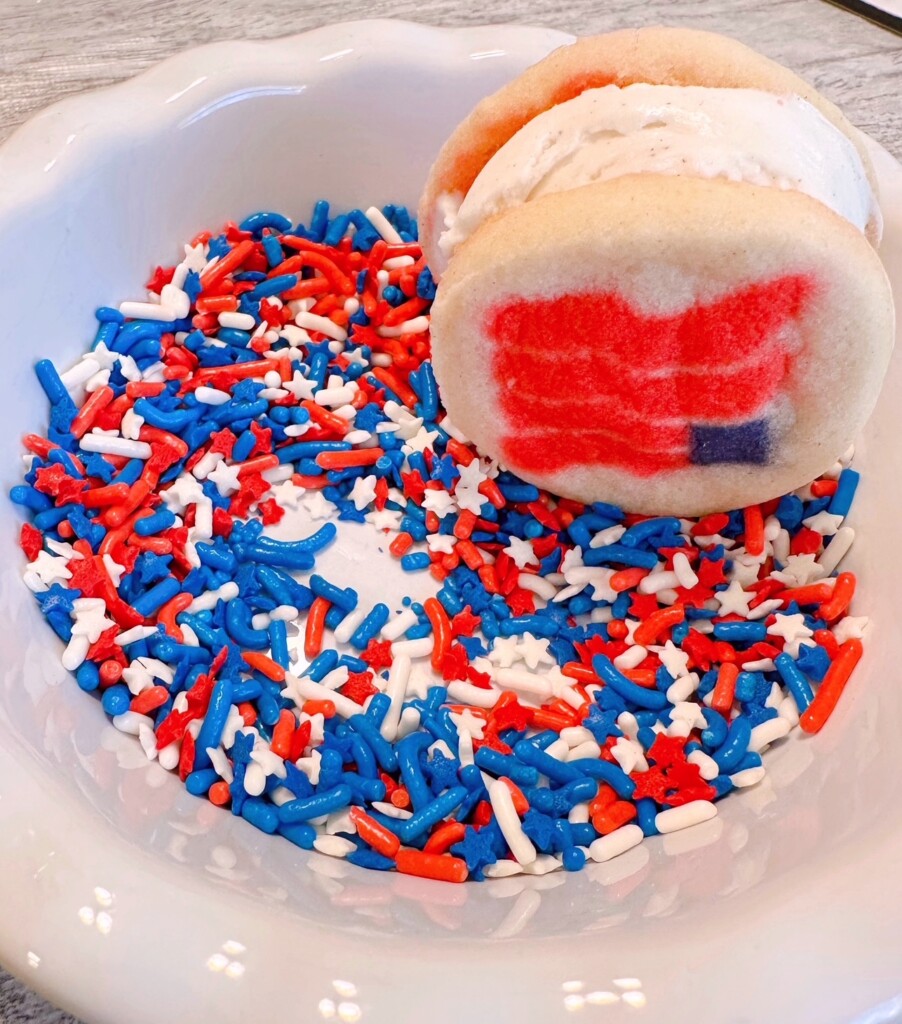
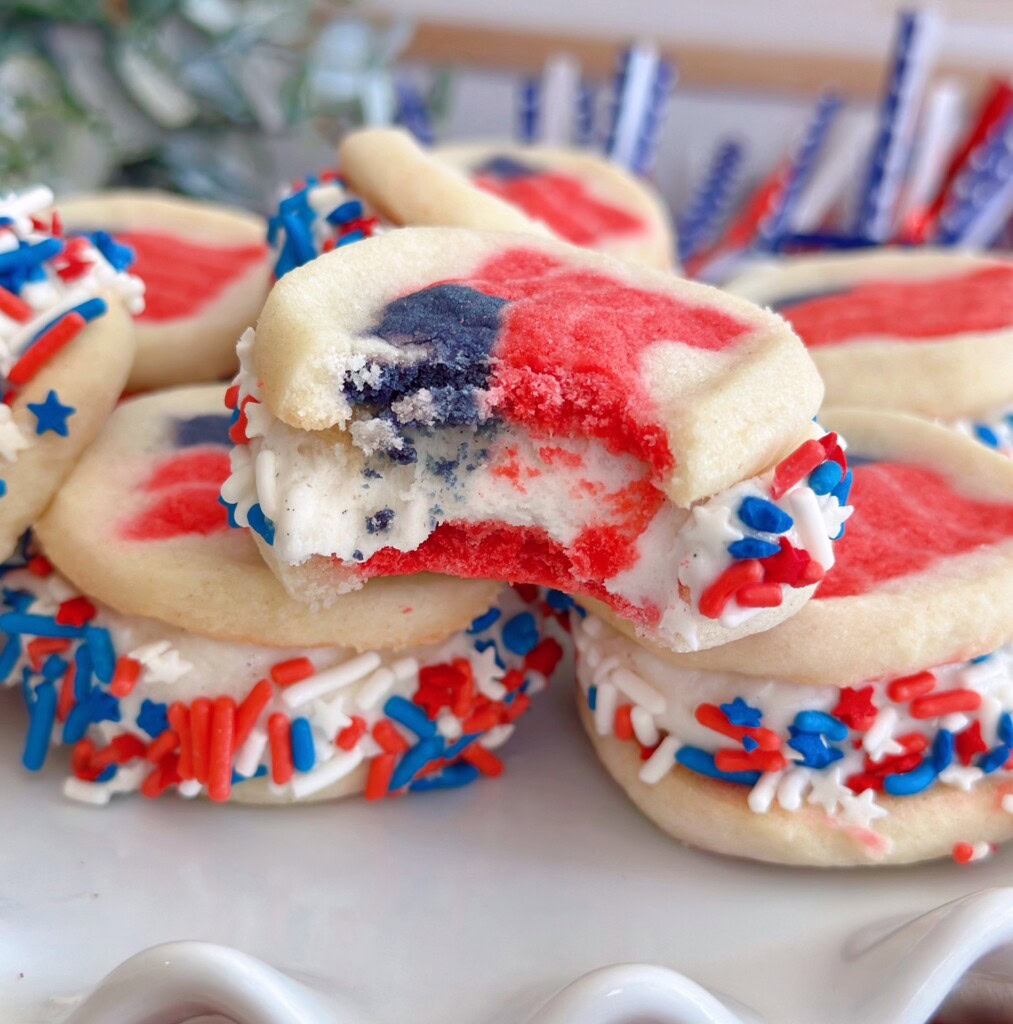
Step 5 – Next, roll the exposed ice cream edges in red, white, and blue sprinkles. This is where the magic happens! Suddenly, your simple cookie sandwiches transform into patriotic desserts worthy of any backyard barbecue or Fourth of July celebration.
Step 6 – Place the assembled sandwiches on a parchment-lined baking sheet and freeze for at least 1–2 hours, or until firm. This helps everything hold together and makes them much easier to serve.
Tips For Serving And Storing The Ice Cream Sandwiches
These festive ice cream sandwiches should be served cold and straight from the freezer, especially on a hot summer’s day when everyone is looking for a way to cool down.
If you’ve made them ahead of time, let them sit at room temperature for 2–3 minutes before serving. This softens the ice cream just enough to make that first bite a little easier without turning your dessert into a melty mess!
When it comes to storing leftovers (if you’re lucky enough to have any!), wrap each sandwich individually in plastic wrap or parchment paper and place them in an airtight freezer container or Ziploc Freezer Bag. This helps prevent freezer burn and keeps the cookies from absorbing any unwanted freezer odors. Properly stored, they’ll stay fresh and delicious for up to two weeks.
One of my favorite tricks is to make a batch a few days before a holiday gathering. Not only does it save time on party day, but it also means there’s always a festive frozen treat waiting in the freezer whenever a summer sweet tooth strikes. And honestly, that’s the kind of preparedness I can get behind!
Enjoying A Cool And Patriotic Treat On Independence Day
There’s just something special about gathering with family and friends on the Fourth of July, enjoying good food, sharing laughs, and celebrating the freedoms we hold dear. These festive Ice Cream Sandwiches fit right in with all the holiday fun.

Other Favorite 4th of July Recipes
- Firecracker Swiss Roll Cake Pops
- Red, White, and Blue Poke Cake Recipe
- Patriotic Sprinkle Dipped Ice Cream Cones
- Mini No-Bake Patriotic Cheesecake Pies
- 4th of July Eats and Treats Round-Up
Recipe Wrap-up!
Whether you’re hosting a backyard barbecue, heading to a neighborhood potluck, or settling in to watch the fireworks light up the night sky… these soft sugar cookies, creamy ice cream, and cheerful red, white, and blue decorations create a dessert that’s as patriotic as it is delicious.
My family gobbled these little treats up in no time at all! I think we have a new Holiday tradition and I’m okay with that!
I hope you and your family enjoy this fun 4th of July treat. Even kiddos can join in the fun of making this treat!
Thanks for stopping by and visiting my Nest today!

Printable Recipe Card

Patriotic 4th of July Ice Cream Sandwiches
Ingredients
- 1 9.1 oz. Pillsbury Flag Shape Sugar Cookie Dough
- 2 cups ice cream softened slightly
- ½ cup sprinkles
Instructions
- Preheat the oven to 350°(F) (or 325° for a nonstick cookie sheet). Place cookie dough rounds on ungreased cookie sheet. Spaced about ½ inch apart.
- Bake for 12–14 minutes. Cookie surface and edges will be pale in color. DO NOT OVERBAKE. Cool for 30 minutes.
- Start by matching the cookies into pairs of similar sizes. Place a generous scoop of slightly softened ice cream on the flat side of one cookie.
- Top with a second cookie and gently press down until the ice cream reaches the edges.
- Next, roll the exposed ice cream edges in red, white, and blue sprinkles.
- Place the assembled sandwiches on a parchment-lined baking sheet and freeze for at least 1–2 hours, or until firm. This helps everything hold together and makes them much easier to serve. Makes 10 ice cream sandwiches. Store by wrapping in plastic wrap and placing them in an airtight container for up to two weeks.
Nutrition

Meet the Author
Hi! I’m Norine, the cook, baker, and recipe creator behind Norine’s Nest. I love sharing and creating recipes that invite family, friends, and neighbors to gather around the dinner table. Sharing good food and creating memories with those we love brings me happiness. Thanks for stopping by my Nest!


The Ice Cream Sandwiches are sooooo cute! I love Ice Cream too. Happy 4th of July! Enjoy a Dr. Pepper for me with your Ice Cream Sandwich. And I hope that they get the fires under control soon – it is so sad how much has already burned.
Hi Audrey!
It’s so good to hear from my favorite Dr Pepper buddy! I hope you have a wonderful holiday weekend. It has been a bad fire season already. Let’s pray we all survive it.
Norine