Homemade Soft French Bread
This fresh delicious Homemade Soft French Bread is a quick easy recipe and perfect side carb for those delicious soups and pasta dishes. It also makes the best Hard Rolls!
I think one of the best “Mom tricks” mothers throughout time have pulled off…is putting a beautiful dinner on the table when the budget is tight (like sofa diving for loose change tight…get my drift?) and her little nest of chicks never realize how real the struggle is!
I remember one such time (there were many when our Nest was full), I had made spaghetti…my “go to” budget stretcher and I wanted a loaf of French bread to go with the meal. I didn’t have two nickles to rub together to go buy a loaf of French bread at the time. (Sad…but true!)
So I turned to my bountiful supply of “Church cookbooks”! (This was long before food recipe sites existed!… Yes! I’m THAT old!) No better cooks on the earth than the good ladies from church with their tried-and-true recipes!
I stumbled upon this recipe for “French Bread or Hard rolls” from a friend of my sister-in-law in one such cookbook. I figured it had to be good…after all she was my SIL “bestie” (Hi Heather!) so it had to be good! Another benefit… I had all the ingredients on hand!
Boy! Was it good!!! It’s soft, light, easy to make, and quick! The perfect Homemade Soft French Bread!
It’s so good I’ve been making it for 18 years now! It’s one of my very favorite bread recipes and a great recipe for a beginning bread maker!
How To Make Homemade Soft French Bread
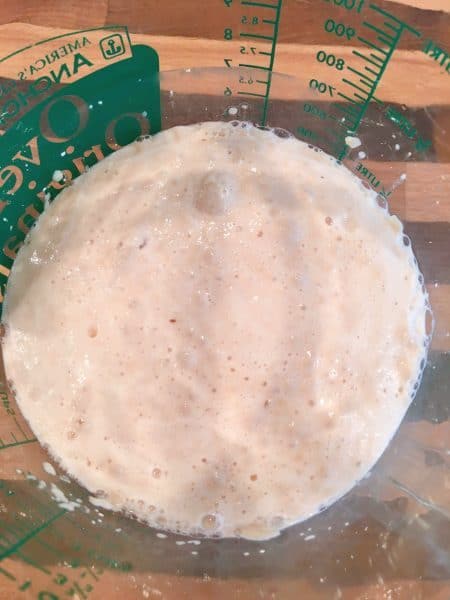
In your mixer, or glass measuring cup, add 2 1/2 cups hot water and 2 Tablespoons yeast and 2 Tablespoons sugar.
TIP: Make sure your water is not too hot, or it will kill the yeast! It should be slightly too warm to the touch. The combination of sugar and hot water should activate the yeast causing it to bubble and foam.
Add 1 Tablespoon salt and 1/8 cup oil to yeast mixture. Add 3 cups of All-purpose flour to wet ingredients.
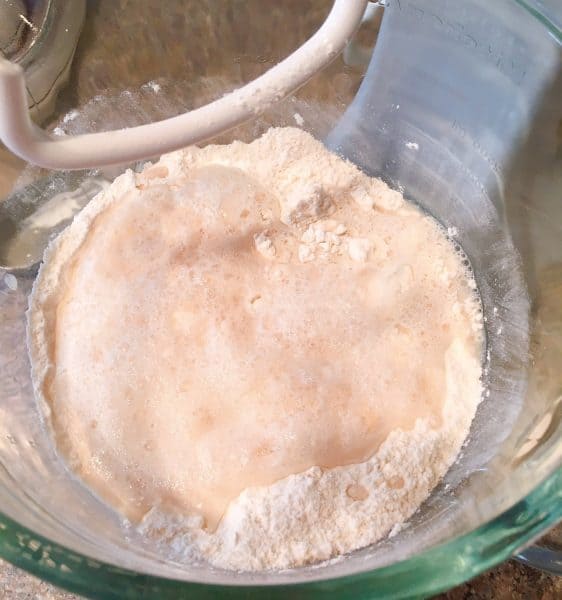
Use the dough hook of your mixer, mix on low speed until wet and dry ingredients begin to combine.
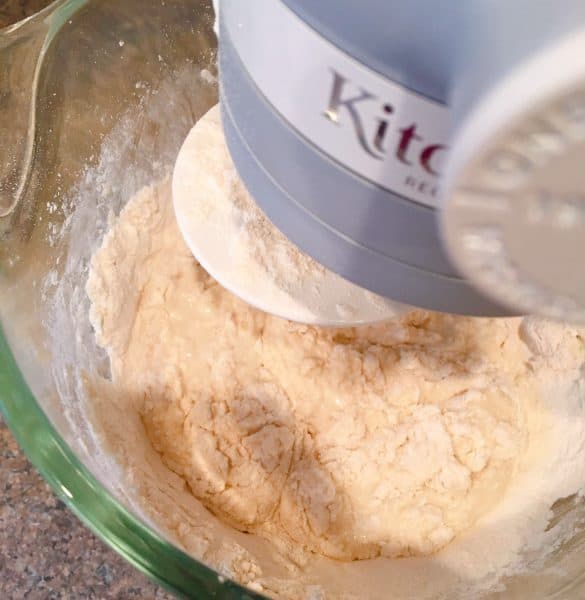
Add additional 3 cups of flour, one cup of flour at a time, until dough begins to cling to the hook and pull away from the sides of the bowl. It should take about 10 minutes. (That dough should cling to the dough hook like a toddler to its mothers leg when its nap time! The grip of death!)
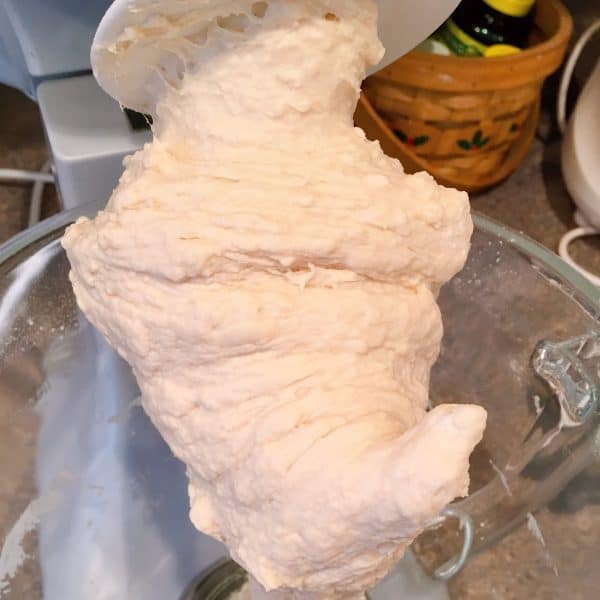
Let’s take a closer look at that dough, so you can see the texture. The dough should still be slightly sticky…this will allow you to hand knead in a little extra flour to get the perfect elasticity the bread will need.
I’m a firm believer that you need to “handle” the dough! Bread is all about texture, and it has a specific feel when it hits the right consistency! Over time, you learn exactly what the right texture is. You should be able to poke it and have the indent stay for a minute or two. If it is hard to push into the dough…It’s already too tough and may not rise correctly.
Remove the dough from the dough hook using a rubber spatula. Place the dough on a well flour surface. I like to use my “dough disc”.
I’m a huge fan of the dough disc!!! You can find it in my Amazon Store or in the link below in the recipe card! It washes up beautifully, just toss the cotton cover in the washing machine. Another bonus, the dough never sticks to the floured cloth, it is perfect for doughs, pie crusts, etc. It’s a must-have for my kitchen!
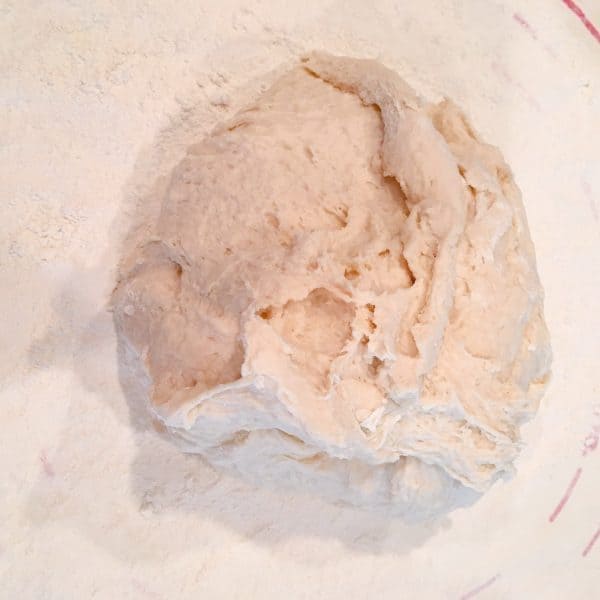
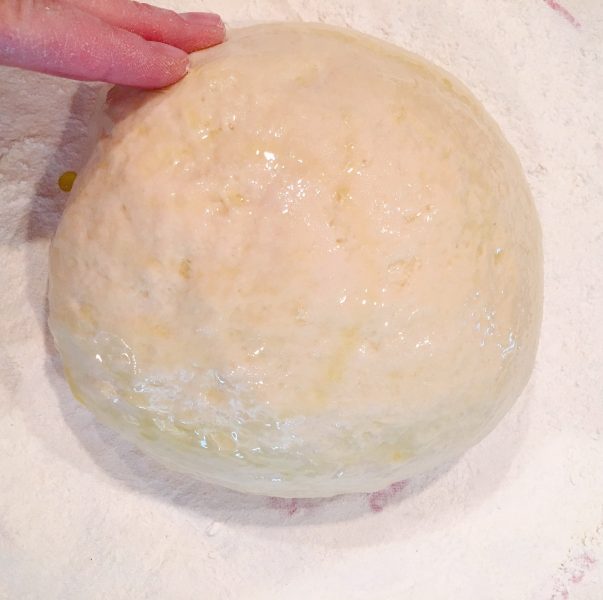
Knead the dough about 5–8 times until you are able to form a nice soft elastic ball. It should still be slightly sticky on the inside and nice and smooth on the outside.
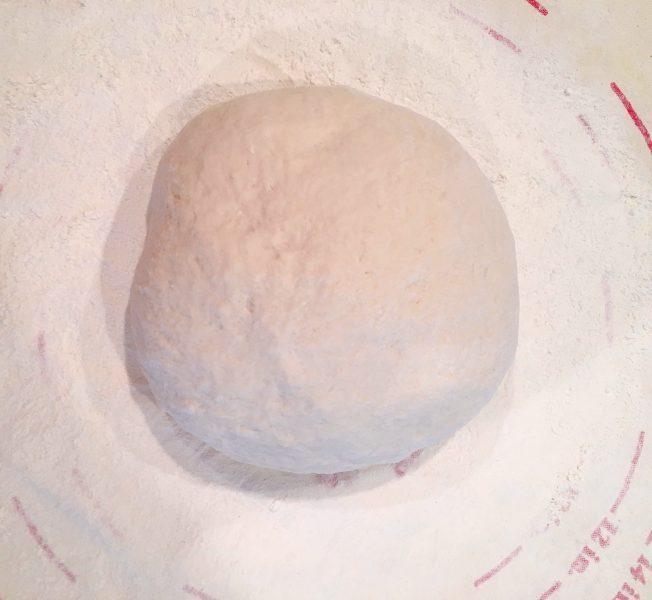
Oil a medium size bowl, place dough in the bowl, turn it over so oiled side is up. This will prevent the dough from sticking to the cover placed over the bowl.
TIP: You can brush the top with olive oil before placing in the bowl if that is easier for you. Either method will work.
Place dough into oiled bowl and cover. Allow to rise in a warm place until dough in size. About 25–30 minutes.
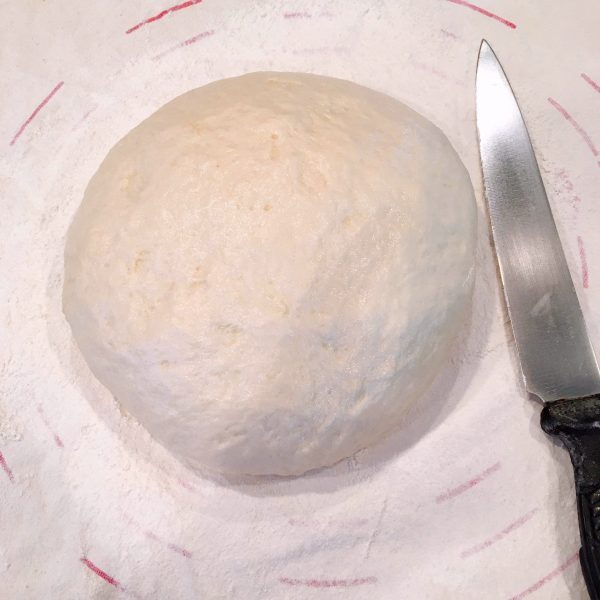
Now for the fun part…PUNCH that dough down! Give it a good ol’ smack! You don’t have to tell me who you’re thinking about…punching down dough is the most therapeutic thing on the planet…next to tenderizing a piece of chicken!
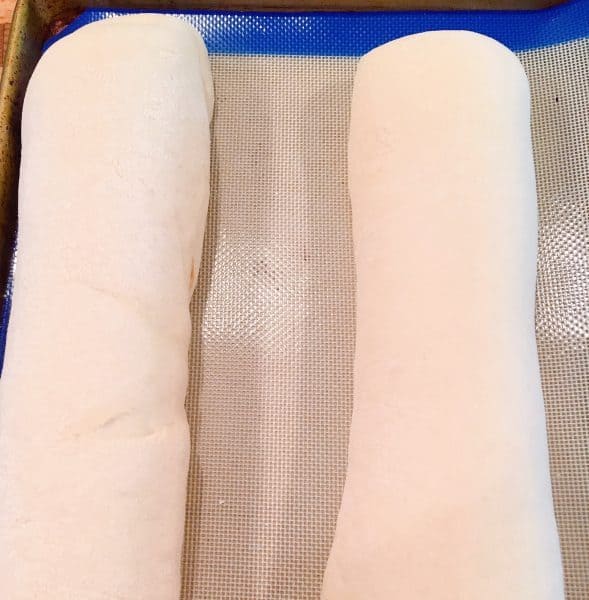
Place dough on floured dough disc and cut the dough in half. One half for each loaf of bread.
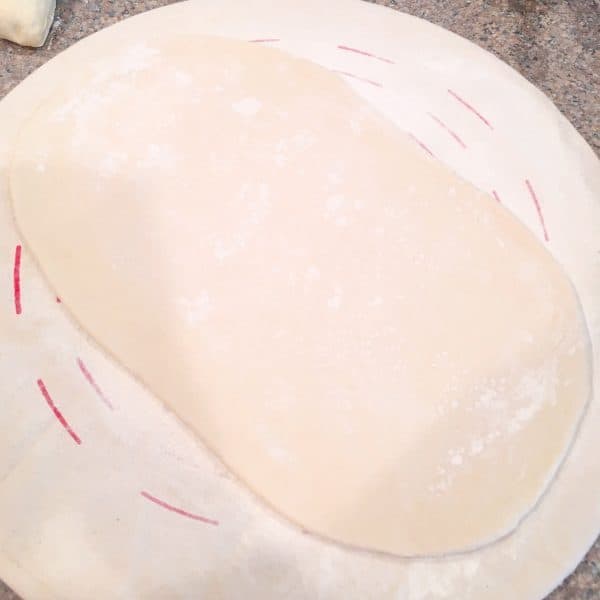
Roll one portion of the dough into a large rectangle. The dough should be a little over 1/4 inch thick!
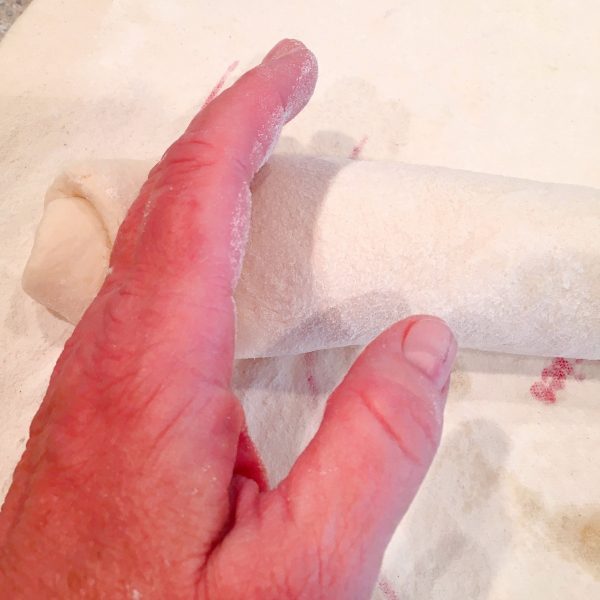
Starting along one of the long sides of the dough…roll the dough towards the other side creating a long roll. Using the side of your hand, press down the end of the roll, and tuck end under, at the pinch mark.
Don’t be afraid to use your hands to shape the loaf of French bread the way you want it to look. I like the traditional look of a loaf of French bread, so that is how I shape mine.
TIP: If you are making “hard rolls” you’ll want to pinch off portions of the dough and roll them into balls.
Repeat the above to create the second loaf of bread.
Place the two loaves of bread, seam side down, on a parchment or silicone lined baking sheet. I love my silicone baking sheets! They work beautifully for this bread recipe.
Using a sharp knife, cut three slits along the top of each loaf of bread about 2 1/2 inches long! Make sure you cut through the first layer of the rolled dough loaves.
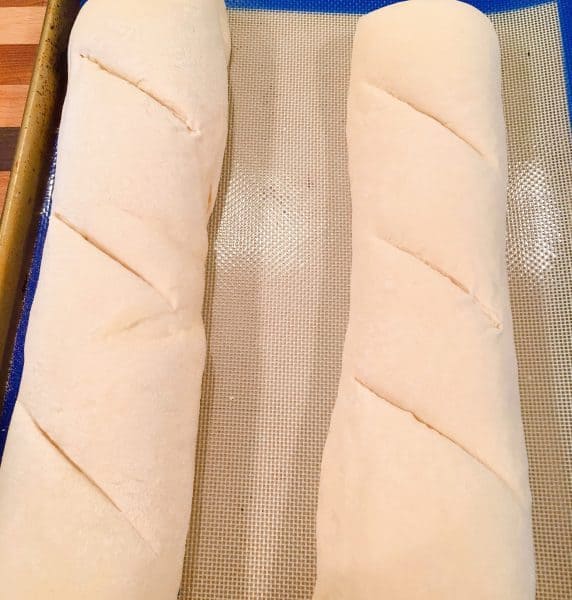
Cover bread with a light cloth and allow to rise another 15–20 minutes or until double in size. Preheat oven to 400°.
Place bread in preheated oven and bake for 25 minutes, until bread is crispy golden brown on top.
TIP: The bread is completely cooked through if you thump on the top of the loaf, and it sounds hallow.
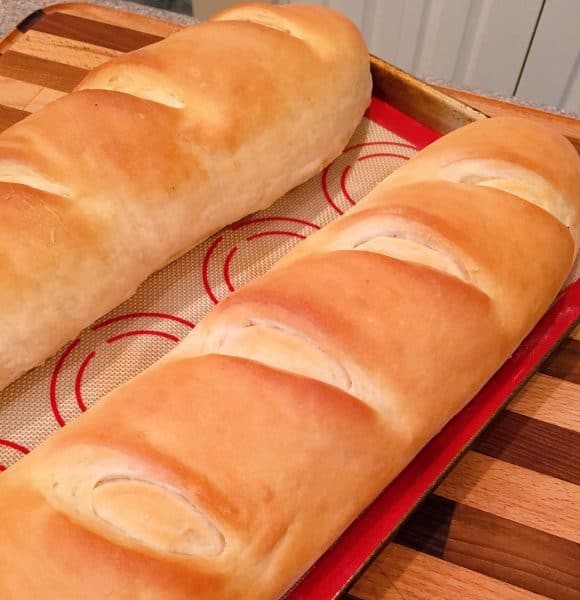
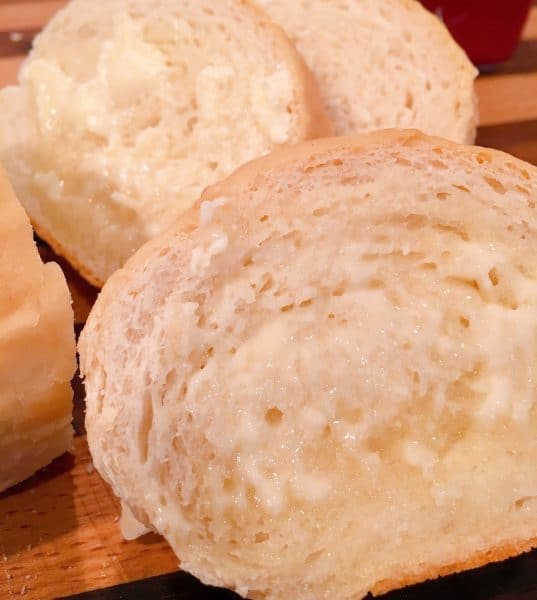
TIP: If you want the bread to be soft on top, rather than crusty, brush the top of the loaf with melted butter.
We like it a little bit softer, so I brush my loaves with melted butter. Plus there’s the amazing buttery flavor…who am I to argue with buttery flavor!
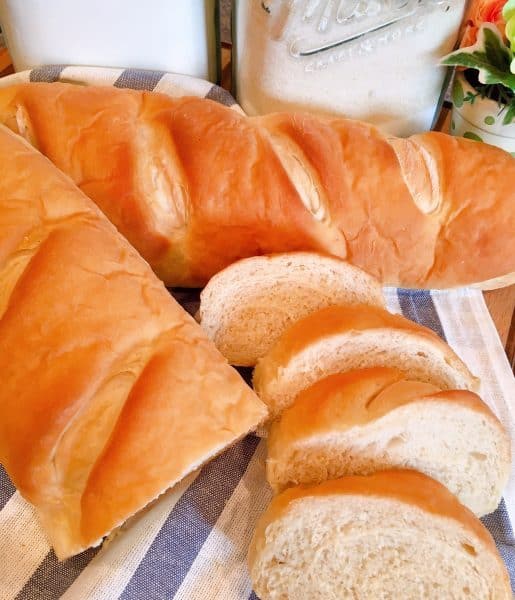
This bread is delicious straight out of the oven with a nice slab of real butter! I have a hard time resisting it when it’s pipping hot…and I can’t just eat one slice…nope! I have to sneak a few slices before it even reaches the dinner table! (Shhhhh! There are things family members do not need to know! Mom eating bread before dinner is one of them!)
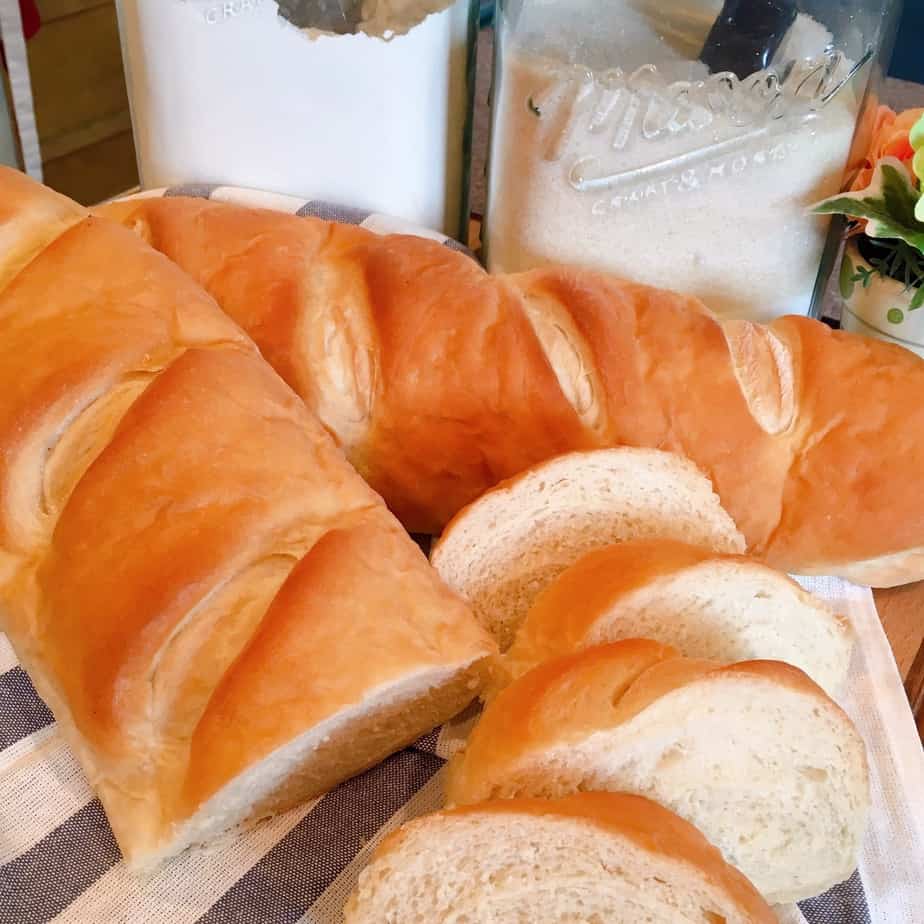
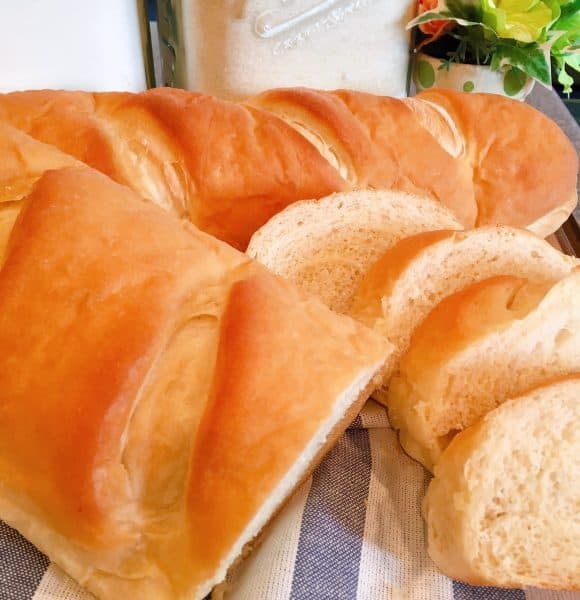
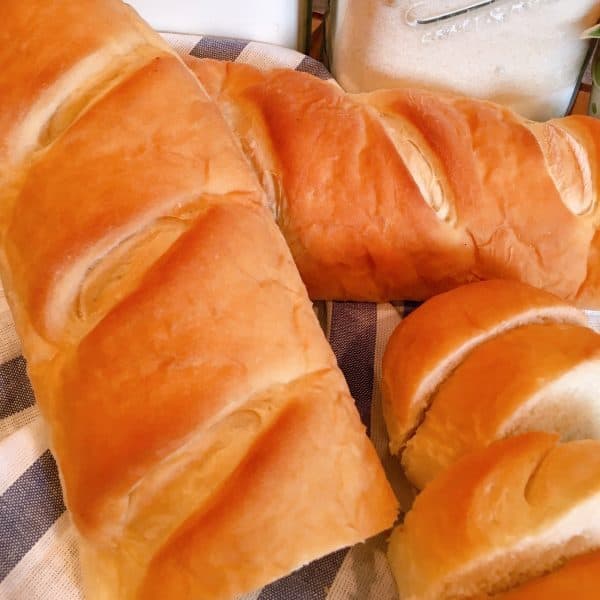
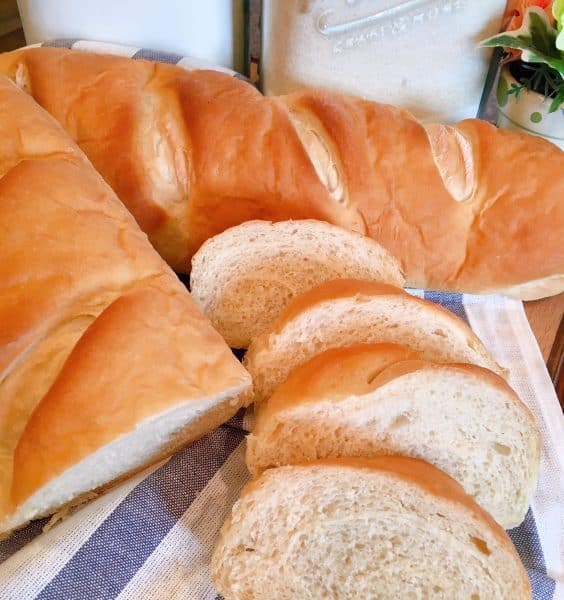
It’s the perfect texture! Rolling the dough prevents large air bubbles from forming during cooking, and it creates the beautiful loaf of bread!
The slits give it a beautiful traditional French Bread appearance! The golden hues on this bread are stunning! It really is a delightful loaf of carbs to make!
This bread can be sliced thick and serve with your favorite pasta dish! It also makes wonderful French Toast, croutons, or sub sandwiches! Use the dough to make hard crusty dinner rolls to go with your favorite salad…or use the thick slices to “sop” up your favorite soup!
It’s such a versatile bread and so easy to make. I walked you through it step-by-step, but I also know some of you have never made bread before, so I wanted you to feel comfortable trying your hand at baking this bread!
You can also try this other amazing easy bread recipes
- Cake Mix Cinnamon Rolls
- No-knead Artisan Bread
- Buttery Sweet Corn Bread
- Lion House Dinner Rolls
- Homemade Pan Dinner Rolls
Sometimes the best things come out of our day-to-day trials. Like this beautiful French Bread when I couldn’t afford to go buy a loaf. It’s so much better than anything I could have bought that day had I had the two nickles to rub together. Plus it really made me feel like I was making something extra special for my family.
There is something so comforting about making bread for those you love. Bread really is the staff of life isn’t it!
Enjoy my Friends! Thanks so much for stopping by and visiting with me today!
Happy Nesting!


Homemade Soft French Bread
Ingredients
- 2 1/2 Cups hot water
- 2 Tablespoons yeast
- 2 Tablespoons sugar
- 1 Tablespoon salt
- 1/8 Cup Vegetable oil
- 6-7 cups of All-purpose flour
Instructions
- In the bowl of mixer add hot water, yeast, and sugar. Allow to sit until yeast is activated and bubbly.
- Add salt and and oil. Mix together using the dough hook of your mixer. Add 3 cups all purpose flour and mix on low until mixture begins to combine.
- Add 3 more cups of flour, one cup at a time, until dough begins to cling to hook and dough pulls away from the sides of bowl.
- Place dough on floured surface and knead 5-8 times till outside of dough is smooth. Place in well oiled bowl and turn oil side up. Cover and allow dough to rise until double in size. About 30 minutes.
- Punch dough down and cut in half. Roll one half of dough into a large rectangle about 1/4 inch thick.
- Roll dough from one long side to the other. Pinch ends and fold under. Repeat for second loaf. Shape dough into even loaves and place on silicone or parchment lined baking sheet.
- Cut three slits about 2 1/2 inch long along the top of each loaf. Cover loaves and allow to rise 20 minutes. Preheat oven to 400°.
- Place loaves in oven and bake for 25 minutes until bread is golden brown and crusty on top. Brush baked loaves with butter for a softer loaf of bread. Allow to cool slightly and serve.
Notes
Nutrition

Meet the Author
Hi! I’m Norine, the cook, baker, and recipe creator behind Norine’s Nest. I love sharing and creating recipes that invite family, friends, and neighbors to gather around the dinner table. Sharing good food and creating memories with those we love brings me happiness. Thanks for stopping by my Nest!


Thank You. I DID NOT SCREW THIS UP.
Hi Tennie!!
Of course you didn’t! That’s awesome!!
Thanks so much for sharing. Come back soon.
Norine
How would i turn these in 8 in rolls for sandwiches
Hi Okami!
Great Question. After the dough has risen and you punch the dough down to make into two loaves…instead of making them into two loaves, just roll them into 4 inch rolls and let them rise until almost double in size and then bake at 400° for 15-18 minutes. You could even make them into sub rolls by just making smaller loaves about 4 inches long.
Hope this helps! Thanks for stopping by and visiting. Have a wonderful weekend.
Norine
Hello, what kind of yeast do you use? Can I use instant?
Hi Sarah,
I just use standard yeast, but you could use quick rise or instant. It’s a very forgiving recipe and makes the best French Bread.
Happy Holidays,
Norine
I just wanted to say this is my husband’s favorite bread that I have made. He thought it tasted and looked like it came from a bakery.
Hi Victoria!
Hooray!!! I’m so glad your husband likes this bread. Isn’t it easy to make too? One of my favorite bread recipes of all time. I just made two loaves last week and turned one of them into my Cheesy Garlic Bread, which is always a hit at this Nest. Thanks so much for stopping by and visiting with me. I hope you’ll come back again soon.
Happy Nesting!
Norine
This recipe is the best one I’ve ever made! Definitely a keeper! It turned out perfect! Got lots of complements. The loaves were beautiful!
Hi Carolyn!
Thanks so much for taking the time to leave this review. I’m making a couple of loaves of this bread myself this week. It’s my favorite French Bread. I hope you come back and visit soon and I hope you have a great week!
Thanks!
~Norine
Hi good day to you, I must say thanks for the recipe. My husband love French bread, but since we are in Barbados and we have to stay in door because of the virus. I was searching for a recipe and found your it work great and it was so soft. Thank you! Can I ask if you have a white bread recipe or can I use this to make sandwiches loaf?
Hi! How do you suggest we mix if we don’t have a stand mixer with a dough hook? I have a hand mixer or my actual hands with a wooden spoon.
Hi Christina!
If you don’t have a stand mixer with a dough hook I’d mix with a wooden spoon until it becomes too difficult then turn out on a floured surface and knead until smooth, then follow the remaining directions. Hope this helps and I hope you have a wonderful week. Thanks so much for stopping by!
Happy Nesting!
~Norine
You bring tears to my eyes with this recipe, i never in my life was successful baking any bread, so i quit, and today i found this bread recipe, and i said why not,fail one more time:) and what came out of my oven speechless, i did, i made bread for the first time in my life, thank you for your honesty to share you recipe with us,thank you so much,
Myriam!
You brought tears to my eyes! Thank you SO much for taking a chance with me and my recipe! I’m so impressed that you went for it! I really appreciate you stopping by and sharing this with me! You completely made my day! Enjoy your bread…there is nothing better in the world than homemade bread…that you made YOURSELF!
Happy Nesting!
~Norine
Hi, I would like to thank you for this recipe.I made this today and it came out just as you said, it was my fist time and it was easy. Thanks so much!
Hi Nikki!
I’m SO glad you made this recipe and that it turned out for you! I’m loving the fact that so many are trying this recipe! It makes my day when I read reviews like this. Thank you for taking the time to share with me. I hope you have a great week and keep baking! Hooray!!
Happy Nesting!
~Norine
Your pic of the buttered slice of bread makes me weak in the knees!!! I believe that I inherited my love of bread from my mom. I can’t wait to make this bread. Thank you for sharing this recipe 🙂
Hi Evelyn!
I completely understand what you’re saying! It has the same effect on me…EVERY. TIME!!! Thanks so much for stopping by and sharing with me… I hope you love this bread as much as we all do! Have a GREAT weekend!
Happy Nesting!
Norine