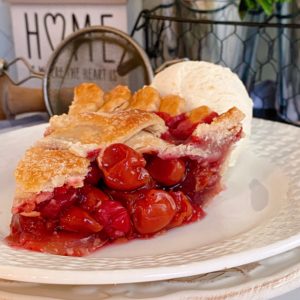
Cherry Cranberry Raspberry Pie
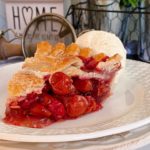
A beautiful homemade flaky lattice pie crust is piled high with loads of tart cherries, fresh cranberries and raspberries with a slightly sweet cinnamon filling. It’s the perfect pie for fruit lovers!

During Fall my mind was filled with all things Cranberry! Muffins, cakes, and scones! They’re my favorite Fall fruit. I love their tangy flavor, vibrant ruby color, and longevity. I think they are so overlooked.
However, Fall came… and went, and my vision of a Cherry Cranberry pie came… and went, without much success. I did try, and I made a cherry cranberry pie for Thanksgiving. However, I made the mistake of using “sweet cherries”! Huge mistake! Gigantic!!! Too much contrast between the sweetness of the cherries and the tartness of the cranberries. It was an epic fail. (Kind of like my last diet… I started it yesterday morning and ended it at lunch!)
After the holidays were over, I went back to the drawing board…and tried again using “tart” cherries, 1 cup of thawed cranberries, and adding a cup of fresh raspberries. The results were AMAZING! A new favorite is born! Best part…you don’t have to wait for Fall!
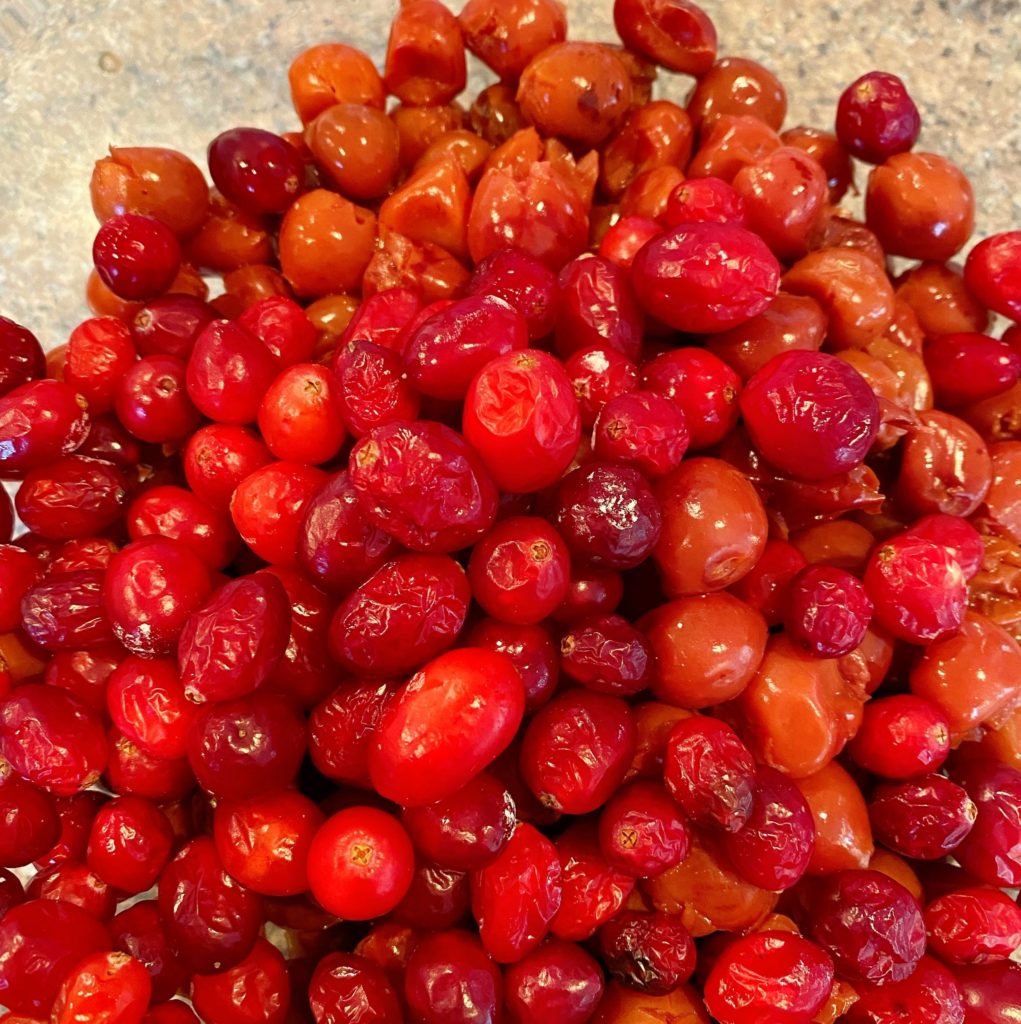
I know what you’re thinking… How do I get fresh cranberries this time of year? Fresh cranberries can only be purchased during their harvesting season, September through January. They will last 3–4 weeks when refrigerated, and up to a year if frozen. I love to stock-up on them, freeze them and bake them year round. So…the key to baking year round with cranberries: Stock up in the Fall!
Ingredients
- Double Pie Crust (My recipe for Easy Pie Crust with Video is perfect for this pie)
- 4 ½ Cups Tart Canned Cherries, drained (about 3 cans of tart cherries)
- 1 Cup Fresh Raspberries
- 1 Cup Fresh, or thawed, Cranberries
- 1½ cups granulated sugar (If you like your pie sweeter, I would add 1¾ cup sugar)
- 1/3 Cup cornstarch
- 1/4 teaspoon nutmeg
- 1/4 teaspoon cinnamon
- Dash ground cloves
- 1 teaspoon almond extract
How to Make Cranberry Cherry Pie
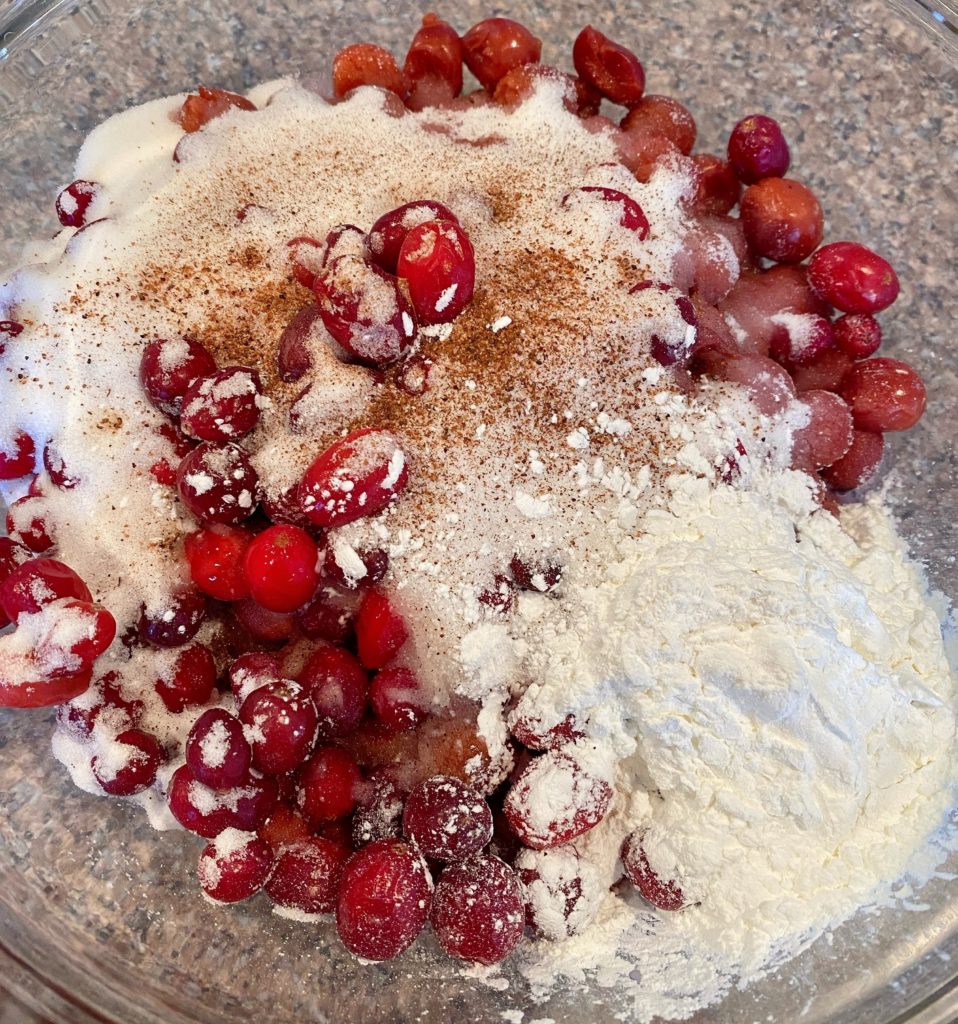
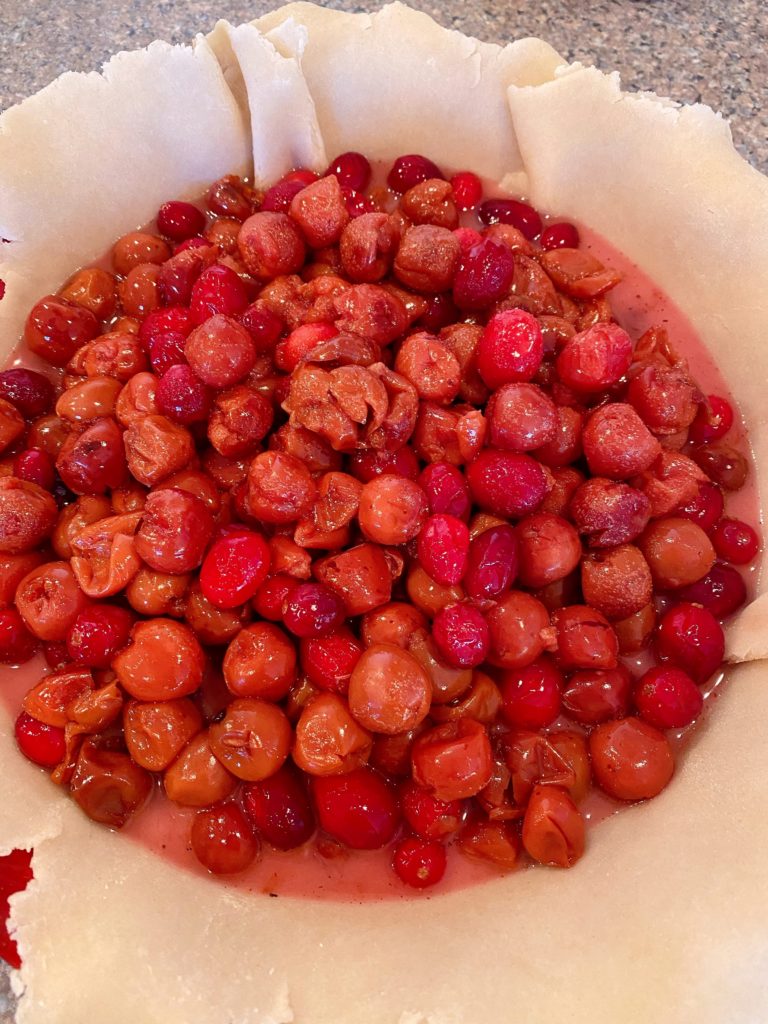
In a large bowl, combine drained cherries and cranberries, fresh or thawed. (Note my cranberries resemble my face…a little wrinkly! That’s because they were frozen and thawed.)
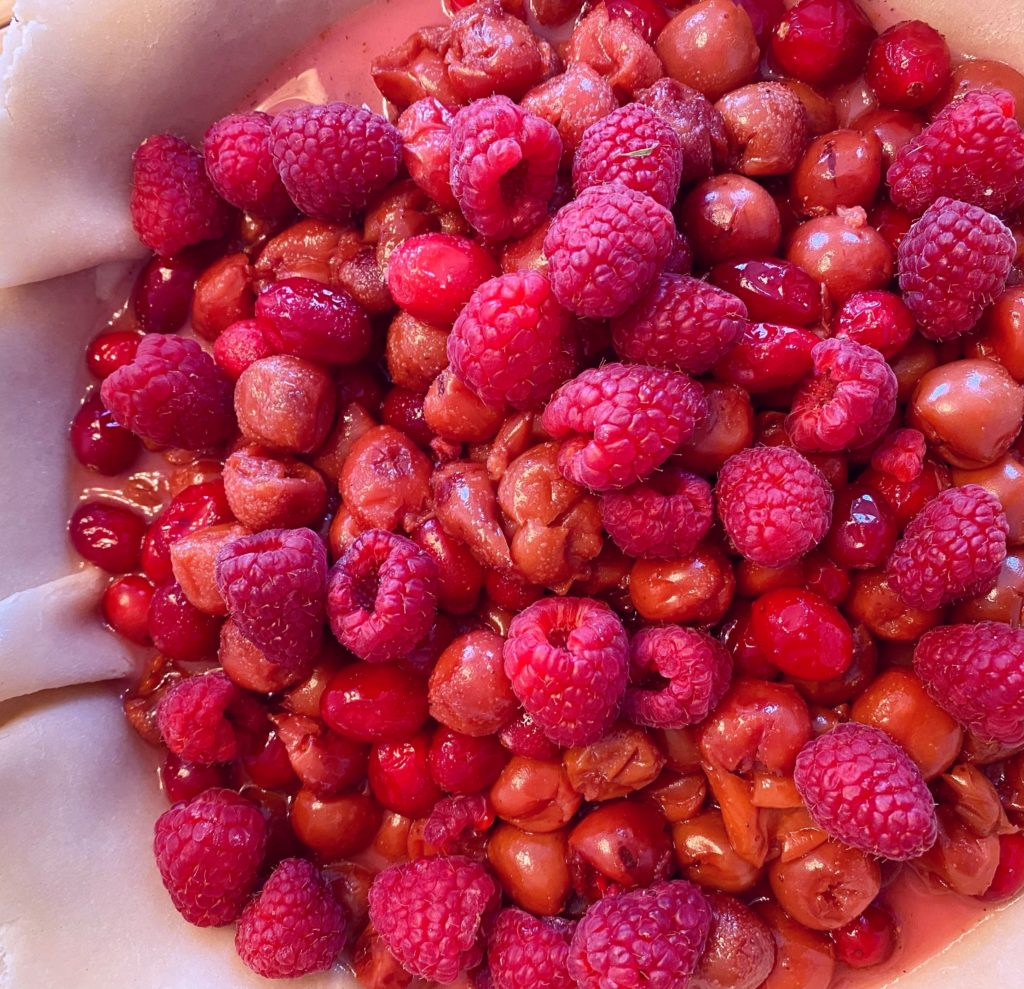
TIP: The raspberries come into play right before placing the top crust on the pie. It prevents them from falling apart.
Add 1½ cups of sugar, 1/3 cup cornstarch, nutmeg, cloves, almond extract, and cinnamon to the cherries and cranberries. Gently toss, or stir, to combine and set aside.
Cranberry Cherry Pie Filling
Prepare pastry as directed, whether store-bought, or homemade.
In a 9-inch-deep dish pie plate, line the bottom of your pie plate with the pastry circle.
TIP: Let me be clear here: I’m all about using what is easiest for you! If using store-bought prepared pie crust is easier for you, then by all means, use it. I prefer to make my own crust. I’ve been doing it for years, and it is easier for me to work with.
Once you have your bottom pie crust placed in your pie plate, transfer all the filling ingredients into the pie shell. Don’t worry about trimming the bottom crust just yet! We’ll get to that in a minute.
Now is the time to add one cup of fresh raspberries! Sprinkle them over the top of the cherry and cranberry filling! It’s okay if they’re not mixed in…the filling will bubble up during baking and encase the berries.
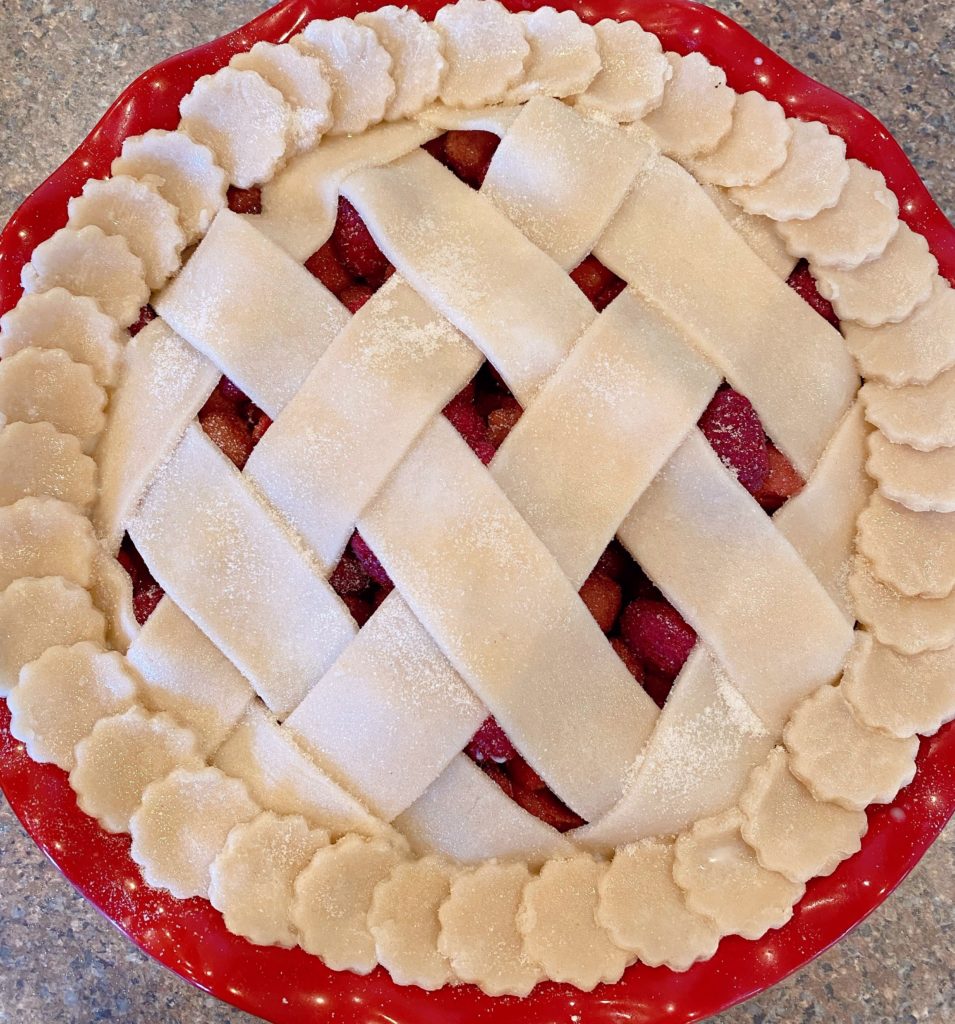
Lattice Top Crust
You can finish this pie off any way you like. A solid top pie crust, crumb top, or a lattice top. If you’d like to make the lattice crust top, here are the instructions.
Roll out the top crust. Using a pizza cutter and a ruler, cut into 1-inch-wide strips.
This pie has a diagonal lattice top. It produces sharp classic lines for this beautiful pie, a little bit fancier than the traditional lattice basket woven top crust.
To make a diagonal lattice, place four strips diagonally across the top of the crust. Allow the excess to overhang the edge of the crust.
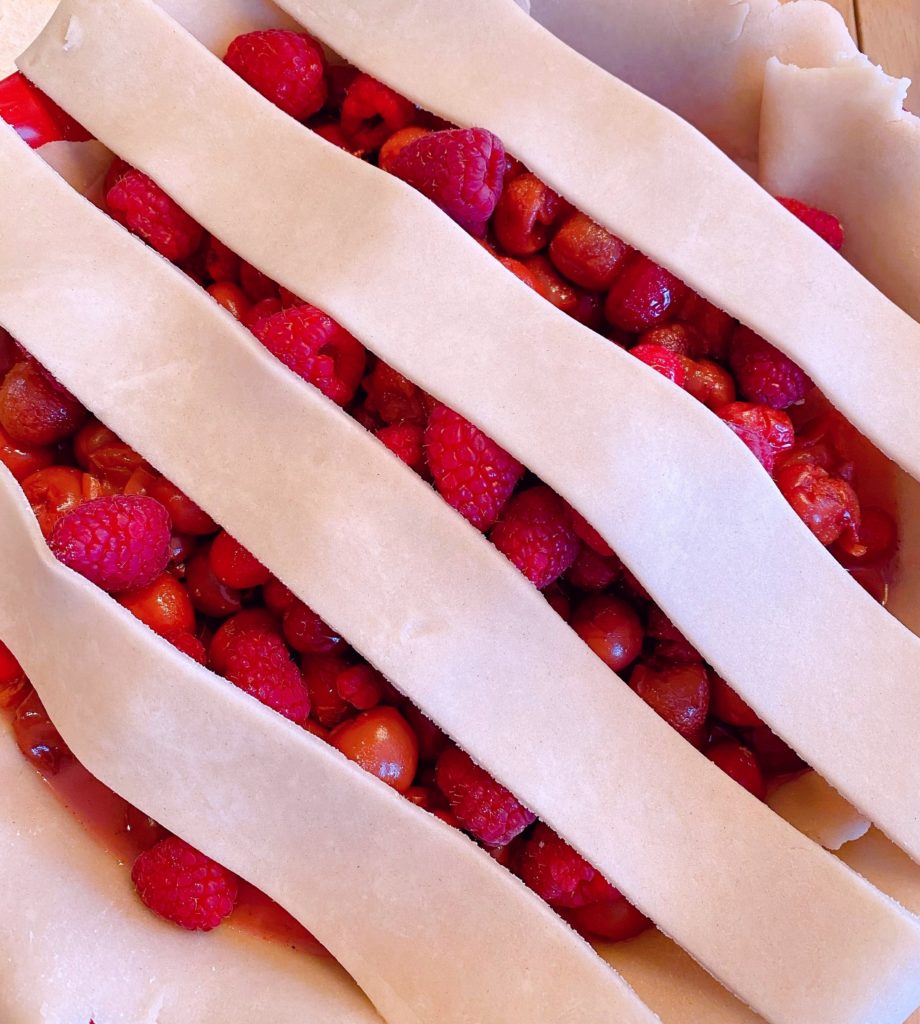
Lay every other strip halfway back, and place another strip in the opposite direction diagonally. Fold the two strips back down. Lie the other two strips halfway back. Place another strip, 1 inch from the first center strip. Fold the two strips back down. Reverse this process, and finish it on the other half of the pie.
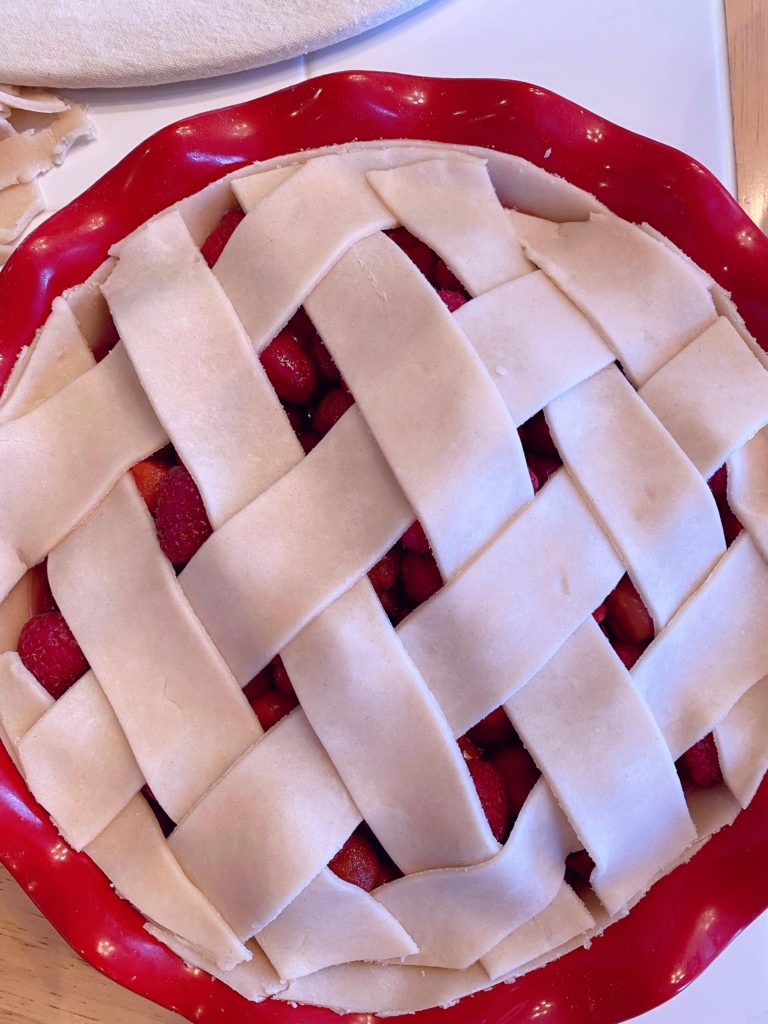
Using a sharp knife, trim around the entire edge of the pie, just inside the pie plate rim. *See photo below.
At this point, you can stop! I love a really fancy edge, so I generally add one to all my pie crusts. That’s just me.
For this particular pie, I used the leftover pie dough and cut out small circles with a tiny scalloped round cutter. You could cut out leaves or other shapes.
Brush the edges with a pastry brush and milk. Place the circles overlapping all around the edge of the pie crust.
NOTE: If you choose to make your edges this way, you may need to brush the edges of the circles with milk so that they adhere to each other. (Yep! It’s a labor of love, but that’s what pie making is! Always has been!)
Finishing Edges
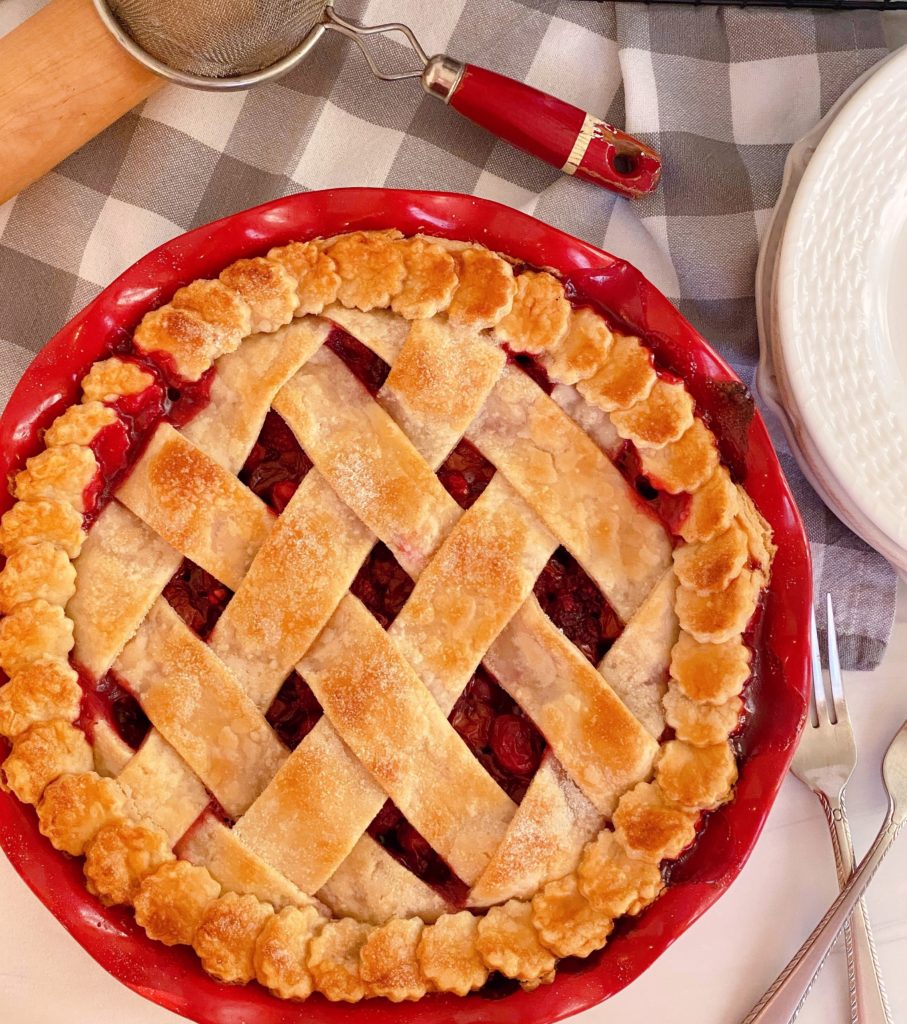
Brush the entire top of the pie, carefully, with milk. Then sprinkle with 1 Tablespoon granulated sugar.
Baking Instructions
Preheat oven to 375 °F.
TIP: Place pie on a silicone-lined baking sheet. This will prevent any filling from bubbling over onto the bottom of your oven!
I know most recipes call for you to cover the edges of your pie crust with foil. You can do that. I just prefer to allow the entire pie to bake, until the top and edges are golden brown, then tent the top of the pie with a foil tent.

Bake the pie for 30 minutes. Check the top of the pie crust. If it is beginning to get too brown, gently and carefully, to not burn yourself, cover the top of the pie with a foil tent.
Bake the pie for an additional 35–40 minutes, or until the filling is bubbling 2 inches from the edge and the pastry is golden brown. Your bake time may be different from mine. All ovens bake differently, so the key is the bubbling pie filling.
NOTE: If the filling is NOT bubbling, do NOT pull the pie from the oven! The bubbling of any fruit pie filling is the BEST indicator that it is thickening and will lead to a nice firm set!
Recipe Wrap-Up
Carefully remove pie and completely cool on a wire rack…allowing the filling to “set”.
Isn’t that a beautiful pie?! I love the design of this pie. It fits! Like I mentioned above, you can do any top crust you like, but I have to admit, I love the diagonal lattice crust on this pie! It’s worth the extra effort. We eat with our eyes too. (Someone said that… Although I prefer to eat with my mouth…just sayin’….)
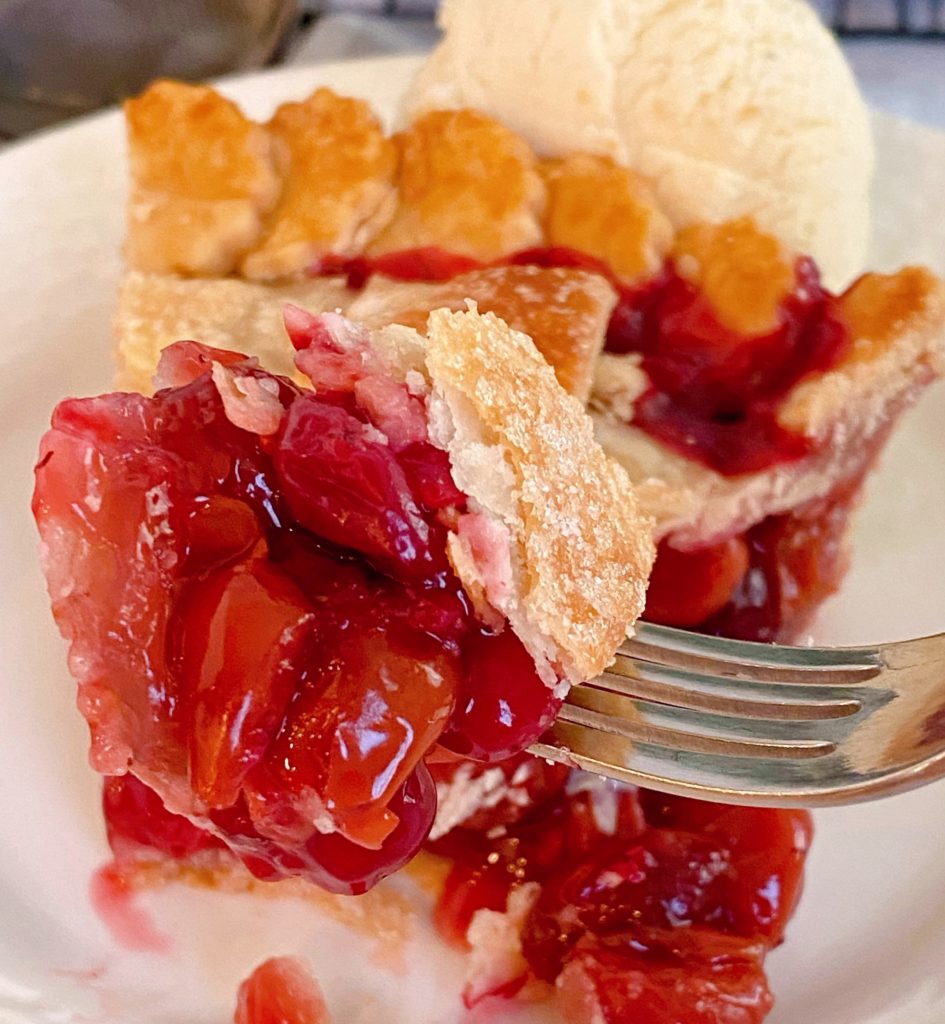
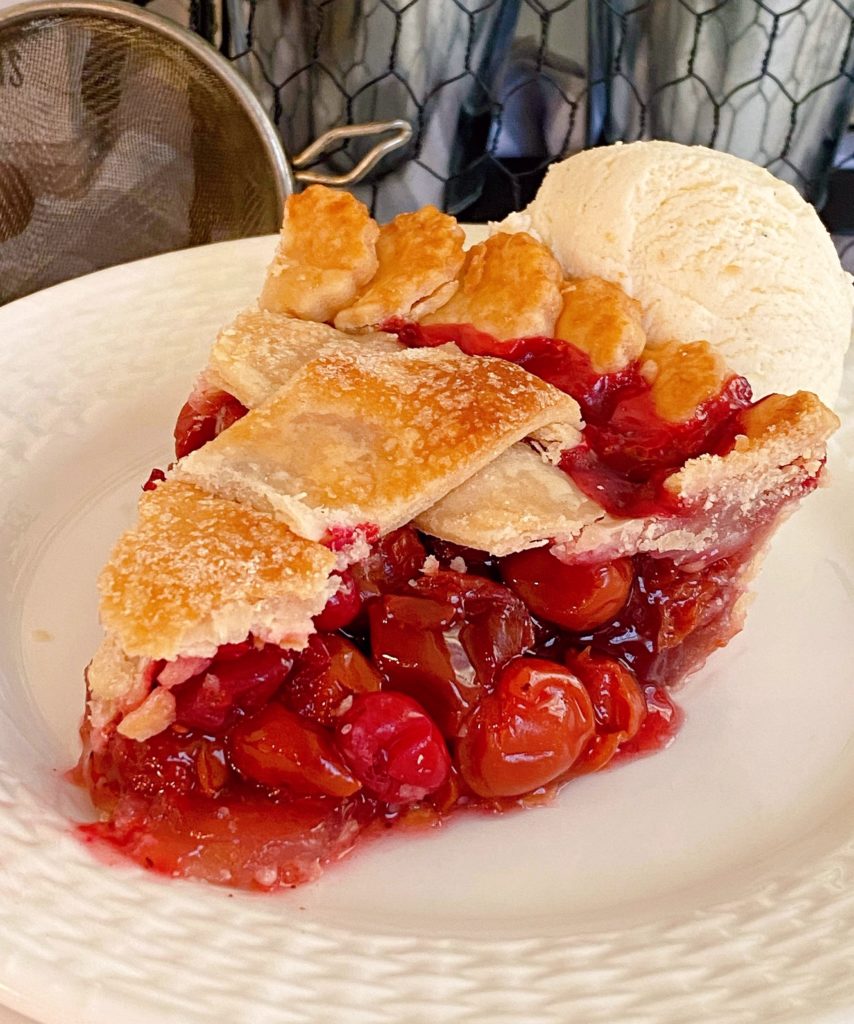
All that’s left is a scoop of vanilla bean ice cream and a fork! (I’m drooling! I know just how yummy this pie is!)
Are you an “à la mode” fan with your warm fruit pies? I am! Helps tone down that tart just a tad! I love the mixture of creamy and tart! So good!
TIP: You can “warm” this pie in the microwave for about 20–25 seconds, and it’s perfect!
This pie truly is the perfect blend of tart fruits. Every single one falls into the category of “tart”! There’s no getting around that fact. However, with the right amount of sugar, spice, and baking love…you have the best possible balance of sweet and tart!
Other Favorite Pie Recipes
- Double Crust Purple Plum Pie
- Strawberry Rhubarb Pie
- Spiced Caramel Apple Pie
- Fresh Classic Blueberry Pie
- Cranberry Apple Pie
- Traditional Homemade Cherry Pie
- Cranberry Blueberry Cream Cheese Pie
- Banana Cream Pie
- Triple Mixed Berry Deep Dish Galette
- Nectarine and Strawberry Pie from A Red Spatula
- Fresh Peach Pie from I am Baker
As always, thanks so much for stopping by my Nest today and visiting with me! I hope you enjoy this recipe…and I hope you have some cranberries tucked away in your freezer!
Happy Nesting!
Printable Recipe
Cherry Cranberry Raspberry Pie
Ingredients
- Pastry for a Lattice-Top Pie double crust
- 1½ cups of sugar 1¾ cups for a sweeter pie
- 1/3 cup cornstarch
- 1/4 teaspoon nutmeg
- 1/4 teaspoon cinnamon
- dash ground cloves
- 1 teaspoon almond extract
- 4½ cups tart cherries about 3 cans drained
- 1 cup fresh or thawed, cranberries
- 1 cup fresh raspberries
Instructions
- For filling, in a large bowl, combine cherries and cranberries. Add sugar, cornstarch, nutmeg, cinnamon, cloves, and almond extract. Gently stir until coated. Let stand 15 minutes, or until a syrup forms, stirring occasionally.
- Preheat oven to 375°F. Prepare pastry. Line a 9 inch deep dish pie plate with the bottom pastry circle. Transfer the filling to the pastry-lined pie plate. Sprinkle 1 cup of fresh raspberries over the top of the pie filling. Weave pastry strips over filling in a lattice pattern. Trim pastry to the edge of the pie plate. If desired, use a sharp knife to cut out leaf shapes or other decorative designs from the pastry trimmings to create an pretty edge on the pie crust.
- Brush lattice with milk and press decorative cut outs around the edge of the crust. Sprinkle entire pie with additional sugar.
- Place pie on silicone lined baking sheet. To prevent overbrowning, bake pie for 30 minutes, and carefully cover with foil tent. Bake an additional 25-35 minutes more, or until filling is bubbly 2 inches from edge and pastry is golden brown. Cool on wire rack. Makes 8 servings.
Video
Nutrition
About the Author

Meet the Author
Hi! I’m Norine, the cook, baker, and recipe creator behind Norine’s Nest. I love sharing and creating recipes that invite family, friends, and neighbors to gather around the dinner table. Sharing good food and creating memories with those we love brings me happiness. Thanks for stopping by my Nest!